Countertop side splashes not only add a touch of elegance to your kitchen or bathroom but also serve a functional purpose by protecting your walls from moisture and spills. If you’re wondering how to install a countertop side splash, look no further. In this comprehensive guide, we’ll walk you through the process step by step, answering all your burning questions along the way.
We’ll cover essential topics such as why a side splash is necessary, how to prepare your walls for installation, filling the gaps between the splash and countertop, finishing the edge, and much more. By the end, you’ll have the confidence and know-how to tackle this DIY project with ease. So grab your tools and let’s get started!
Keywords: What is a countertop side splash?, Do you grout between countertop and backsplash?, How do you prep a wall for backsplash?, How do you fill the gap between backsplash and countertop?, How do you finish the edge of a backsplash?, How high should vanity backsplash be?, How do you attach a countertop backsplash?, How far should tile be from stove?, Do you grout the bottom of a backsplash?, How do you secure a vanity backsplash?, How far should backsplash go up?, What do you use for vanity backsplash?, Is granite backsplash dated?, Which goes up first backsplash or countertop?, How do you install laminate end splash?, Is a side splash needed?, Does backsplash go behind cabinets?, Does backsplash sit on countertop?, Should backsplash go all the way up?, How do you install a side splash?
How to Easily Install a Countertop Side Splash
Are you tired of water splashing all over your countertops every time you wash your hands? Installing a countertop side splash is the perfect solution to this wet and messy problem. In this guide, we’ll walk you through the simple steps of installing a countertop side splash like a pro.
Gathering Your Supplies
Before diving into the installation process, let’s make sure we have everything we need. Here’s a list of supplies you’ll need to get started:
-
Countertop Side Splash: Measure the length and height of your countertop to determine the size of the side splash you’ll need. You can purchase one from your local hardware store or order it online.
-
Measuring Tape: Ensuring accurate measurements is crucial for a seamless installation. So grab a trusty measuring tape before you begin.
-
Level: We don’t want a wonky side splash, do we? A level will help you ensure that your installation is perfectly straight.
-
Pencil: A pencil will come in handy for marking the areas where you’ll be making cuts or drilling holes.
-
Caulk Gun: To secure the side splash and prevent any water leakage, you’ll need a caulk gun loaded with silicone adhesive caulk.
Preparing the Work Area
Now that we have everything we need, it’s time to clear the area and prepare for installation.
-
Clean the Countertop: Remove any debris or dirt from the countertop surface. A clean, smooth surface is essential for proper adhesion.
-
Protective Measures: Lay a drop cloth over the countertop to prevent accidental scratches.
-
Mark Position: Use the measuring tape and pencil to mark the desired position where you want to install your side splash. Make sure it is level and at a suitable height.
Installing the Countertop Side Splash
-
Apply Caulk: Apply a thin bead of silicone adhesive caulk along the back of the side splash. Be sure to leave a gap at the top to allow for any water runoff.
-
Position and Press: Carefully align the side splash with the marks you made earlier and gently press it against the countertop. Ensure it is level and securely attached.
-
Smooth the Caulk: Using a caulk smoothing tool or your finger, smooth out any excess caulk along the edges of the side splash for a clean finish.
-
Let It Cure: Give the caulk some time to cure as per the manufacturer’s instructions. This will ensure it sets properly and provides a long-lasting seal.
Final Touches
Take a step back and admire your newly installed countertop side splash. It not only adds a functional element to your kitchen or bathroom but also acts as a stylish accent.
Remember, installing a countertop side splash isn’t just about preventing water splashes; it’s about taking your countertop to the next level. With a little bit of effort and some basic tools, you can transform your space into something truly remarkable.
So, grab your supplies, put on your DIY hat, and get ready to impress your friends and family with your countertop installation skills!
Note: If you encounter any issues during the installation process or if you’re unsure about any step, it’s always a good idea to consult a professional for guidance.
Now, go on and enjoy a splash-free countertop in style!
FAQ: How to Install Countertop Side Splash
Adding a countertop side splash is a great way to protect your walls from splashes and spills while also adding a touch of style to your kitchen or bathroom. In this comprehensive FAQ-style guide, we’ll answer some common questions about installing a countertop side splash and provide you with all the information you need to tackle this project with confidence.
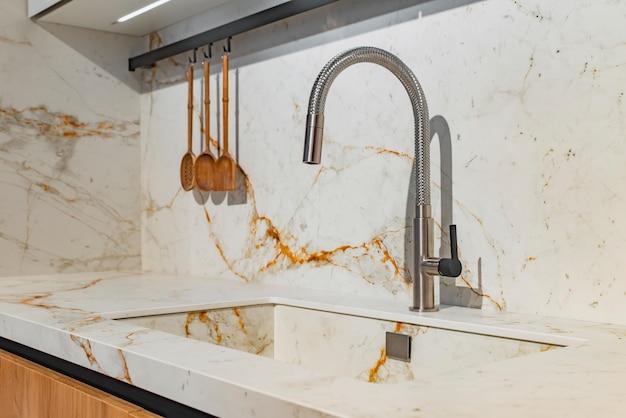
What is a Countertop Side Splash
A countertop side splash is a vertical extension of your countertop that is installed against the wall to prevent water and other liquids from seeping behind the countertop. It is typically made from the same material as the countertop and adds both functionality and visual appeal to your space.
Do You Grout Between Countertop and Backsplash
No, you typically do not grout between the countertop and backsplash. Instead, a small gap is left between the two to allow for movement and prevent cracking. This gap can be filled with a color-matched silicone sealant that not only creates a clean, finished look but also ensures a watertight seal.
How Do You Prep a Wall for Backsplash
Before installing a backsplash, it is important to properly prep the wall to ensure a smooth and secure installation. Start by cleaning the wall surface thoroughly, removing any dirt, grease, or debris. Next, ensure the wall is smooth and free from any imperfections by filling in holes or dents with a spackling compound and sanding it down. Finally, use a primer to create a suitable surface for the adhesive to bond to.
How Do You Fill the Gap Between Backsplash and Countertop
To fill the gap between the backsplash and countertop, start by applying painter’s tape on both surfaces, leaving a small space between them. Then, using a color-matched silicone sealant or caulking, carefully fill the gap, ensuring an even and smooth application. Remove the tape while the sealant is still wet for a clean finish.
How Do You Finish the Edge of a Backsplash
To give your backsplash a polished and finished look, you can use various edge treatments. One common option is to install a metal trim or bullnose tile along the exposed edge of the backsplash. This not only adds durability but also provides a decorative element. Alternatively, you can smooth and round the exposed edge with a diamond hand pad for a clean and modern finish.
How High Should Vanity Backsplash Be
The height of a vanity backsplash can vary depending on personal preference and the style of your bathroom. However, a typical height for a vanity backsplash ranges from 4 to 6 inches. This ensures that water splashes from the sink are contained while still maintaining an aesthetically pleasing appearance.
How Do You Attach a Countertop Backsplash
Attaching a countertop backsplash is a fairly straightforward process. Start by applying a thin layer of construction adhesive to the backside of the backsplash material. Press the backsplash firmly against the wall, making sure it is level and aligned with the countertop. To secure it further, you can use brad nails or screws, but be careful not to damage the countertop surface.
How Far Should Tile Be from Stove
When it comes to installing a tile backsplash behind a stove or cooktop, it is generally recommended to leave a gap of at least 15 inches between the heat source and the tile. This allows for proper ventilation and helps prevent the tile from being damaged by excessive heat.
Do You Grout the Bottom of a Backsplash
Grouting the bottom of a backsplash is a matter of personal preference. While some people choose to grout the entire backsplash, including the bottom, others opt to leave it ungrouted. If you decide to grout the bottom, make sure to use a waterproof grout and seal it properly to prevent any water infiltration.
How Do You Secure a Vanity Backsplash
To secure a vanity backsplash, start by applying construction adhesive to the backside of the backsplash material. Press it firmly against the wall, aligning it with the top of the vanity. To provide additional support, you can also use brad nails or screws through the back of the vanity into the backsplash. Just make sure not to overdrive the nails or screws, as it may crack the material.
How Far Should Backsplash Go Up
The height at which a backsplash should go up depends on personal preference and the design of your space. In a kitchen, it is common for the backsplash to extend from the countertop up to the underside of the upper cabinets. In a bathroom, the backsplash often goes up to the bottom of the mirror or vanity light fixtures. Ultimately, the decision is yours to make based on aesthetics and functionality.
What Do You Use for Vanity Backsplash
For a vanity backsplash, you can use a variety of materials depending on your preference and budget. Some popular options include ceramic or porcelain tiles, stone tiles, laminate, solid surface materials, or even a continuation of the countertop material itself. Choose a material that complements your vanity and enhances the overall look of your bathroom.
Is Granite Backsplash Dated
Granite backsplashes were once a popular choice for kitchens and bathrooms, but design trends have shifted over time. While granite can still be a beautiful and durable option, it is no longer considered the most contemporary choice. To achieve a more modern look, you might consider other materials such as glass tiles, ceramic tiles, or even sleek stainless steel.
Which Goes Up First: Backsplash or Countertop
When it comes to installation, it is generally recommended to install the countertop first and then the backsplash. This allows for a seamless transition between the two and ensures a more secure attachment. Installing the countertop first also allows for easier leveling and alignment of the backsplash.
How Do You Install Laminate End Splash
Installing a laminate end splash is a fairly simple process. Start by measuring and cutting the end splash to the desired length and shape. Apply a thin layer of adhesive to both the end splash and the exposed edge of the countertop. Press the end splash firmly against the countertop edge, making sure it is level and aligned. Use clamps or weights to hold it in place while the adhesive dries.
Is a Side Splash Needed
While a side splash is not always necessary, it can offer additional protection against water damage and add a finished look to your countertop. If you have a high-traffic area or frequently use the countertop near a wall, a side splash can help prevent water, soap, or other liquids from seeping behind the countertop and potentially causing damage.
Does Backsplash Go Behind Cabinets
In most cases, backsplash does not go behind cabinets. It is typically installed on the wall surface between the countertop and the underside of the upper cabinets. This creates a visually appealing and functional element without the need to cover the entire wall surface.
Does Backsplash Sit on Countertop
No, a backsplash does not sit directly on the countertop. It is installed against the wall and rests on the countertop surface. It is important to leave a small gap between the backsplash and the countertop to allow for movement and prevent cracking or damage.
Should Backsplash Go All the Way Up
The decision of whether the backsplash should go all the way up to the ceiling or stop at a certain height depends on your personal style and the design of your space. While a full-height backsplash can make a bold statement and draw the eye upward, a lower backsplash can create a more balanced and visually pleasing look. Consider the overall aesthetic and functionality of the space when making this decision.
How Do You Install a Side Splash
Installing a side splash follows a similar process to installing a countertop backsplash. Begin by applying a thin layer of construction adhesive to the backside of the side splash material. Align the side splash with the countertop edge and press it firmly against the wall. To ensure a secure attachment, you can also use clamps or weights to hold it in place until the adhesive sets.
Installing a countertop side splash is a worthwhile investment that adds both practicality and style to your kitchen or bathroom. We hope this comprehensive FAQ-style guide has answered all your burning questions and equipped you with the knowledge and confidence to tackle this project. So, unleash your inner DIY enthusiast and make a splash with your countertop side splash installation!