Are you tired of inefficient airflow in your home? Installing a return air vent in the ceiling can be a game-changer. It not only helps maintain proper air circulation but also improves the overall comfort of your living space. In this blog post, we’ll guide you through the process of installing a return air vent in the ceiling, addressing common questions like blocking cold air from vents, the use of flexible duct for return air, the importance of return air vents, and more.
One of the recurring questions homeowners have is whether every room needs a cold air return. We’ll discuss this issue in detail, as well as the optimal placement of return air vents, whether they should be high or low. Additionally, we’ll explore the benefits of putting a cold air return in the ceiling and the appropriate size for your return air duct. We’ll also explore the function and significance of return ducts and discuss the necessity of having a duct for your return vent.
Join us as we delve into the essential aspects of return air vents and provide practical tips on installation. Discover the right number of return vents required for your house, consequences of undersized ductwork, limitations of flexible duct length, reasons for cold air return placement near the ceiling, and the potential effects of blocking a return air vent. We’ll also address concerns about furniture placement in front of return vents and provide insights into the cost of adding a return vent.
Let’s roll up our sleeves and get started on enhancing your home’s airflow with a perfectly installed return air vent in the ceiling!
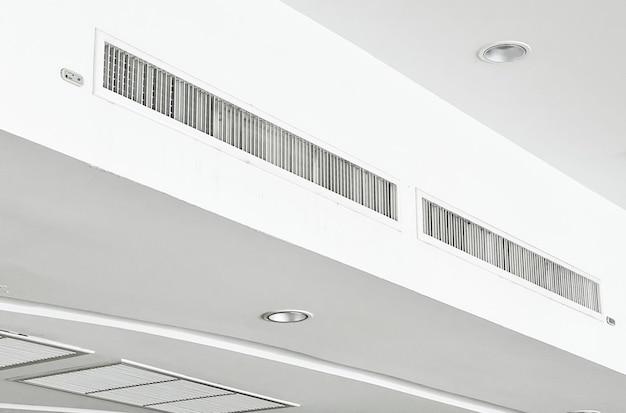
How to Install a Return Air Vent in Ceiling
So, you’ve decided it’s time to upgrade your home’s HVAC system by installing a return air vent in the ceiling. Congratulations! Not only will this improve the overall efficiency of your heating and cooling, but it will also add a touch of elegance to your space. In this step-by-step guide, we’ll walk you through the process of installing a return air vent in your ceiling, turning it from a boring necessity into a stylish focal point.
Materials You’ll Need
Before you embark on this DIY adventure, make sure you have the following materials ready:
- A return air vent kit (make sure it’s the right size for your space)
- a screwdriver (a cordless one will save you from unnecessary arm workout)
- A stud finder (finding studs is not a psychic talent, unfortunately)
- A measuring tape (because measuring twice is always better than cutting once)
- A pencil (don’t worry, we won’t be drawing any masterpieces here)
- A ladder (unless you’re a ninja with the ability to fly)
- And last but not least, an unflappable sense of confidence (you got this!)
Step 1: Choose the Perfect Location
First things first, you need to decide where you want to install your return air vent. Look for a spot on the ceiling that’s centrally located and away from any obstructions. Take into account the layout of your room and the airflow patterns in your home. And hey, don’t forget to consider the aesthetics too – you don’t want your vent to clash with your carefully curated decor!
Step 2: Find the Right Spot
Grab your trusty stud finder and locate the nearest ceiling joists. These sturdy fellows will provide the necessary support for your air vent. Mark the edges of the joist with your pencil, creating a guideline for the installation. And while you’re at it, take a moment to appreciate the beauty of those hidden wooden heroes. They’re the unsung stars of your home’s structural integrity!
Step 3: Measure Twice, Cut Once
Now it’s time to measure the dimensions of your return air vent and mark them on the ceiling. Remember, accuracy is the name of the game here. Measure twice (or thrice if you’re feeling particularly meticulous) to ensure your cutout is the perfect fit. This is not the time for guesswork – those walls don’t forgive easily!
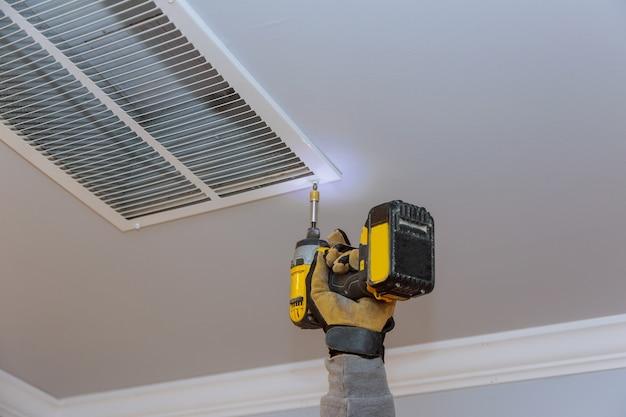
Step 4: Embrace Your Inner Carpenter
Lay down some drop cloths or old sheets to protect your space from the ensuing debris. Put on your safety goggles and grab your favorite power tool – it’s time to cut a hole in that ceiling! Follow the lines you marked earlier and carefully saw along the edges. Take your time, and don’t forget to breathe (sawdust is not part of a well-balanced diet).
Step 5: Ventilate Your Vent
Now that you have your hole, it’s time to attach the air vent. Take your shiny new return air vent kit and follow the manufacturer’s instructions for installation. Secure it tightly to the ceiling using screws, making sure it’s flush and level. Remember, we’re aiming for both function and flair here – a wonky vent just won’t cut it!
Step 6: Bask in Your DIY Glory
Congrats, you’ve successfully installed a return air vent in your ceiling! Take a few steps back and admire your handiwork. Not only have you elevated the functionality of your HVAC system, but you’ve also added a touch of sophistication to your space. Now sit back and revel in the cool breeze of accomplishment – you deserve it!
Now that you know how to install a return air vent in your ceiling, go forth and conquer that DIY project! Remember, safety first, measure twice, and never underestimate the power of a properly ventilated home. Happy venturing!
FAQ: How To Install A Return Air Vent In Ceiling
How do I block cold air from ceiling vents
If you want to prevent chilly drafts from creeping in through your ceiling vents, there are a couple of nifty tricks you can try. One option is to use magnetic vent covers, which are as simple to install as they are effective. Just pop these bad boys over your vents, and voila! Cold air is blocked from infiltrating your space. Another option is to employ the strategic use of foam insulation. By placing foam insulation boards above the vents, you create a barrier that helps keep the cold air where it belongs – outside. So go ahead, say goodbye to Jack Frost’s unwelcome surprise appearances!
Can flexible duct be used for return air
Absolutely! Flexible duct is a fantastic choice when it comes to return air vents. Not only is it lightweight and easy to work with, but it also offers flexibility (no pun intended!) in terms of installation. You can bend and twist it to fit into tight spaces without any hassle. So if you’re looking for a ducting material that won’t give you a headache, flexible duct is the way to go.
Does every room need a cold air return
While it’s important to ensure proper airflow throughout your home, not every room necessarily needs a cold air return. The placement of cold air returns should be strategic, focusing on areas where air circulation may be limited. Rooms that are far from the HVAC unit or have doors that are frequently closed might benefit from having a cold air return. However, rooms with open floor plans or areas already well-served by existing returns may not require an additional one. So, make sure to assess the airflow needs of each room before you go on a vent-installing spree!
Should return air vents be high or low
When it comes to return air vent placement, the general rule of thumb is to position them low on the wall or low on the floor. This allows the return vents to efficiently capture the cool air that naturally sinks towards the ground. By placing the vents low, you ensure that the airflow is maximized and that your system doesn’t have to work harder than necessary to maintain a comfortable temperature in your space. So, keep it low, folks!
Can I install a cold air return in the ceiling
While installing a return air vent in the ceiling might seem like a tempting idea, it’s generally not recommended. Why, you ask? Well, hot air rises, and when you install a return vent in the ceiling, it tends to suck up only the warm air that has already made its way up there. This can create an imbalance in your air circulation and result in uneven heating or cooling throughout your home. So, stick to the tried and true method of placing your return vents low on the wall or floor for optimal performance.
How big should my return air duct be
The size of your return air duct is a crucial factor in ensuring proper airflow in your home. If it’s too small, your HVAC system will struggle to draw in enough air, leading to inefficiency and potentially damaging the system. On the other hand, if it’s too big, you might experience excessive noise and low air velocity. The ideal size for a return air duct depends on various factors, including the size of your HVAC system, the square footage of your home, and the number of return vents. It’s best to consult an HVAC professional to determine the appropriate size for your specific needs.
How important is the return air vent
Ah, the return air vent – often overlooked but oh-so-important! The return vent plays a vital role in maintaining a comfortable and efficient HVAC system. It’s responsible for drawing in the air from your living space and bringing it back to the furnace or air conditioner for heating or cooling. Without a properly functioning return vent, your system would struggle to create balanced and consistent airflow, leading to potential energy waste and discomfort. So, while it may not be the star of the show, the return air vent is undoubtedly an unsung hero in your home’s HVAC system.
What is a return duct
A return duct, my dear reader, is like the expressway that carries air from your living space back to your HVAC system for conditioning. It acts as the conduit for the air that has been dispersed through your vents, ensuring a smooth flow back to the heart of your heating or cooling setup. Without these return ducts, your system would be left puzzled, wondering where all the air has disappeared to. So, let’s give some love to these essential ducts, shall we?
Does a return vent need a duct
Yes, indeed! A return vent is incomplete without its partner-in-crime, the return duct. The return duct is responsible for connecting the return vent to the HVAC system, providing a pathway for the air to travel back and forth. It’s like a trusty sidekick, supporting the return vent in its mission to maintain proper air circulation. So remember, a return vent without a duct is like a PB without the J – it just doesn’t work!
How many return vents do I need in a house
Ah, the classic question: “How many return vents do I need?” The answer, my friend, lies in the unique layout and size of your humble abode. As a general guideline, it’s advisable to have at least one return vent in each main living area, such as the living room or dining room. However, larger spaces may benefit from additional returns to ensure optimal airflow and temperature consistency. Ultimately, it’s best to consult with an HVAC professional who can assess your home’s specific needs and offer tailored advice on the number of return vents required to keep your space comfortable and cozy.
What happens if ductwork is undersized
Oh boy, undersized ductwork can wreak havoc on your HVAC system! When your ductwork is too small to handle the airflow demands of your heating and cooling system, it can lead to a host of issues. First and foremost, you might experience reduced comfort levels due to inadequate airflow reaching your living spaces. Additionally, your HVAC system will have to work harder to compensate for the restriction, resulting in increased energy consumption and potentially shortened equipment lifespan. So, don’t underestimate the importance of properly-sized ductwork – it’s key to keeping your system happy and your home cozy!
What is the max recommended length of flexible duct
Ah, the flexible duct – so versatile, yet it does have its limitations. The maximum recommended length of flexible ducts can vary depending on factors such as the diameter of the duct and the airflow requirements of your system. However, as a general rule, it’s best to avoid exceeding lengths beyond 25 feet for residential installations. Beyond this point, the airflow might become restricted, leading to inefficiency and potentially compromised comfort in your home. So, remember, while flexible ducts are a convenient choice, it’s essential to stay within the recommended length limits.
Why are my cold air returns near the ceiling
Ah, the mystery of ceiling returns! If you’ve been wondering why your cold air returns are positioned near the ceiling, fear not – there’s a method to this madness. The reason behind this placement is to take advantage of the natural airflow patterns in your space. Since warm air rises, the return vent near the ceiling helps capture the warm air that accumulates at the top of the room, allowing for efficient circulation. However, it’s worth noting that this setup may not be ideal for all situations, as it can lead to uneven temperature distribution if not properly balanced with low-wall or floor return vents. So, keep your cool and make sure your ventilation system is set up to achieve optimal comfort.
What will blocking a cold air return do
Ah, blocking a cold air return – a surefire way to throw your HVAC system into a tizzy! If you choose to block a cold air return, you’ll likely notice a disruption in the balance of your heating and cooling system. By obstructing the return vent, you restrict the airflow necessary for maintaining proper circulation. As a result, you may experience uneven temperatures, reduced energy efficiency, and increased strain on your HVAC equipment. So, unless you’re a fan of hot and cold zones in your home, it’s best to keep those return vents clear and let your HVAC system work its magic!
How do I install a return air vent
Installing a return air vent doesn’t have to be a headache-inducing endeavor. Here’s a step-by-step guide to get you on your way:
-
Choose the ideal location: Identify a spot low on the wall or floor, taking into consideration the airflow dynamics and the layout of your space.
-
Measure and mark: Use a tape measure to determine the dimensions of the vent opening. Then, mark the area with a pencil or light markings to guide your cutting.
-
Cut the opening: Carefully cut along the marked lines using a suitable tool, such as a drywall saw or a utility knife. Remember to take safety precautions, like wearing protective eyewear.
-
Install the vent: Fit the return vent into the opening and secure it in place using the provided screws or latches. Ensure a snug and secure fit to prevent any unwanted wobbling or air leaks.
-
Connect the return duct: If you don’t already have a return duct in place, you’ll need to connect one from the vent to your HVAC system. This involves measuring, cutting, and securing the ductwork, ensuring a proper seal for efficient airflow.
-
Test it out: Once everything is in place, turn on your HVAC system and bask in the satisfaction of a successfully installed return air vent.
Where should my return air duct be located
Seeking the ideal spot for your return air duct? Look no further! For optimal performance, it’s recommended to place the return air duct in a central location, preferably near the center of your home. By positioning the duct in a centralized spot, you ensure that air is efficiently drawn from all areas of your living space, promoting balanced airflow and consistent temperatures. Keep the heart of your home pumping with a thoughtfully placed return air duct!
Can I put furniture in front of a return vent
While it may be tempting to arrange your furniture without considering the location of your return vent, it’s best to avoid blocking it with heavy or bulky pieces. When furniture obstructs a return vent, it restricts the flow of air, potentially causing inefficiency in your HVAC system and creating temperature imbalances. Don’t stifle your system’s airflow – give it the freedom to breathe by keeping your return vents clear of furniture. Your heating and cooling will thank you!
How much does it cost to add a return vent
Ah, the cost of comfort! The expense associated with adding a return vent can vary depending on several factors, including the complexity of the installation, the size of your living space, and the accessibility of your HVAC system. On average, you can expect to pay anywhere from $300 to $1,000 for a professional installation. However, it’s important to note that these are rough estimates, and the final cost may be influenced by regional variations and specific project requirements. To get a precise price for your return vent addition, it’s best to reach out to local HVAC professionals for quotes tailored to your unique needs.
Can I block a return air vent
While you might be tempted to block a return air vent for aesthetic or practical reasons, it’s generally not advisable. Blocking a return vent inhibits proper air circulation, leading to inefficiency and potential strain on your HVAC system. It’s crucial to maintain a well-balanced airflow throughout your living space to ensure comfort and optimal system performance. So, instead of using your return vent as a convenient shelf for knick-knacks or an unintentional hiding place for socks, keep it free and clear to keep your home cozy and your system happy!