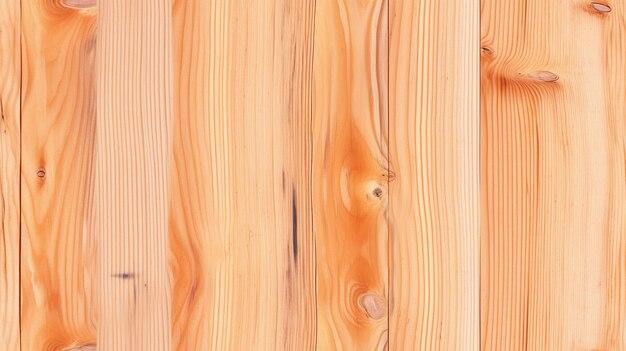
Woodworking projects often involve the use of plywood, a versatile and cost-effective material. One common challenge that arises when working with plywood is how to hide the seams. Whether you’re building cabinets, installing a plywood ceiling, or creating wall paneling, unsightly plywood seams can detract from the overall aesthetic. But fear not, because in this blog post, we’ll explore a variety of techniques and solutions to help you achieve a seamless finish.
From filling gaps and covering seams to using the right tape and sealants, we’ve got you covered. We’ll dive into the world of wood fillers, adhesives, and other helpful tools that can make those plywood seams disappear. So whether you’re a seasoned woodworker or a DIY enthusiast, keep reading to discover the best methods and products for hiding plywood seams and achieving a professional, polished look.
How to Conceal Plywood Seams Like a Pro
So you’ve assembled that beautiful piece of furniture or built that creative home DIY project using plywood, but now you’re faced with the unsightly issue of plywood seams. Fear not, my DIY enthusiast! In this guide, we’ll reveal some clever tricks and techniques to hide those seams like a pro.
1. Sandpaper: The Magic Wand of Woodworking
Before diving into the world of plywood seam concealment, let’s start by leveling the playing field. Grab your trusty sandpaper, preferably in a grit of 120 or higher, and smooth out those plywood edges. Sanding not only ensures a more seamless finish but also allows any finishing materials to adhere better. Remember, smooth edges are key to camouflaging seams effectively.
2. The Wonder of Wood Fillers
Wood fillers are like the chameleons of the woodworking world—they seamlessly blend in and hide imperfections. Choose a wood filler that matches the color of your plywood, and apply it generously along the seams using a putty knife or a similar tool. Once dry, sand it down gently to create an invisible transition from one plywood piece to another. Voila! Those seams will be waving goodbye in no time.
3. Embrace the Power of Veneer Tape
If you’re aiming for a sleek and undetectable seam, veneer tape is your new best friend. This thin strip of wood veneer with adhesive backing is designed to cover up plywood edges flawlessly. Simply cut the veneer tape slightly longer than the seam, press it on, and trim off the excess with a sharp knife. With veneer tape, your plywood will look like a single, solid piece, fooling even the sharpest eyes.
4. Gluing and Clamping for a Seamless Bond
For a permanent and visually seamless solution, glue and clamps are your go-to tools. Apply a thin layer of wood glue along the seam, fit the plywood pieces together, and use clamps to hold them in place until the glue dries. Be sure to wipe off any excess glue before it dries, as it can interfere with finishing. Once dry, sand the area, and nobody will ever suspect there were separate pieces of plywood involved.
5. The Art of Edge Banding
If you’re aiming for a professional-grade hidden seam, edge banding is your secret weapon. Edge banding is a thin strip of wood (or other materials) that covers the edges of plywood, providing a seamless look. Apply heat-activated edge banding to the edges of your plywood, using an iron or specialized edge banding tool. Trim off the excess, and behold, your plywood edges are now sleek, smooth, and beautifully camouflaged.
6. Paint It to Perfection
When all else fails, a coat of paint can work wonders for hiding plywood seams. Choose a paint color that matches your final desired look, and apply multiple thin coats. The paint not only masks the seams but also adds a layer of protection and a polished finish. With a bit of paint magic, those once noticeable seams will fade into the background, leaving behind a seamless and professional appearance.
7. Embrace the Joys of Woodworking, Seams and All!
Remember, my fellow woodworking enthusiasts, imperfections are what make our creations unique and truly handcrafted. Don’t be dismayed by plywood seams; instead, embrace them as part of the woodworking journey. With the techniques shared in this guide, you now possess all the knowledge and tools to conceal plywood seams with finesse. So go forth, create, and revel in the joys of woodworking, one seam at a time!
And there you have it, your ultimate guide to hiding plywood seams. Now you can tackle your next woodworking project with confidence, knowing that even the most prominent seams can be expertly concealed. Happy woodworking, my friends!
FAQ: How Do You Hide Plywood Seams
Welcome to our comprehensive FAQ guide on how to hide plywood seams. If you’re working on a wood project and want to achieve a seamless and polished look, you’ve come to the right place. We understand that filling gaps and covering seams can be a challenge, but fear not, we’ve got you covered! Below, you’ll find answers to some common questions that will help you achieve a flawless finish for your plywood projects.
How do you fill gaps in wood projects
When it comes to filling gaps in wood projects, there are a few options you can consider. One popular choice is using wood filler. Wood filler is a versatile product that can be used to fill small to medium-sized gaps in plywood. Simply apply the wood filler to the gap, let it dry, and sand it down until it’s smooth. Another option is using epoxy resin, which is great for filling larger gaps. Just mix the resin according to the instructions, pour it into the gap, and wait for it to cure. Once cured, sand it down to achieve a seamless result.
What kind of tape do you use for plywood
If you’re looking for tape to help hide plywood seams, painter’s tape is your best bet. Painter’s tape is designed for clean and easy removal, making it ideal for temporary applications during the painting or finishing process. It helps create sharp, crisp lines while protecting the surrounding areas from paint or stain. Just apply the tape over the seams, paint or stain the plywood, and remove the tape once you’re done. Voila! Your plywood seams will be neatly concealed.
What to use to fill gaps in wood
When it comes to filling gaps in wood, you have several options to choose from. Wood filler is a popular choice due to its versatility and ease of use. It can be used to fill small to medium-sized gaps in plywood. Another option is using clear caulk, which is great for filling gaps where a transparent finish is desired. For larger gaps, epoxy resin is an excellent choice as it provides strength and durability. It’s important to select a filler that matches the color and texture of your wood to ensure a seamless result.
How do you fill large gaps in plywood
Filling large gaps in plywood requires a different approach than filling smaller gaps. One effective method is to use wooden shims. Simply cut the shims to the desired length, apply glue to one side, and insert them into the gaps. Once the glue dries, you can trim any excess shim material and sand it down to create a smooth surface. Another option is to use a combination of wood filler and epoxy resin. Apply the wood filler to fill the majority of the gap and then top it with a layer of epoxy resin for added strength and durability.
Is there a tape that sticks to wood
Yes, there are tapes specifically designed to stick to wood. One such tape is called double-sided tape. It has adhesive on both sides, allowing it to securely bond to the wood surface. Double-sided tape is commonly used for mounting objects or attaching materials together. Another tape option is carpet tape, which is renowned for its strong adhesion to different surfaces, including wood. Just ensure that the surface is clean and dry before applying the tape for optimal stickiness.
What is the best sealer for plywood
When it comes to sealing plywood, there are a few options you can consider. One popular choice is polyurethane sealant. It provides a durable and protective coating that enhances the natural beauty of the wood while preventing moisture damage. Another option is marine-grade varnish, which is specifically designed to protect plywood from water and other environmental factors. Whichever sealer you choose, be sure to apply multiple coats and follow the manufacturer’s instructions for the best results.
How do you make a good finish on plywood
To achieve a good finish on plywood, follow these steps for a flawless result:
- Start by sanding the plywood surface with a fine-grit sandpaper to smooth out any imperfections.
- Clean the surface to remove dust and debris.
- Apply a coat of wood primer to create a smooth and even base for your finish.
- Once the primer is dry, apply your chosen paint, stain, or varnish evenly using a brush or roller.
- Allow the first coat to dry completely, then lightly sand the surface with a fine-grit sandpaper.
- Apply additional coats as needed to achieve your desired finish, allowing each coat to dry and sanding between coats.
- Finish off with a clear topcoat or sealer to protect the plywood and enhance its appearance.
What kind of tape can stick to wood
When it comes to tape that can stick to wood, duct tape is a reliable choice. Duct tape has strong adhesive properties that make it suitable for a wide range of applications, including sticking to wood surfaces. Just make sure the wood surface is clean and dry before applying the tape for maximum adhesion. Remember, duct tape is not only functional but also versatile, coming in various colors and patterns to suit your creative needs.
How do you cover seams in plywood ceiling
To cover seams in a plywood ceiling, you can use a combination of wood filler and paint. Start by applying the wood filler to the seams, making sure to fill them completely. Once the filler is dry, sand it down until it’s smooth and level with the surrounding plywood. Afterward, prime the entire ceiling, ensuring to cover the filled seams. Finally, paint the ceiling with your desired color, making sure to blend the seams with the rest of the ceiling. This will help conceal the seams and create a uniform and finished look.
How can I seal plywood
Sealing plywood is essential to protect it from moisture and other environmental factors. One effective method is to use a waterproofing sealant. Start by cleaning the plywood surface and removing any dirt or debris. Next, apply the sealant using a brush or roller, making sure to cover the entire surface. Be thorough in your application and follow the manufacturer’s instructions for drying times and additional coats, if necessary. Once the sealant has dried, your plywood will be sealed and ready for use in any damp or outdoor setting.
How do you hide seams in wood
To hide seams in wood, you can employ several techniques. One option is to use wood filler or putty that matches the color of the wood. Simply apply the filler to the seams, smooth it out, and let it dry. Once dry, sand the filled seams until they are flush with the surrounding wood. Another method is to use a technique called “easing.” This involves slightly beveling the edges of adjacent pieces of wood to create a seamless transition. Finally, applying a finish or stain to the wood can also help camouflage seams by creating a cohesive appearance.
Can you use wood filler for large gaps
While wood filler can be used for small to medium-sized gaps, it may not be the best option for large gaps in plywood. Large gaps require a more robust solution to ensure a durable and stable result. One alternative is to use wooden shims. These can be cut to the desired size and inserted into the gap, providing a solid and stable fill. Alternatively, consider using a combination of wood filler and epoxy resin. Apply the wood filler first to fill the majority of the gap, and then top it off with a layer of epoxy resin for added strength and durability.
What is the best sealant for plywood
When it comes to choosing the best sealant for plywood, there are a few factors to consider, such as the intended use and environmental conditions. Marine-grade varnish is often considered the top choice for sealing plywood, as it provides excellent protection against water and UV damage. Polyurethane sealant is also a popular option, offering durability and moisture resistance. Ultimately, the best sealant for your plywood will depend on factors such as exposure to moisture, desired level of protection, and aesthetic preferences.
How do you hide seams in wood cabinets
To hide seams in wood cabinets, you can follow these steps:
- Start by applying wood filler or putty that matches the color of the wood to the seams.
- Use a putty knife to smooth the filler along the seams, pressing it firmly into any gaps.
- Allow the filler to dry completely, following the manufacturer’s instructions.
- Once dry, use a fine-grit sandpaper to sand down the filled seams until they are flush with the surrounding wood.
- Wipe away any dust or debris.
- Apply a finish or stain to the cabinets to create a uniform appearance and further conceal the seams. Remember to follow the manufacturer’s instructions for the finish or stain you are using.
How big of a gap can wood filler fill
Wood filler is best suited for filling small to medium-sized gaps in wood. However, the maximum gap size that wood filler can effectively fill may vary depending on the specific product you are using. As a general rule of thumb, wood filler is typically recommended for gaps up to 1/4 inch in width. For larger gaps, it is advisable to use alternative methods such as shims or a combination of wood filler and epoxy resin.
Can you tape and joint plywood
Yes, tape and joint compound can be used to hide seams in plywood. Tape and joint compound, also known as drywall mud, is commonly used for finishing drywall joints, but it can also be used to hide seams in plywood. Start by applying a layer of joint compound along the seams, then embed paper tape into the compound. Smooth out any excess compound using a putty knife and allow the compound to dry. Once dry, sand the seams until they are flush with the rest of the plywood. Finally, apply a thin layer of joint compound over the seams to create a seamless finish.
Can zip tape be used on plywood
Zip tape is not commonly used for plywood projects, as it is primarily designed for joining or repairing polyethylene vapor barriers. While it may offer some temporary adhesion to plywood, it is not the most suitable tape for concealing seams or gaps. If you need to hide seams and gaps in plywood, it is recommended to use painter’s tape or other tapes specifically designed for wood applications.
How do you hide wall seams
To hide wall seams, follow these steps:
- Start by applying a thin layer of joint compound to the seams using a putty knife.
- Embed drywall tape into the compound, pressing it into place with a drywall knife.
- Smooth out any excess compound and allow it to dry.
- Once dry, sand the seams until they are smooth and blend them seamlessly with the surrounding wall.
- Apply a second layer of joint compound if necessary and repeat the sanding process.
- Finally, prime and paint the wall to achieve a flawless finish that conceals the seams.
Can I use plywood for my ceiling
Yes, plywood can be used for your ceiling. Plywood is often selected for ceiling applications due to its durability, ease of installation, and aesthetic appeal. Before installing plywood on your ceiling, ensure that it is properly supported by the underlying structure. Choose a plywood grade that suits your needs, such as one with a smooth finish or a distinctive wood grain. Remember to apply the appropriate sealant or finish to protect the plywood from any potential moisture damage or staining.
How do you seal gaps in plywood walls
To seal gaps in plywood walls, you can follow these steps:
- Start by cleaning the gaps and ensuring the surface is free from dust and debris.
- Apply a bead of silicone caulk or acrylic caulk to the gaps, making sure to fill them completely.
- Smooth out the caulk with a caulk smoothing tool or a wet finger to create a neat, even finish.
- Allow the caulk to dry completely, following the manufacturer’s instructions.
- Once dry, check for any remaining gaps or cracks and repeat the process if necessary.
- Finally, apply a coat of paint or primer to the plywood walls to achieve a seamless look.
Can you mud over plywood
Yes, you can mud over plywood to achieve a smooth and seamless finish. Mud, or joint compound, is commonly used to fill gaps, seams, and joints in drywall installations. To mud over plywood, follow these steps:
- Start by applying a thin layer of joint compound to the plywood surface using a putty knife.
- Spread the mud evenly, feathering the edges to create a smooth transition.
- Allow the compound to dry and then sand it down until it is flush with the plywood surface.
- Apply additional coats of joint compound as needed, allowing each layer to dry and sanding between coats.
- Once the desired finish is achieved, prime and paint the plywood for a flawless appearance.
How do you hide paneling seams
To hide paneling seams, you can follow these steps:
- Start by thoroughly cleaning the paneling and removing any dust or debris.
- Apply a thin layer of wood filler or putty that matches the color of the paneling to the seams.
- Use a putty knife to smooth the filler along the seams, pressing it firmly into any gaps.
- Allow the filler to dry completely, following the manufacturer’s instructions.
- Once dry, use a fine-grit sandpaper to sand down the filled seams until they are flush with the surrounding paneling.
- Wipe away any dust or debris.
- Apply a primer to the paneling, ensuring to cover the filled seams.
- Finally, paint or stain the paneling with your desired color, making sure to blend the seams with the rest of the paneling. This will help conceal the seams and create a uniform and finished look.
Conclusion
We hope this FAQ guide has provided you with valuable insights into hiding plywood seams. By following these tips and techniques, you’ll be able to achieve a seamless and professional finish for your plywood projects. Remember to select the appropriate materials and techniques based on the size of the gaps or seams you’re trying to conceal. With a little effort and attention to detail, your plywood projects will look amazing and impress everyone who sees them. Happy crafting!