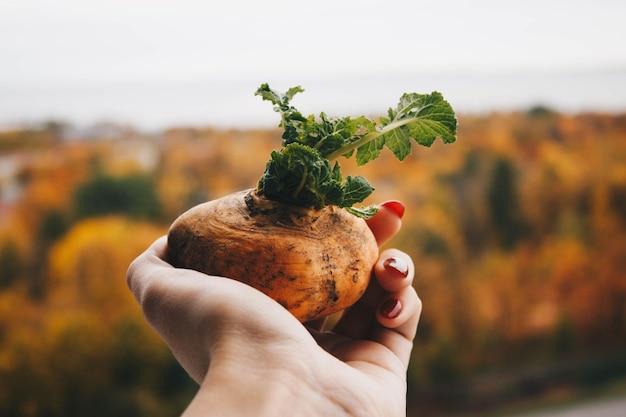
Did you know that you can actually grow your own rutabaga from scraps? It’s a great way to reduce food waste and enjoy fresh, homegrown produce. Rutabagas are root vegetables that are similar to turnips but have their own unique flavor and texture. They are versatile in the kitchen and can be cooked in various ways, from roasting to mashing.
In this blog post, we will walk you through the process of growing rutabaga from scraps step by step. We’ll answer common questions like whether you can plant rutabaga by onions, how to start rutabaga seeds indoors, and what companion plants work well with rutabaga. We’ll also share tips on how to take the bitterness out of rutabaga and how to know when they are ripe for harvesting. So let’s dig in and discover the joys of growing your own rutabaga!
How to Grow Delicious Rutabaga from Kitchen Scraps
Are you tired of just tossing your vegetable scraps into the compost bin? Well, here’s a fun and tasty project that will save you a trip to the grocery store and turn those scraps into something truly delicious. Yes, my friends, I’m talking about growing your very own rutabaga from kitchen scraps! It’s easier than you think, and it’s a fantastic way to reduce waste while enjoying the fruits (or rather, the vegetables) of your labor.
Finding the Perfect Rutabaga Scraps
To get started, you’ll need some rutabaga scraps. Now, before you start raiding your neighbor’s trash cans or dumpster diving behind your local supermarket, let me assure you that finding rutabaga scraps is a lot easier than you might think. Simply check your fridge! That’s right, those leftover rutabaga ends that you usually throw away can actually be used to grow new ones. It’s like recycling, but way more delicious.
Preparing Your Scraps for Planting
Once you’ve gathered your rutabaga scraps, it’s time to prepare them for planting. First, make sure you have a sharp knife on hand. Then, carefully cut off the bottom 1 inch of the rutabaga, leaving the top intact. This bottom part is where the roots will grow from. Take the top part of the rutabaga and trim it down to about 2 inches. This is where the new leaves will sprout from. Just think of it as giving your rutabaga a stylish haircut – it’s all about making them look their best!
Finding the Perfect Spot
Now that your rutabaga scraps are ready, it’s time to find them a cozy home. Rutabagas love cool weather, so pick a spot in your garden that gets plenty of sunlight but stays relatively cool. If you live in a hot climate, consider planting them in a container that you can move to a shadier area during the hottest parts of the day. Remember, you want your rutabagas to be happy and comfortable, just like you after a long day of gardening.
Planting Your Scraps
Dig a small hole in the soil, about 3 inches deep. Place the trimmed top of the rutabaga into the hole, making sure that only the top inch or so is sticking out. Gently pat the soil around it and give it a little water. Then, take the bottom part of the rutabaga and place it nearby, covering it lightly with soil. This is where the magic happens – roots will start to grow from the bottom scraps, while new leaves sprout from the top ones. It’s like a mini vegetable resurrection!
Caring for Your Growing Rutabaga
Congratulations, you’re now officially a rutabaga parent! Take good care of your little ones by keeping the soil moist but not waterlogged. Rutabagas like to be well-hydrated, but drowning them is a big no-no. Keep an eye out for any pesky weeds and give your rutabagas some space to spread their roots. If you notice any signs of pests, you can always sprinkle a bit of organic insecticide or enlist the help of some friendly neighborhood ladybugs to protect your precious crops.
Harvesting Your Tasty Rutabagas
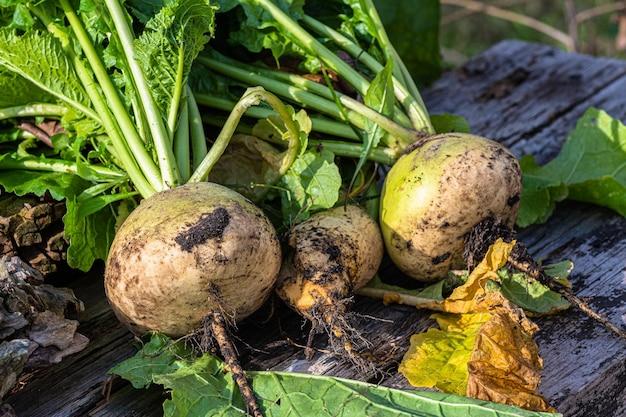
After a few months of tender loving care, it’s finally time to reap the rewards of your hard work. When your rutabagas reach about 4 inches in diameter, they’re ready to be harvested. Gently dig them out of the soil using a garden fork or your trusty hands. Admire their glorious purplish skin and the satisfying feeling of homegrown success. Rinse them off, dust off your overalls, and get ready to create some incredible culinary masterpieces with your very own rutabagas.
Growing rutabaga from kitchen scraps is not only a clever way to reduce waste but also a delightful and rewarding project. With a little love, patience, and a few humble scraps, you can transform your kitchen into a rutabaga paradise. So, go on, give it a try and impress your friends and family with your newfound superpower of growing delicious and sustainable veggies from the very scraps that used to go unnoticed. Happy gardening!
FAQ: How To Grow Rutabaga From Scraps
Can You Plant Rutabaga by Onions
Despite their similar shape and size, rutabagas and onions are not the best planting partners. These two veggies have different growth requirements and may not thrive when planted together. So, it’s best to keep them in separate parts of your garden or containers. Let your rutabagas and onions socialize at the dinner table instead of the garden!
How Do You Take the Bitterness Out of a Rutabaga
Ah, the bitter rutabaga conundrum! If you’ve ever bitten into a bitter rutabaga, you know what I’m talking about. Thankfully, there’s a sweet solution. To reduce the bitterness, simply peel the rutabaga, slice it into small pieces, and submerge them in cold water for about 30 minutes. This cold water bath helps mellow out any bitter flavors, leaving you with a more enjoyable vegetable experience.
What Is a Companion Plant for Rutabaga
Rutabagas are friendly fellows and enjoy the company of certain plants. One of their favorite companions is the trusty cabbage. They both belong to the brassica family and can get along quite well in the garden. So, if you want to create a harmonious vegetable community, consider planting your rutabagas alongside cabbage. It’s like veggie matchmaking!
Are Rutabagas Cold Hardy
Absolutely! Rutabagas are as tough as they come. These hardy root vegetables can tolerate frost and even thrive in cooler climates. In fact, a touch of cold weather can enhance their sweetness. So, if you live in a colder region, don’t hesitate to grow rutabagas. They’ll weather the winter with style, providing you with a delicious harvest.
How Do You Eat Rutabagas
Ah, the million-dollar question! Rutabagas are incredibly versatile in the kitchen. You can enjoy them roasted, mashed, boiled, sautéed, or even added to stews and soups. They bring a unique flavor to any dish, encompassing the best of a turnip and a cabbage. So, get creative! Whether as a side dish or the star of the show, rutabagas are ready to tickle your taste buds.
Can You Start Rutabaga Seeds Indoors
While some vegetable seeds are eager for indoor adventures, rutabagas prefer the great outdoors. They don’t appreciate being cooped up indoors for too long. So, it’s best to sow rutabaga seeds directly in their final growing spot. Give them plenty of space to stretch their roots and watch them thrive under the open sky. Farewell, seed trays!
Are Parsnip Leaves Poisonous
No need to panic! Parsnip leaves, although not as commonly consumed as the root, are not poisonous. However, it’s essential to take prudent precautions and wash them thoroughly before eating. So, ditch any worries about leafy hazards and enjoy your parsnips in all their delicious glory. Just make sure to keep the root the centerpiece of your parsnip feast!
How Do You Plant Rutabaga Seeds
Planting rutabaga seeds is as easy as pie! Start by preparing a well-drained garden bed or container. Sow the seeds about half an inch deep and one inch apart. Once they sprout, thin them out to allow for proper growth. Provide consistent watering, and make sure they receive ample sunlight. In no time, you’ll have a radishing rutabaga patch ready for harvest!
How Do You Start a Rutabaga
Starting a rutabaga journey is no Herculean task! Simply follow these simple steps:
- Pick a sunny location for your rutabaga patch.
- Prepare the soil by loosening it with a garden fork or tiller.
- Create furrows about half an inch deep and one inch apart.
- Place your rutabaga seeds in the furrows.
- Cover them with soil and gently pat it down.
- Water your seeds thoroughly but avoid any drowning mishaps.
- Wait patiently for those delightful rutabagas to sprout up.
Can You Grow Rutabaga in Spring
Indeed, you can! While rutabagas thrive in cooler temperatures, they can still be grown in the spring. Just make sure to sow the seeds early enough to give them ample time to mature before the scorching summer heat arrives. With some planning and nurturing, you’ll have scrumptious spring-grown rutabagas to add to your seasonal menu.
How Many Rutabaga Seeds Are in a Hole
Ah, the eternal question of seed abundance! To ensure proper spacing and avoid overcrowding, it’s best to place one rutabaga seed per hole. But don’t worry, rutabaga seeds are tiny but mighty, and they’ll eagerly sprout and grow into robust root vegetables. So, let each seed have its own little spot in the garden, where it can blossom and flourish.
Are Rutabagas Easy to Grow
Absolutely! Rutabagas are like the cheerleaders of the vegetable garden. They thrive in various growing conditions and provide a bountiful harvest with minimal effort. Whether you’re a seasoned gardener or just starting, rutabagas won’t disappoint. So, put on your gardening gloves, get your rutabaga seeds ready, and let the green-thumb magic begin!
How Many Rutabagas Does a Plant Produce
Ah, the question of abundance! Each rutabaga plant is a champion producer, graciously providing you with multiple bulbs of deliciousness. On average, you can expect two to four rutabagas per plant. Of course, this may vary depending on various factors like growing conditions and the plant’s individual mood. But don’t worry, your kitchen will soon be graced with a rutabaga abundance!
Can I Plant a Sprouted Rutabaga
Absolutely! Sprouted rutabagas may look like they’re ready for retirement, but they still have life left in them. If you have a sprouted rutabaga, don’t let it go to waste. Plant it in the ground, following the usual planting instructions for seeds or seedlings. With a little extra love and care, your sprouted rutabaga may surprise you with a second chance at a thriving life!
Are Rutabaga Leaves Poisonous
No need to panic about rutabaga leaves! While they may not be as commonly consumed as the roots, they are not poisonous. However, it’s always a good idea to wash them thoroughly before eating to ensure a clean and safe experience. So, embrace the full rutabaga plant, leaves and all, and let your culinary creativity soar!
Can You Plant Rutabaga and Potatoes Together
Now, here’s a dream team combo you’ll want to avoid. Rutabagas and potatoes are like two celebrities who simply don’t get along. They have different growing preferences and may compete for resources in the garden. So, it’s best to give them separate plots to avoid any plant celebrity feuds. Let them find harmony on your dinner plate instead!
Are Rutabagas Good for You
Absolutely! Rutabagas are not only delicious but also pack a punch of nutritional goodness. They are a great source of vitamins, minerals, and fiber. Plus, they’re low in calories, making them a fantastic addition to a healthy diet. So, go ahead and indulge in those rutabaga-inspired culinary adventures guilt-free. Your taste buds and body will thank you!
Can You Regrow Radishes from Scraps
Oh, the magical world of regrowth! While radishes are known for their rapid growth, regrowing them from scraps is a bit of a tricky task. It’s best to stick with traditional methods of growing radishes from seeds, which ensure the best results. So, save those radish scraps for a delicious salad and sow some fresh seeds for a successful radish-growing venture.
Can You Grow Rutabaga in Winter
Winter wonderland rutabagas? Absolutely! These frost-tolerant root vegetables can make winter gardening a delight. Start sowing your rutabaga seeds in late summer or early fall, giving them enough time to establish themselves before the chilly temperatures arrive. With a little protective mulch, you’ll have winter-grown rutabagas to bring warmth to your seasonal feast!
Can I Grow a Turnip from a Sprouting Top
Ah, the possibility of a sprouting top reincarnation! Unfortunately, turnip tops are not the best candidates for regrowth tricks. While you can enjoy the greens for culinary purposes, growing a whole new turnip from a sprouting top is unlikely to succeed. So, treasure those tasty greens, but when it comes to growing turnips, grab some fresh seeds and start from scratch.
How Do You Know When a Rutabaga Is Ripe
The ripening mystery! Determining the perfect time to harvest your rutabagas can be a bit tricky. But fear not, there are a few helpful signs to look out for. A ripe rutabaga will have a firm texture and a smooth skin with a vibrant purple hue. Additionally, they’ll reach a size of around three to five inches in diameter. Give them a gentle squeeze and trust your gardening instincts—your taste buds are depending on it!