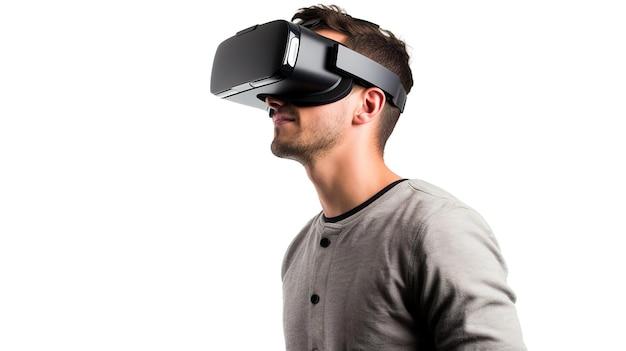
Are you wondering how to capture all the amazing moments in VRChat Quest? Whether you want to throw objects, take selfies, or even stream your gameplay on Twitch, having a camera in VRChat opens up a whole new world of possibilities. In this blog post, we’ll guide you through all the steps and tips on how to obtain and use a camera in VRChat Quest.
From learning how to throw objects in VRChat to understanding the ins and outs of OVRdrop and OVR Toolkit, we’ll cover everything you need to know. We’ll also explore how to integrate Twitch chat into your VRChat experience, take screenshots on your Oculus VR, and even dive into the realms of Roblox VR.
Join us on this virtual adventure as we uncover the secrets of getting a camera in VRChat Quest. Let’s capture those memorable moments in the metaverse!
How to Capture the Perfect Moments in VRChat Quest
So you’ve jumped into the virtual world of VRChat Quest and you want to capture those epic moments in-game. Well, fear not, because we’ve got you covered! In this guide, we’ll walk you through the steps to get a camera in VRChat Quest and unleash your inner virtual photographer. So put on your virtual thinking caps and let’s get snapping!
A Quest for the Perfect Shot
Finding the Right Tools
Before you can start capturing those picture-perfect moments in VRChat Quest, you’ll need to equip yourself with the right tools. Luckily, with a few simple steps, you can get your hands on a camera that will make your virtual artistry shine.
1. Start with the Basics
First things first, fire up your VR headset and dive into VRChat Quest. Once you’re inside the virtual world, take a deep breath and soak in the sights and sounds. Now, let’s move on to the next step.
2. Exploring the VRChat Marketplace
To get your hands on a camera, head over to the VRChat Marketplace. This treasure trove of virtual goodies is where you’ll find all sorts of items to enhance your VR experience. Play around with the search bar and type in keywords like “camera” or “photography” to uncover the hidden gems.
3. Evaluating the Options
Now that you’ve found the camera section in the VRChat Marketplace, you’ll likely be bombarded with a plethora of options. Don’t fret! Take your time to read the descriptions, reviews, and look at the screenshots. You’re looking for something that suits your style, functionality, and, of course, has a bit of pizzazz!
Snapping Away in VRChat Quest
4. Acquiring the Camera
Once you’ve made your decision on the perfect camera, it’s time to make the purchase. Follow the instructions provided on the VRChat Marketplace to finalize your transaction. Be sure to read any additional requirements or installation steps.
5. Setting Up the Camera
With your virtual camera in hand, you’re almost ready to start capturing those amazing moments. Find a comfortable spot in VRChat Quest where you can set up your camera. Make sure it’s in a position that gives you the best angle and composition for your shots.
6. Mastering the Art of Photography
Now that you’ve set up your camera, it’s time to unleash your creativity and master the art of virtual photography. Experiment with different lighting, angles, and poses to capture the essence of the scene. Don’t be afraid to play around and try new things. After all, in the virtual world, the only limit is your imagination!
The World is Your Canvas
7. Sharing Your Masterpieces
Congratulations, you’ve taken your first steps into the world of virtual photography! Once you’ve captured that perfect shot, it’s time to show it off to the world. Share your masterpieces with the VRChat community, your friends, or even on social media. Let the world see your artistic prowess!
8. Inspiring Others
By sharing your virtual photography, you have the power to inspire others to embark on their own creative journeys. Spark conversations, exchange tips and tricks, and encourage fellow VRChat Quest enthusiasts to explore the beauty of virtual artistry.
So there you have it, fellow VRChat Quest adventurers! With the right camera and a sprinkle of creativity, you can capture breathtaking moments that will leave everyone in awe. So go forth, explore the virtual wonders, and snap away like there’s no tomorrow. Happy virtual photography!
Keywords: VRChat Quest camera, capturing moments in VRChat Quest, virtual photography, VRChat Marketplace, setting up a camera, mastering virtual photography, sharing virtual masterpieces, inspiring others
FAQ: How to Get a Camera in VRChat Quest
How do you throw in VRChat
Throwing objects in VRChat can add an extra level of fun and interactivity to your virtual experiences. To throw an object, simply follow these steps:
- Grab the object: Use your virtual hands to pick up the object you want to throw. Just reach out and grab it as you would in real life.
- Release the object: Once you have a good grip on the object, release your virtual hand to let it go. You can fling it with a quick flick of your wrist or give it a toss with a more exaggerated motion. Experiment and have fun with it!
Just be mindful of your surroundings and any fellow VRChat participants nearby. You don’t want to accidentally hit someone with your virtual projectile!
How do you get a camera on VRChat desktop
If you want to capture those awesome moments in VRChat on your desktop, here’s how to get a camera:
- Install OVR Toolkit: OVR Toolkit is a handy third-party tool that allows you to overlay windows and widgets in your VR environment. It includes a virtual camera feature.
- Launch OVR Toolkit: After installing OVR Toolkit, launch the program and make sure it is running in the background.
- Enable Virtual Camera: In your VRChat settings, look for the option to enable the virtual camera. Once enabled, you should be able to see the camera overlay in your VR environment.
- Adjust Camera Settings: Open OVR Toolkit and select the camera overlay. You can then adjust the camera’s position, size, and settings to your preference.
- Start Recording: With the virtual camera set up, use your favorite screen recording software to capture your VRChat adventures on your desktop.
Now you have the power to capture and share your VR exploits with the wider world!
What is OVRdrop
OVRdrop is a fantastic tool that allows you to bring additional windows and applications into your VR experience. With OVRdrop, you can easily view Twitch chat, web browsers, and even your own desktop within your VR headset. It’s like having a personal assistant right in your virtual world!
How do you get Twitch chat in VR on your wrist
Never miss a beat on Twitch while immersing yourself in VR! Here’s how you can get Twitch chat on your wrist:
- Install OVRdrop: OVRdrop is a versatile software tool that integrates seamlessly with VR experiences. Install it on your computer.
- Launch OVRdrop: Once OVRdrop is installed, launch the program and ensure it’s running in the background.
- Open Twitch Chat: Fire up your web browser and navigate to your favorite Twitch stream. Locate the chat window on the stream page.
- Enable OVRdrop Overlay: With OVRdrop running, select the Twitch chat window and drag it onto your wrist in the VR environment. Voila! You now have Twitch chat conveniently displayed right on your wrist.
Stay up-to-date with the latest Twitch banter while exploring the virtual world in VRChat!
Where do Steam screenshots go
If you’ve been exploring VRChat on Steam and have been happily snapping away with your screenshots, you may wonder where they end up. Fear not! Steam stores your VRChat screenshots in a specific location. Here’s how to find them:
- Navigate to your Steam Directory: Open the Windows File Explorer and head to the following location (assuming a default Steam installation):
C:\Program Files (x86)\Steam\userdata\\760\remote\438100\screenshots - Browse Your Screenshots: In the screenshots folder, you will find all the screenshots you have taken in VRChat. Take a trip down memory lane as you relive your virtual adventures.
So, grab that popcorn and enjoy reminiscing about your glorious moments in VRChat!
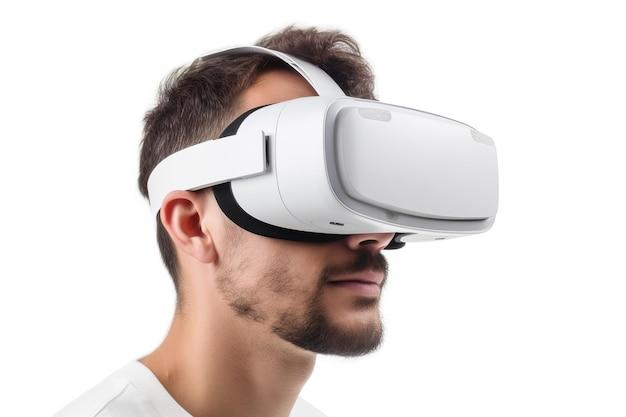
Can Oculus Quest Connect to VRChat
Absolutely! The Oculus Quest is VRChat-compatible, allowing you to dive into the virtual wonderland with ease. Here’s how to connect your Oculus Quest to VRChat:
- Install VRChat: Begin by installing VRChat on your Oculus Quest. You can find it on the Oculus Store or through the Oculus mobile app.
- Launch VRChat: After installation, launch VRChat on your Quest headset. Make sure your device is connected to the internet.
- Create or Log In to Your Account: If you don’t already have a VRChat account, create one by following the on-screen prompts. If you have an existing account, log in using your credentials.
- Join the VRChat World: Once you are logged in, you can explore various engaging worlds and meet other VR enthusiasts. Let your imagination run wild!
Get ready to step into a world where anything is possible, all from the comfort of your Oculus Quest!
How do you play VR hands on Roblox
While Roblox is primarily a game played on a computer or mobile device, you can still enjoy it in a limited form with VR hands. Here’s how to play with VR hands on Roblox:
- Install Roblox VR: Start by installing the Roblox VR application on your VR headset. Check the official Roblox website for instructions on how to set it up.
- Launch Roblox VR: Once the Roblox VR application is installed, launch it on your VR headset. Make sure your VR system is properly connected.
- Select a VR-Compatible Roblox Game: Not all Roblox games are VR-compatible. To play with VR hands, you need to choose a game specifically designed for VR play.
- Put on Your VR Headset: Strap on your VR headset and immerse yourself in the VR world of Roblox.
- Use VR Hand Controls: In VR, you can use your virtual hands to interact with the game. Reach out and grab objects, press buttons, and engage with the virtual environment.
Now, get ready to leave your mark in the Roblox universe with your VR hands!
How do I get unbanned from Omegle
If you’ve found yourself banned from Omegle, perhaps due to a misunderstanding or a temporary lapse in judgment, here are a few potential steps to help you get unbanned:
- Wait it out: Omegle bans are typically temporary, ranging from a few hours to a few weeks. If you believe your ban is for a minor infraction or mistake, it’s usually best to wait it out and give yourself some time to reflect on the rules and guidelines of the platform.
- Behave appropriately: If you’re lucky enough to get a second chance, make sure to follow Omegle’s rules strictly. Avoid any behaviors that may result in another ban, such as nudity or inappropriate content.
- Clear your cache and cookies: Sometimes, clearing your browser’s cache and cookies can help reset your Omegle ban. This method may not work in all cases, but it’s worth a try.
- Use a VPN: If your ban persists, you may consider using a Virtual Private Network (VPN) to change your IP address and circumvent the ban. However, be aware that using a VPN violates Omegle’s terms of service, and there is no guarantee this method will work or prevent further bans.
Remember, it’s important to follow Omegle’s guidelines and respect the rules of the platform to ensure a positive and inclusive experience for everyone.
How do you take selfies on VRChat
Capturing a selfie in VRChat is a fantastic way to preserve those memorable moments with your virtual friends. To take a selfie, follow these steps:
- Equip a Camera: Before taking a selfie, make sure you have a camera in your virtual hands. Check out the VRChat store or various worlds within VRChat to find cameras you can acquire.
- Strike a Pose: Position your virtual self in front of a scenic backdrop or with your friends. Get creative and think about fun poses that reflect your personality.
- Activate the Camera: Once you’re ready, use the camera in your virtual hands to activate the selfie mode. This usually involves pressing a button or interacting with the camera object.
- Smile and Snap: With the camera activated, strike your best pose and smile. Capture the perfect selfie by pressing the camera button.
Now you have a virtual memento of your adventures in VRChat that you can share with others online!
How do I screenshot on my Oculus VR
If you’ve stumbled upon a breathtaking scene in VR and want to capture it on your Oculus VR headset, taking a screenshot is simple. Here’s how to do it:
- Hold Down the Oculus Button: While in your VR experience, hold down the Oculus button on either of your Touch controllers.
- Choose “Take a Photo”: After holding down the button, a menu will appear. Use your virtual hand to point at the “Take a Photo” option.
- Time to Strike a Pose: Once you’ve selected “Take a Photo,” the VR environment will freeze, allowing you to take your time and find the perfect angle for your screenshot.
- Capture the Moment: When you’re ready, press the trigger button on either of your Touch controllers to capture the screenshot.
Congratulations! You’ve now immortalized that perfect VR moment on your Oculus headset.
Is Oculus Quest 2 Minecraft
While the Oculus Quest 2 is a fantastic virtual reality headset, it is not Minecraft itself. However, you can enjoy Minecraft on the Oculus Quest 2!
- Install Minecraft on Oculus Quest 2: Visit the Oculus Store and search for “Minecraft.” Purchase and download the Minecraft VR version specifically designed for the Oculus Quest 2.
- Launch Minecraft VR: Once you’ve installed Minecraft on your Oculus Quest 2, launch the game from your VR library.
- Immerse Yourself in Minecraft VR: With your headset on, embark on an immersive journey through the blocky world of Minecraft, now fully realized in virtual reality.
Experience the joy of survival and creativity in Minecraft like never before with the Oculus Quest 2!
How do I enable virtual camera in OBS
To enable a virtual camera in OBS (Open Broadcaster Software), follow these steps:
- Install OBS Virtual Camera: Start by installing the OBS Virtual Camera plugin. This plugin allows OBS to produce a virtual camera feed that can be used in various applications.
- Launch OBS Studio: After successfully installing the OBS Virtual Camera plugin, launch OBS Studio on your computer.
- Configure OBS Virtual Camera: In OBS Studio, go to the “Tools” menu and select “VirtualCam.” A new window will open.
- Start Virtual Camera: In the VirtualCam window, click on the “Start” button to activate the virtual camera feed.
- Select Virtual Camera in Your Application: Once the virtual camera is active, you can test it out by selecting it as your camera source within your preferred application, such as Zoom or Discord.
Now you’re ready to bring your OBS stream to life and impress your viewers with a virtual camera!
Is the Oculus Quest 2 worth it
Absolutely! The Oculus Quest 2 is an exceptional virtual reality headset that offers an immersive and accessible VR experience. Here are a few reasons why the Oculus Quest 2 is worth every penny:
- Standalone VR: The Oculus Quest 2 eliminates the need for a PC or external sensors, providing a truly wireless and hassle-free VR experience.
- High-Quality Visuals: With a vibrant LCD display and a resolution of 1832 x 1920 pixels per eye, the Oculus Quest 2 delivers stunning visuals that immerse you in the virtual world.
- Vast Game Library: The Oculus Quest 2 offers a wide range of games and experiences, including popular titles like Beat Saber and Superhot VR. There’s something for everyone.
- Comfort and Ergonomics: The Quest 2 features a lightweight design with adjustable straps, ensuring a comfortable fit for extended VR sessions.
- Affordable Price: Compared to other VR headsets on the market, the Oculus Quest 2 provides an excellent balance of performance and affordability.
Embark on an unparalleled VR journey and explore countless virtual worlds with the Oculus Quest 2!
How do you use the camera in VRChat Quest
Using the camera in VRChat on your Oculus Quest is a fun way to capture and share your virtual adventures. Here’s how to use the camera in VRChat Quest:
- Activate the Camera Mode: In VRChat, bring up the quick menu by pressing the menu button on your Oculus Quest controller. Navigate to “System” and select “Camera.”
- Choose Camera Options: With the camera mode activated, you can adjust various settings to suit your needs. Experiment with options such as camera movement, depth of field, and filters to find your desired effect.
- Strike a Pose: Once you have the camera settings in place, strike a pose, or position your virtual avatar the way you want it to appear in the photo.
- Capture the Moment: Press the camera button on either of your Oculus Quest controllers to take the photo. The camera will capture the scene just as you see it in your virtual environment.
- View and Share: After taking the photo, you can view it in your VRChat gallery. From there, you can share it with friends, post it on social media, or simply cherish it as a virtual memento.
Unleash your creativity and let the world see the amazing moments you’ve captured in VRChat!
How do you get Twitch chat on Oculus Quest
Want to stay connected with your Twitch community while in VR? Here’s how to get Twitch chat on your Oculus Quest:
- Install OVRdrop: Begin by installing OVRdrop, a popular application that allows you to overlay windows and applications within your VR environment.
- Launch OVRdrop: Once OVRdrop is installed, launch the program and ensure it’s running in the background.
- Open Twitch Chat: Using your Oculus Quest browser, navigate to your desired Twitch stream and open the chat window.
- Enable OVRdrop Overlay: With OVRdrop running, select the Twitch chat window and position it within your VR environment. You can place it in a convenient spot, such as on your wrist, for easy access while immersed in VR.
- Start Interacting: With Twitch chat now within reach, you can interact with your viewers, read messages, and keep the conversation flowing while enjoying your favorite VR experiences.
No more FOMO (Fear of Missing Out) on the Twitch action while you’re deep into VR with your Oculus Quest!