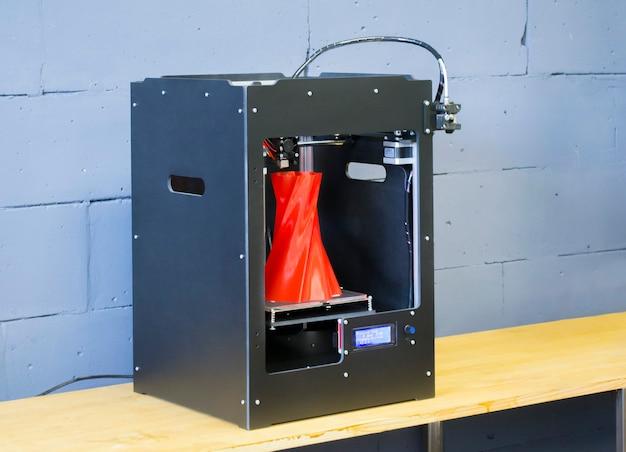
Are you ready to take your 3D printing experience to the next level? One crucial aspect of maximizing your printer’s potential is understanding and mastering the firmware and eeprom. These two elements play a significant role in ensuring your printer’s performance and functionality. However, the process of flashing the firmware or resetting the eeprom can be quite daunting, especially if you’re new to the world of 3D printing.
In this comprehensive guide, we’ll walk you through everything you need to know about flashing your eeprom on a 3D printer. We’ll cover topics such as finding the firmware for your printer, connecting your printer to Cura 3D, understanding the eeprom’s role, and troubleshooting common issues like eeprom faults. Whether you have a CR 10 or an Ender 3 Raspberry Pi, we’ve got you covered!
So, grab your coffee and let’s dive right in! Get ready to unlock the full potential of your 3D printer by flashing its eeprom and updating its firmware. Let’s make your prints better than ever before!
How to Easily Flash Your 3D Printer’s EEPROM
So, you’ve got yourself a fancy 3D printer, and you’re ready to take your prints to the next level. But what’s this about flashing the EEPROM? It might sound a bit technical, but fear not! I’m here to guide you through the process, step by step, and turn you into a flashing guru in no time. Grab your coffee, put on your favorite tunes, and let’s dive right in!
What the Heck is EEPROM, Anyway
Before we jump into the flashing frenzy, let’s take a quick detour to understand what this mysterious EEPROM thingy is. EEPROM stands for Electrically Erasable Programmable Read-Only Memory. Phew, that’s a mouthful! Basically, it’s a tiny storage chip in your 3D printer that holds crucial settings and configuration data. Think of it as your printer’s memory bank. So, when you flash the EEPROM, you’re simply giving it a little brain upgrade. Pretty cool, right?
Step 1: Know Your Printer Inside Out
Before you get all trigger-happy with flashing, make sure you know the ins and outs of your printer. Seriously, get to know it like the back of your hand. Check the user manual, explore the settings menu, and even give your printer a cute nickname if that helps. The more you know about your printer, the smoother this flashing adventure will be.
Step 2: Safety First, My Friend
Ah, safety, my dear friend. It’s important to keep in mind that flashing the EEPROM involves tinkering with the inner workings of your printer. So, power down your printer before you start any flashing shenanigans. Trust me; you don’t want to give yourself an electric shock or surprise your cat with a spontaneous 3D printing dance party. Safety goggles and protective gear are optional, but hey, if you’re feeling adventurous, go for it!
Step 3: Choose Your Flashing Weapon
Now that you’re all geared up, it’s time to choose your flashing weapon. There are many ways to go about this, but for the sake of simplicity, let’s focus on using the trusty Marlin firmware. It’s a popular choice among 3D printing enthusiasts, and it’ll make your life a whole lot easier. Plus, it’s like having a superhero sidekick by your side. Who doesn’t want that?
Step 4: Get Your Hands Dirty with Marlin
Okay, time to roll up those sleeves and get down to business. You’ll need to download the latest version of Marlin firmware for your specific printer model. Head over to their official website, look for the downloads section, and find your printer in the list. Grab the firmware like it’s the last slice of pizza, and make sure to unzip it to a designated folder. Don’t worry; no pizza will be harmed in this process.
Step 5: Configuration Magic
Now, this is where the real magic happens. Open up the Marlin folder and locate the Configuration.h file. This is your golden ticket to unlocking the EEPROM flashing wonders. Open it with your favorite text editor – mine’s called “SnazzyWriter5000” – and prepare to dive into a sea of mind-boggling printer settings. But fret not, my friend! Marlin has plenty of helpful comments in the file to guide you through the maze. Think of it as your code whisperer.
Step 6: Tweaking Time
Time to unleash your inner mad scientist! This step is all about tweaking those settings to fit your 3D printing desires. From nozzle temperatures to printer dimensions, take your time to go through each option and make adjustments as needed. It’s like crafting your own secret recipe for the perfect print. Don’t be afraid to experiment and find that sweet spot that makes your printer sing with joy.
Step 7: Saving the Day… and the EEPROM
Now that you’ve fine-tuned your printer settings, it’s time to save them and let your printer do its magic. Head back to the Marlin folder, locate the Configuration_adv.h file, and open it up. In this file, you’ll find the cherished line of code that triggers the EEPROM flashing. Uncomment that line – removing the pesky double slashes that hide its power – and save the file. You’re now ready for the grand finale!
Step 8: Flash It, Baby!
Hold on to your hats, folks! It’s time to hit that flashing button and watch the magic unfold before your eyes. Connect your printer to your computer using a USB cable, fire up the Arduino IDE – the geeky software used for uploading firmware – and hit that upload button like there’s no tomorrow. Your printer will come to life, dancing with excitement as it absorbs the new settings you’ve lovingly provided. It’s a beautiful moment, my friend.
Step 9: Celebrate Your Flashing Triumph!
Congratulations, dear reader! You’ve successfully flashed your 3D printer’s EEPROM like a true champ! Take a moment to pat yourself on the back, do a little happy dance, or even throw a mini confetti party. You deserve it! From this point on, your prints will be smoother, your settings will be spot-on, and your 3D printer prowess will reach new heights. So go forth, my flashing friend, and create amazing things with your upgraded printer!
Now that you’re dialed in on the magical art of flashing your 3D printer’s EEPROM, you’re all set to conquer the 3D printing world, one filament at a time. May your prints be flawless, your creativity boundless, and your flashing adventures filled with joy. Happy printing, my friend!

FAQ: How To Flash Your EEPROM on a 3D Printer
So you’ve got your 3D printer and you’re ready to dive into the wonderful world of firmware and EEPROM flashing. But wait, what even is EEPROM? And how do you reset or update it? Don’t worry, we’ve got you covered! In this FAQ-style guide, we’ll answer all your burning questions about flashing your EEPROM on a 3D printer. Let’s get started!
How do I Reset My EEPROM
If you’re experiencing issues with your 3D printer or need to start fresh, resetting your EEPROM can be a helpful solution. To reset your EEPROM, follow these steps:
- Turn off your 3D printer and disconnect it from the power source.
- Locate the EEPROM reset pin on your 3D printer’s control board.
- Using a small tool like a paperclip, gently press and hold the reset pin for 10 seconds.
- Release the reset pin and reconnect your 3D printer to the power source.
- Turn your 3D printer back on, and your EEPROM should be reset to its default settings.
How do I Find the Firmware of My 3D Printer
Finding the firmware of your 3D printer is essential for troubleshooting and updating purposes. To locate the firmware of your 3D printer, follow these steps:
- Power on your 3D printer and navigate to the settings menu.
- Look for the “About” or “Information” section.
- In this section, you should find the firmware version and other relevant information about your 3D printer.
How do I Connect My Cura 3D Printer
Connecting your 3D printer to Cura software is crucial for slicing and printing models. To connect your Cura 3D printer, follow these steps:
- Ensure your 3D printer is powered on and connected to your computer.
- Launch Cura software on your computer.
- From the top menu bar, click on “Preferences” and select “Printers.”
- Click on the “Add” button to add a new printer.
- Follow the on-screen instructions to connect your specific 3D printer model to Cura.
What is 3D Printer EEPROM
EEPROM stands for Electrically Erasable Programmable Read-Only Memory. In the context of 3D printers, the EEPROM stores the settings and configurations unique to your printer. It retains this information even when your printer is powered off. So, whenever you turn on your printer, it recalls those settings, making your printing experience more convenient.
What is 3D Printer Firmware
Firmware is the software that controls the basic operations and functionality of your 3D printer. It acts as the bridge between your printer’s hardware and the commands you send to it. Firmware tells your printer how to move its motors, heat the bed and nozzle, and execute other crucial tasks during the printing process.
What is EEPROM Fault
An EEPROM fault refers to an issue or error with the EEPROM of your 3D printer. This may result in incorrect settings or the inability to save and recall settings properly. One common symptom of an EEPROM fault is settings being lost or resetting to defaults after power cycling your printer.
How do I Reset My CR 10
The CR 10 is a popular 3D printer model, and resetting its EEPROM can help resolve certain issues. To reset your CR 10’s EEPROM, follow these steps:
- Turn off your CR 10 3D printer and unplug it from the power source.
- Locate the EEPROM reset pins on your CR 10’s control board.
- Using a small tool, such as a paperclip, carefully short the two EEPROM reset pins for about 10 seconds.
- Remove the tool and plug your CR 10 back into the power source.
- Power on your CR 10, and your EEPROM should be successfully reset.
What is Marlin Firmware for 3D Printers
Marlin is an open-source firmware widely used in 3D printers. Packed with features and customization options, Marlin allows you to optimize your printer’s performance and enhance its capabilities. It’s highly versatile and can be used on various 3D printer models, including popular ones like the Ender 3 and CR 10.
How does EEPROM Work
EEPROM works by using electrical signals to store and retrieve data. Unlike standard RAM, EEPROM retains its data even when power is removed. This characteristic makes EEPROM a suitable choice for storing vital printer settings that need to survive power cycles.
How do I Update the Firmware on My Ender 3 Raspberry Pi
To update the firmware on your Ender 3 using a Raspberry Pi, follow these steps:
- Set up OctoPrint on your Raspberry Pi and connect it to your Ender 3.
- Open OctoPrint in your web browser and navigate to the firmware update plugin.
- Upload the firmware file you want to use.
- Select the appropriate options for your Ender 3, such as the board type and firmware version.
- Confirm the settings and start the firmware update process.
- Sit back and relax while your Ender 3’s firmware is updated.
What does Marlin Firmware Do
Marlin firmware provides your 3D printer with the necessary instructions for smooth and accurate printing. It controls the movement of motors, temperature regulation, and various other vital functions. In addition, Marlin firmware allows for customization, enabling you to tailor your printer’s behavior to your specific needs.
How do I Flash My New Firmware to My 3D Printer
Flashing new firmware to your 3D printer is the process of updating or installing a new version of the printer’s firmware. To flash new firmware, you generally need to follow these steps:
- Download the firmware file for your specific printer model.
- Connect your printer to your computer using a USB cable.
- Open the firmware flashing tool/software and select the firmware file you downloaded.
- Configure any necessary settings, such as the printer type and connection port.
- Start the firmware flashing process and wait for it to complete.
- Once finished, disconnect your printer from the computer, and you’re good to go with the new firmware.
How do You Flash the Ender 3 Firmware
To flash the firmware on your Ender 3, you can follow these general steps:
- Download the firmware file for the Ender 3 from a reliable source.
- Connect your Ender 3 to your computer using a USB cable.
- Open the firmware flashing tool/software of your choice.
- Select the firmware file you downloaded and configure any necessary settings for your Ender 3, such as the printer type and connection port.
- Start the firmware flashing process and patiently wait for it to finish.
- Disconnect your Ender 3 from the computer, and you’re all set with the new firmware.
How do You Make a Firmware
Creating your own firmware can be a complex process that requires coding skills and in-depth knowledge of your 3D printer’s hardware. While it’s not feasible to cover the entire process in this FAQ, you can start with an existing firmware like Marlin and modify it to suit your specific needs. Remember, always exercise caution when flashing custom firmware and consult reliable sources for guidance.
What is Eeprom DAT Ender 3
Unfortunately, there isn’t sufficient information available regarding “Eeprom DAT Ender 3.” It is possible that it could be a misunderstood term or a specific topic within the Ender 3 community. For further clarification, it’s recommended to consult community forums, user manuals, or trusted online resources related to your Ender 3 3D printer.
How do I Put My Keyboard in Flash Mode
To put your keyboard in flash mode for firmware updates or customization, follow these steps:
- Check the documentation or instructions provided by the manufacturer of your keyboard to identify the flash mode key combination.
- Power off your keyboard.
- Press and hold the designated flash mode key combination. This could involve pressing and holding a specific combination of keys or using a dedicated flash mode button (if available).
- While holding the flash mode keys/buttons, power on your keyboard.
- Ensure that the keyboard is recognized by your computer and proceed with the necessary firmware update or customization steps.
What is Flashing QMK
Flashing QMK refers to the process of updating or customizing the firmware on keyboards that support the QMK firmware ecosystem. QMK is an open-source firmware that offers advanced features and flexibility for keyboard enthusiasts. Flashing QMK allows you to modify key layouts, enable macros, and customize other aspects of your keyboard’s functionality.
What is Eeprom Reset Keyboard
An EEPROM reset function for a keyboard would imply a process to reset the keyboard’s EEPROM storage back to its default settings. However, the availability and implementation of such a feature may vary depending on the specific keyboard model and firmware. If you’re looking to reset your keyboard’s settings, consult the manufacturer’s documentation or online resources for instructions tailored to your keyboard model.
How do I Reset My EEPROM Ender 3
To reset the EEPROM on your Ender 3 3D printer, follow these steps:
- Power off your Ender 3 and unplug it from the power source.
- Locate the EEPROM reset pins on your Ender 3’s control board.
- Utilizing a small tool like a paperclip or jumper, gently short the two EEPROM reset pins for about 10 seconds.
- Remove the tool and reconnect your Ender 3 to the power source.
- Power on your Ender 3, and the EEPROM should now be reset to its default settings.
How do I Reset My EEPROM IC
Resetting the EEPROM IC (Integrated Circuit) involves performing a hardware reset on the specific integrated circuit that contains the EEPROM within your device. The steps to reset the EEPROM IC may vary depending on the device and circuitry involved, and it is recommended to consult the device’s user manual or contact the manufacturer for accurate instructions tailored to your specific device model.
Does My 3D Printer Have a Bootloader
Most modern 3D printers come with a bootloader pre-installed. A bootloader is a small piece of software that enables firmware updates on the 3D printer without the need for specialized programming tools. It allows you to easily flash new firmware onto your 3D printer using tools like Arduino or specific firmware flashing utilities. However, the presence of a bootloader can vary between different printer models and manufacturers, so it’s always a good idea to verify your specific printer’s capabilities before attempting a firmware update.
What Firmware Does Ender 3 Use
The Ender 3 3D printer typically uses the Marlin firmware. Marlin is a popular firmware choice due to its open-source nature and extensive community support. It offers flexibility, customization options, and compatibility with various printer models. There are also other firmware options available, but Marlin is often recommended and widely used within the Ender 3 community.
Congratulations, you’ve reached the end of our comprehensive FAQ-style guide on flashing your EEPROM on a 3D printer! We hope this article has provided you with valuable insights and answers to your burning questions. Remember, while working with firmware and EEPROM may seem daunting at first, it opens up a realm of possibilities for fine-tuning your 3D printing experience. Happy printing and flashing!
Please note that this article is intended for informational purposes only, and all instructions should be followed with caution and in accordance with your specific 3D printer’s guidelines.