Are cracks in your ceiling ruining the aesthetic appeal of your room? Don’t let them hold you back from achieving the perfect paint job! In this guide, we’ll show you step-by-step how to fix those unsightly cracks so you can have a smooth and flawless ceiling that’s ready for a fresh coat of paint.
From determining the type of ceiling you have to choosing the right filler, we’ll cover everything you need to know to tackle this DIY project with ease. So whether you’re dealing with hairline cracks or more substantial fissures, we’ve got you covered. Say goodbye to those blemishes and hello to a beautifully painted ceiling!
In this blog post, we’ll answer common questions like, “Can I use caulk as a filler?” and “What is the best filler for ceiling cracks?” We’ll also address concerns about priming, the differences between caulk and filler, and the costs associated with fixing ceiling cracks. So let’s get started on transforming your ceiling into a masterpiece!
How to Repair Those Pesky Ceiling Cracks Before Painting
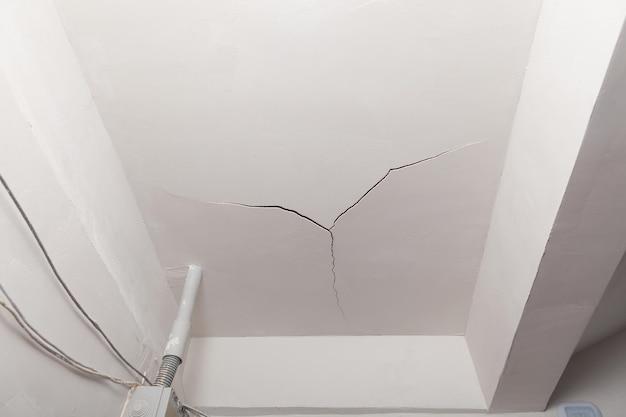
Finding the Hidden Cracks
Cracks in the ceiling can be quite the eyesore, not to mention a potential hazard if left unaddressed. But fear not, for you’re about to embark on a journey to fix those pesky cracks and restore the beauty of your ceiling! The first step is to play detective and find out where those hidden cracks are lurking.
So, grab a flashlight and carefully examine every nook and cranny of your ceiling. Don’t be surprised if some cracks try to play hide-and-seek with you. Once you have spotted them all, it’s time to roll up your sleeves and get to work!
Gather Your Tools, Superheroes!
Now that we’re all set to embark on our mission, let’s gather the tools that will help us conquer those cracks like true superheroes. Here’s a handy list of what you’ll need:
1. Protective Gear (because superheroes stay safe!)
Wear goggles to shield your eyes from dust and debris, old clothes to protect yourself, and a mask to prevent inhaling any potential irritants when working with materials like plaster or joint compound.
2. A Utility Knife (the superhero’s trusty sidekick)
Use a utility knife to widen the crack slightly, allowing the patching material to adhere better and ensure a smooth finish.
3. Sandpaper (the refinement superhero)
Prepare for some sanding action! Invest in a medium-grit sandpaper to smoothen the patched areas and create a seamless surface for painting.
4. Joint Compound (the magical hero with stunning adhesive powers)
This incredible substance will be your best friend throughout this cracking adventure. Grab some joint compound, which is readily available in most hardware stores, as this will be essential for filling in and repairing the cracks.
5. A Putty Knife (the crack-fighting champion)
This trusty sidekick will help you apply the joint compound seamlessly and effectively. Opt for a putty knife with a wide blade to cover larger areas and ensure a smooth application.
6. A Paint Roller or Brush (the final touch of superhero magic)
Lastly, equip yourself with a paint roller or brush to give your ceiling a fresh, new coat of paint after the crack-filling marvel is complete. Because what’s a superhero without their finishing touch?
Let the Crack-filling Magic Begin!
Now that we’ve assembled our superhero team of tools, it’s time to dive into the crack-filling magic and bid farewell to those unsightly blemishes. Follow these steps to become an expert crack-fixer:
Step 1: Cleanse the Battlefield!
Before beginning any heroic feats, make sure the area is free from dust, dirt, and loose debris. Give the cracks a thorough cleaning using a vacuum cleaner or a soft brush, as this will ensure a better bond between the joint compound and the ceiling.
Step 2: Widen the Cracks (Gently, Though!)
Take your trusty utility knife and carefully widen the cracks. Don’t go overboard; a width of about ¼ inch should suffice. This step helps create space for the joint compound to work its magic.
Step 3: Time for the Joint Compound to Shine!
Grab your putty knife and generously apply the joint compound into the cracked areas. Smooth it out, ensuring the compound fills the cracks entirely. Remember, we want those cracks to disappear into oblivion!
Step 4: Sand, Smooth, and Glory Awaits!
After the joint compound has dried completely (typically 24 hours), unleash your sanding skills with the medium-grit sandpaper. Gently sand the patched areas, feathering out the edges so they blend seamlessly with the surrounding ceiling.
Step 5: Dust Off the Evidence!
Once you’ve perfected the smoothness of your patched cracks, take a soft cloth or brush and wipe away the fine dust particles. We want that ceiling to shine like new before the painting extravaganza begins!
Step 6: Unleash Your Inner Picasso…or Sherwin-Williams!
Now that our heroics have come to fruition, it’s time to embrace the final step: painting! Use a paint roller or brush to give your ceiling a fresh coat of paint, and watch it come to life once more!
Cracks Be Gone!
Congratulations, my fellow crack-fixer and superhero of the ceiling repair! You’ve successfully vanquished those cracks and brought back the pristine beauty of your ceiling. Remember, the key to a successful repair is patience, precision, and a touch of superhero flair!
So go forth, my trusty DIYer, and may your ceilings forever remain crack-free!

Fix Cracks in Ceiling Before Painting: Your Comprehensive FAQ Guide
Are you planning to give your ceiling a fresh coat of paint? Before you dive into your painting project, it’s important to address any cracks in your ceiling. Cracks not only diminish the appearance of your ceiling but can also indicate underlying issues that may require immediate attention. In this comprehensive FAQ guide, we’ll provide you with expert advice and answers to all your burning questions about fixing cracks in the ceiling before painting. So let’s get cracking!
Can I Use Caulk as a Filler
Yes, you can absolutely use caulk as a filler for small cracks in your ceiling. Caulk is a flexible material that adheres well to various surfaces, making it a perfect choice for crack repair. Just make sure to choose a paintable caulk suitable for the ceiling, follow the manufacturer’s instructions, and allow proper drying time before painting.
Can You Caulk Cracks in Plaster
Certainly! Caulking cracks in plaster ceilings is an effective way to restore their seamless appearance. Apply a thin line of paintable caulk along the crack, then use a damp cloth or finger to smooth out the excess. Remember, a little caulk can go a long way, so don’t go overboard!
Can You Plaster Over a Cracked Ceiling
If you’re dealing with more extensive cracks or damaged plaster, you may need to resort to plastering. However, it’s crucial to assess the severity of the cracks before deciding on plastering. Consult a professional to evaluate the condition of your ceiling and provide an appropriate solution. They’ll determine whether plastering is the best course of action or if other repairs are necessary.
How Do You Repair a Crack in an Old House Ceiling
Cracks in old house ceilings can be a common occurrence due to the settling of the structure over time. To repair these cracks, start by cleaning the area around the crack to ensure proper adhesion. Use a high-quality plaster or joint compound to fill the crack, following the manufacturer’s instructions. Once the filler is dry, sand it down gently to achieve a smooth finish. Finally, apply primer before painting to ensure a seamless and long-lasting result.
How Do I Know If My Ceiling Is Plaster or Drywall
Distinguishing between plaster and drywall ceilings is easier than you might think. Simply tap on the ceiling with your knuckles. If you hear a hollow sound, it’s likely drywall. However, if the sound is denser and less hollow, you probably have a plaster ceiling. Additionally, you can look for small, irregular shapes embedded in the plaster, known as keying, which are absent in drywall.
Do I Need to Prime Filler Before Painting
Yes, it’s highly recommended to prime the filler before painting. Priming not only seals the repaired cracks but also ensures an even finish and improved paint adhesion. Use a high-quality primer suitable for your ceiling’s material, apply it according to the manufacturer’s instructions, and allow it to dry before proceeding with your painting project.
What Is the Best Ceiling Filler
The best ceiling filler depends on the type and severity of the cracks you’re dealing with. For small cracks, paintable caulk can work wonders. However, for more significant cracks, you may need to opt for a joint compound or plaster. Make sure to choose a filler that is compatible with your ceiling’s material and follow the instructions provided to achieve the best results.
Should I Worry About Cracks in My Ceiling
While minor hairline cracks might not spell disaster, it’s essential to take them seriously. Cracks can be indicative of structural issues, water damage, or underlying problems that warrant attention. Regularly inspect your ceiling for any changes or new cracks, and if you notice any concerning signs, consult a professional to assess the situation. Taking proactive measures can save you from potential headaches down the road.
Does Primer Fill in Hairline Cracks
Primer is not designed to fill in hairline cracks. Its main purpose is to provide an even base for the paint, improve adhesion, and enhance the appearance of the final result. If you want to address hairline cracks before painting, consider using a specialized crack filler or spackling paste. These products are designed to penetrate and fill hairline cracks effectively.
Can You Just Paint Over Hairline Cracks
Painting over hairline cracks might seem like a quick fix, but it’s not a long-term solution. Over time, the cracks can reappear, tarnishing the flawless finish you desire. Instead, invest a little time and effort in properly filling and priming the cracks before painting. Your beautifully painted ceiling will thank you in the end!
How Do You Fix a Hairline Crack in Drywall Ceiling
Fixing hairline cracks in a drywall ceiling is relatively straightforward. Start by widening the crack slightly using a putty knife or scraper. Then, apply a thin layer of joint compound using a flexible putty knife, feathering the compound outward from the crack. Once the compound is dry, sand it down gently until it blends seamlessly with the surrounding surface. Remember, patience is key!
Should I Use Wood Filler or Caulk
When it comes to fixing cracks in the ceiling, wood filler is not the best choice. Wood filler is primarily designed for filling gaps and holes in wood surfaces, not for repairing cracks in ceilings. Stick with a paintable caulk or a joint compound specially formulated for ceilings. They will provide the flexibility and durability needed to maintain a seamless finish.
Should You Caulk Before or After You Paint
It’s generally recommended to caulk before painting. By addressing cracks and gaps with caulk beforehand, you create a smoother surface for the paint to adhere to, resulting in a more professional and visually appealing finish. Be sure to allow adequate drying time for the caulk before applying paint.
Is It Easy to Plaster a Ceiling
Plastering a ceiling is not for the faint of heart, but it is doable with the right knowledge and preparation. It requires careful surface preparation, including cleaning, priming, and applying a base coat. Smoothing out plaster can be challenging, as it requires a certain level of skill and technique. If you’re unsure about doing it yourself, it’s best to consult a professional plasterer who can ensure a flawless result.
How Do You Prepare Hairline Cracks Before Painting
Preparing hairline cracks before painting involves a few simple steps. First, clean the area around the crack to remove any dust or debris. Next, widen the crack slightly using a putty knife. Then, fill the crack with a specialized crack filler or spackling paste, ensuring it is completely filled. Once the filler is dry, sand it down gently and wipe away any excess dust. Now you’re ready to prime and paint!
Can You Caulk Ceiling Cracks
Certainly! Caulk works wonders for sealing and concealing ceiling cracks. Choose a high-quality, paintable caulk specifically designed for ceilings. Apply it along the cracks, smoothing it out with a damp cloth or your finger. The caulk will not only repair the cracks but also prevent them from reappearing and give your ceiling a clean, polished look.
What Do Decorators Use to Fill Cracks
When it comes to filling cracks, decorators typically use a combination of products depending on the size and type of cracks. Paintable caulk, joint compound, or specialized crack fillers are commonly employed. These materials provide the necessary flexibility, durability, and adhesion properties required to achieve a flawless finish.
What’s the Difference Between Caulk and Filler
Caulk and filler are similar in function, but they have distinct differences. Caulk is typically used for sealing joints and gaps, while filler is used for filling cracks and holes. Caulk is more elastic, making it suitable for areas that may experience some movement. On the other hand, filler is thicker and more rigid, making it ideal for repairing and smoothing surfaces.
Can I Paint Over Caulk
Yes, you can paint over caulk. In fact, paintable caulk is specifically designed for this purpose. Once the caulk has dried completely, you can proceed with your painting project. Just remember to choose a high-quality paint suitable for your ceiling’s material and apply it evenly for a flawless finish.
Do I Need to Fill Hairline Cracks Before Painting
While it’s not always necessary to fill hairline cracks before painting, doing so can greatly improve the final result. Filling hairline cracks helps create a smoother surface, prevents cracks from reappearing, and ensures the paint adheres evenly. It’s a small extra step that can make a significant difference in the overall appearance of your newly painted ceiling.
What Is the Best Filler for Ceiling Cracks
The best filler for ceiling cracks depends on several factors, including the size and severity of the cracks. For small cracks, paintable caulk is a reliable choice. However, for larger cracks or more substantial damage, joint compound or specialized crack fillers may be necessary. Always choose a high-quality filler specifically formulated for ceilings to ensure the best results.
Why Is the Paint on My Ceiling Cracking
Cracking paint on your ceiling can be caused by various factors, including poor surface preparation, excessive moisture, or low-quality paint. It can also be a result of structural issues or improper construction. To prevent paint cracks, it’s essential to properly clean and prime the surface before painting, use high-quality paint, and address any underlying issues that may be affecting the structural integrity of your ceiling.
How Much Does It Cost to Fix Ceiling Cracks
The cost of fixing ceiling cracks can vary depending on the severity of the cracks, the size of the affected area, and whether professional assistance is required. For minor cracks that you can address yourself, the cost may be limited to the price of the necessary materials. However, for more extensive cracks or situations requiring professional intervention, the cost can range from a few hundred to a few thousand dollars. It’s best to consult with a professional to get a more accurate estimate based on your specific circumstances.
Now that you’re armed with this comprehensive FAQ guide on fixing cracks in the ceiling before painting, you can confidently tackle any cracks that may be lurking above. Remember, taking the time to properly repair and prepare your ceiling will ensure a stunning and long-lasting paint job. Happy crack fixing and painting!