In the world of car audio, achieving the best sound quality and performance is a top priority for many car enthusiasts. One way to enhance your car’s audio system is by adding a capacitor. But what exactly is a capacitor and how can you wire it yourself?
In this comprehensive guide, we will explore the ins and outs of wiring a capacitor for car audio. We’ll answer common questions like “Can I add a capacitor to a car battery?” and “Where do you place a capacitor?” This blog post will provide a step-by-step process, complete with helpful tips and insights, on how to successfully wire a capacitor for your car audio system.
So, if you’re ready to take your car audio experience to the next level, let’s dive into the world of capacitors and learn how to wire them like a pro!
Why Wire a Capacitor for Your Car Audio
Car audio enthusiasts know that a powerful sound system requires a stable power supply. When your car’s audio system demands a sudden burst of energy to produce bass-heavy beats or handle high-volume sounds, your car’s battery may struggle to keep up. This can result in a phenomenon known as “dimming” where your headlights or interior lights flicker or dim momentarily.
By adding a capacitor to your car audio system, you can provide an extra power reserve, ensuring that your amplifier receives a constant and stable voltage supply. This not only improves sound quality but also reduces strain on your car’s electrical system.
Now that we understand the importance of wiring a capacitor for car audio, let’s explore the step-by-step process of DIY wiring in detail. But first, let’s answer a few common questions that may be on your mind.
How to DIY Wire a Capacitor for Car Audio
So, you’ve decided to take your car audio game to the next level and install a capacitor. That’s awesome! A capacitor can help improve the performance of your audio system, giving you those earth-shattering bass drops and crystal-clear highs. But here’s the thing: wiring a capacitor may sound daunting at first, but fear not, my friend. I’m here to guide you through the process with this easy-peasy DIY guide. Buckle up, tighten your seatbelt, and let’s get wired!
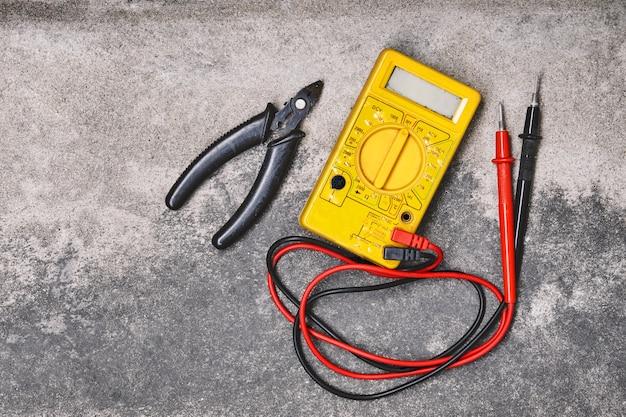
Gather Your Tools and Materials
Before you embark on this electrifying adventure, make sure you have all the necessary tools and materials. Here’s a quick rundown of what you’ll need:
Tools:
- Screwdriver
- Wire cutter/stripper
- Electrical tape
- Heat shrink tubing
- Crimping tool
Materials:
- Capacitor (make sure it matches your car audio system’s power requirements)
- Power cable (with appropriate gauge)
- Ground cable (with appropriate gauge)
- Remote turn-on wire
- Fuse holder and fuse
- Ring terminals
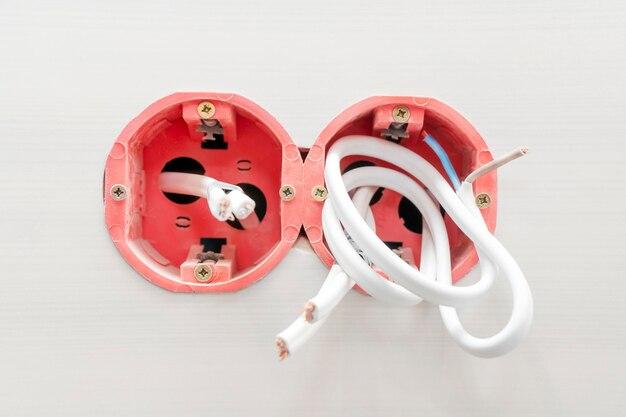
Choosing the Right Location for Your Capacitor
Before you start connecting wires like a mad scientist, you need to find the perfect spot to install your capacitor. You want a location that’s close to the amplifier but away from any heat sources. Avoid placing it near the engine or exhaust system unless you want your capacitor to go up in smoke and give your car a “hot rod” vibe it never asked for.
Wiring 101: Connecting the Capacitor
Now that you’ve found the prime spot for your capacitor, it’s time to get down to the nitty-gritty of wiring. Follow these steps, and you’ll be harnessing the power of audio in no time:
Step 1: Power Up
Connect the power cable from your car battery’s positive terminal to the capacitor’s positive terminal. Remember to use appropriate gauge wire – we don’t want any meltdowns. Secure the connection with a ring terminal and tighten it like your life depends on it. Well, maybe not that tight, but you get the point.
Step 2: Ground Control
Find a solid grounding point in your car. It could be a bolt or stud connected to the vehicle’s metal chassis. Make sure it’s not fake news and is a direct path to the ground. Attach the ground cable from the capacitor’s negative terminal to this chosen spot. Use a ring terminal and fasten it tighter than the lid on a jar of pickles you can’t open.
Step 3: Remote Connection
Locate the remote turn-on wire in your vehicle’s wiring harness. This wire sends a signal to the amplifier, telling it to wake up and start jamming. Connect one end of the remote turn-on wire to the capacitor’s remote terminal and the other end to the remote turn-on wire in your car’s wiring harness. Secure the connection with a crimping tool and pretend you’re crimping a million-dollar deal.
Safety First: Fuse Installation
We’ve wired the capacitor like a boss, but safety should always be our co-pilot. Installing a fuse is crucial to protect your audio system from potential electrical meltdowns. Here’s how to do it:
Step 1: Fuse Holder Placement
Find an appropriate location near the battery to mount the fuse holder. Make it easily accessible, like your favorite snack at the drive-thru, but not in the way of any moving parts.
Step 2: Amp Up the Fuse
Connect one end of the power cable to the fuse holder’s positive terminal and the other end to the positive terminal of your car battery. Don’t worry; this connection won’t cause any explosions. Insert the appropriate fuse into the fuse holder like it’s the missing piece to complete the audio puzzle.
Testing…1, 2, 3
Congratulations, you’ve successfully wired a capacitor for your car audio system! But before you start cranking up the volume and shaking windows in your neighborhood, do a quick test. Start your engine, play some tunes, and ensure everything is working as it should. If not, don’t panic. Check your connections, double-check your wiring, and maybe take a breather and try again. Troubleshooting is part of the game!
So there you have it, my fellow sound aficionado. You now possess the knowledge and skills to wire a capacitor for your car audio system like a pro. Take pride in your DIY prowess and enjoy the audio goodness your new capacitor brings. Remember, always stay safe, follow instructions diligently, and never underestimate the power of some good tunes on the road. Happy wiring and keep rocking in the free world!
Disclaimer: This guide is meant for educational purposes only. Proceed with caution and consult a professional if you are uncertain about any aspect of the installation process.
FAQ: How to DIY Wire a Capacitor for Car Audio
Can I Add a Capacitor to My Car Battery?
Yes, you can definitely add a capacitor to your car battery. In fact, it’s a popular choice among car audio enthusiasts to help provide the additional power needed for their audio system.
What Happens When a Capacitor is Connected in Series to a Battery?
When a capacitor is connected in series to a battery, it charges up and stores electrical energy. This stored energy can then be released when there is a sudden demand for power, such as during heavy bass hits in your car audio system.
Where Do You Place a Capacitor?
Ideally, you should place the capacitor as close as possible to the amplifier in your car audio system. This allows for a shorter path for the power to flow, minimizing any potential voltage drops.
Where Does the Purple Wire Go on a Capacitor?
The purple wire on a capacitor is usually the remote turn-on wire. This wire needs to be connected to a switched 12V power source, such as a remote turn-on lead from your car stereo, to ensure that the capacitor turns on and off with your audio system.
What is the Difference Between a Single and Dual Capacitor?
A single capacitor has only one set of terminals for connecting wires, while a dual capacitor has two sets of terminals. A dual capacitor is used when you need to connect two different systems that require different capacitance values.
Will a Capacitor Drain My Battery?
No, a properly installed capacitor will not drain your car battery. It acts as a buffer between your audio system and the battery, providing the extra power when needed without affecting the overall battery voltage.
Which Wire Goes to the HERM Term on a Capacitor?
The wire that goes to the HERM term on a capacitor is usually the start wire for the compressor in an air conditioning unit. It is important to consult the manufacturer’s instructions or a professional technician to ensure proper wiring.
Which is Better, a Battery or a Capacitor?
Both batteries and capacitors have their strengths and weaknesses. Batteries provide a continuous source of power, while capacitors offer quick bursts of power. For car audio systems, a combination of both can provide the best performance and reliability.
Does It Matter Which Way You Wire a Capacitor?
Yes, it does matter which way you wire a capacitor. The positive terminal should be connected to the positive terminal of the power source, while the negative terminal should be connected to the ground or negative terminal. Wiring it the wrong way can cause damage or malfunction.
Can You Wire a Capacitor Wrong?
Yes, you can wire a capacitor wrong if you don’t follow the correct polarity. Double-check the positive and negative terminals and ensure they are connected to the appropriate corresponding points.
How Do You Install a Capacitor on an AC Unit?
To install a capacitor on an AC unit, start by disconnecting the power. Then, remove the existing capacitor and take note of the wiring connections. Connect the new capacitor in the same way, ensuring correct polarity. Finally, reapply power and test the system.
What Color Goes to the HERM Term on a Capacitor?
The color of the wire that goes to the HERM term on a capacitor varies depending on the specific unit and manufacturer. It’s important to consult the unit’s wiring diagram or seek professional guidance to determine the correct wiring configuration.
Can a Run Capacitor be Wired Backwards?
No, a run capacitor should never be wired backwards. It is designed to work in a specific direction, and reversing the polarity can cause damage or failure.
How Does a Capacitor Increase Bass?
A capacitor increases bass in a car audio system by providing a quick burst of power during heavy bass hits. This helps to supplement the power demand that the amplifier needs to produce deep and impactful bass frequencies, resulting in a clearer and more powerful bass sound.
What Happens When You Connect a Capacitor to a Battery?
When you connect a capacitor to a battery, it starts to charge up and store electrical energy. The capacitor acts as a temporary power reservoir, releasing the stored energy when there is a sudden demand for power.
How Do You Hook Up a Capacitor?
To hook up a capacitor, start by identifying the positive and negative terminals. Connect the positive terminal to the positive terminal of the power source and the negative terminal to the ground or negative terminal. Ensure a secure connection to prevent any electrical issues.
Where Do the Wires Go on a Capacitor?
The specific placement of wires on a capacitor depends on the individual unit and its design. However, in general, the positive wire should be connected to the positive terminal and the negative wire to the negative terminal.
How Do You Hook Up a Capacitor to a Battery?
To hook up a capacitor to a battery, first, disconnect the battery’s negative terminal. Connect the positive terminal of the capacitor to the positive terminal of the battery, then connect the negative terminal of the capacitor to a secure ground point. Finally, reconnect the battery’s negative terminal.
Can You Replace a Dual Capacitor with a Single Capacitor?
Yes, you can replace a dual capacitor with a single capacitor, but it’s important to choose a single capacitor with the same or similar capacitance values as the original dual capacitor. Consult the manufacturer’s specifications or seek professional advice for the appropriate replacement.
What Color Wires Go on a Capacitor?
The color of wires on a capacitor typically follows a standardized convention. The positive wire is often red, while the negative wire is usually black. However, it’s essential to check the manufacturer’s instructions or wiring diagram for the specific unit to ensure correct wiring.
What Happens if You Wire a Capacitor Backwards?
Wiring a capacitor backwards can cause it to fail or become damaged. The reversed polarity can disrupt the charging and discharging cycle, rendering the capacitor ineffective or even causing it to overheat.
Do Capacitors Really Help Car Audio?
Yes, capacitors can significantly help car audio systems by providing a boost of power during peak demand, particularly for bass-heavy tracks. This helps to improve overall sound quality and avoid voltage drops that may occur when the audio system requires additional power.
How Do You Connect a Capacitor to an AC Motor?
To connect a capacitor to an AC motor, start by identifying the motor’s capacitor terminals. Connect one lead of the capacitor to the motor’s start winding terminal, and the other lead to the motor’s run winding terminal. Ensure that the capacitor is securely connected and properly sized for the motor.
Remember, using a capacitor in your car audio system can enhance your listening experience, but it’s important to follow proper installation guidelines and consult professionals when needed. A well-wired capacitor can power up your car audio and make your ride rock!