Photoshop is a powerful software that allows you to edit and manipulate images with precision. Whether you’re a professional photographer or a creative enthusiast, knowing how to delete a selection in Photoshop is an essential skill to master.
Have you ever wondered how to remove a specific part of a picture? Or maybe you want to edit a selection and make changes to it? In this blog post, we will explore various techniques to delete selections in Photoshop. From using keyboard shortcuts like Ctrl + J to exploring different selection tools, we will cover it all.
So, if you’re ready to enhance your Photoshop skills and learn how to delete selections like a pro, let’s dive in!
How to Erase Your Selection in Photoshop
Congratulations! You’ve just made a dazzling selection in Photoshop, but now you’re faced with the terrifying prospect of actually deleting it. Fear not, for I am here to guide you through this perilous journey. So grab your digital eraser and let’s get to work!
Pressing the Keys of Destruction
If you’re a fan of quick and easy solutions, then buckle up because this tip is for you. Simply press the “Delete” key on your keyboard, and poof! Your selection will vanish in an instant. It’s like magic, but with fewer rabbits and more pixels.
The Almighty Right-Click
For those who prefer a more delicate touch, fear not, for Photoshop has bestowed upon us the power of the right-click. With your selection at the ready, simply right-click on it and a menu of options will appear before your very eyes. Locate the “Delete” option and click it like there’s no tomorrow. Your selection will bid its final farewell, leaving you with an empty canvas and a heart filled with satisfaction.
The Menus of Deletion
If you like to take the scenic route, then the menus are your trusty navigational guides. First, make sure your selection is still selected (it’s a no-brainer, I know). Then, head over to the “Edit” menu at the top of your Photoshop window. Take a deep breath and find the “Clear” option. Click it, and watch as your selection fades into the abyss, never to be seen again. Keep in mind that this method may require a few extra clicks, but hey, it’s all about the journey, right?
Brushing Away Your Selection
Sometimes, life calls for a more hands-on approach. In Photoshop, this means grabbing your virtual paintbrush and painting away your selection. Make sure your selection is still active, pick your desired brush tool, and start painting over it. The pixels will tremble in fear as you unleash your artistic power, erasing your selection with each stroke. It’s like painting, but with a side of destruction.
The Fabled Undo Button
Ah, the tantalizing power of the elusive “Undo” button. If all else fails, you can always rely on this trusty companion to undo your selection deletion mishaps. Simply press the sacred “Ctrl + Z” (or “Cmd + Z” if you’re on a Mac) and watch as your selection magically reappears. Remember, my friend, with great power comes great responsibility, so use this button wisely.
And there you have it, fellow Photoshop adventurers! With these handy techniques up your sleeve, deleting your selections will be a breeze. So go forth, delete with confidence, and may your canvases always be clear of those pesky selections. Happy editing!
Key Phrases:
- Photoshop selection deletion
- Erase selection in Photoshop
- Deleting selection in Photoshop
- Removing selected area in Photoshop
- Clearing a selection in Photoshop
FAQ: How To Delete Selection In Photoshop
In this FAQ-style subsection, we’ll tackle some common questions on how to delete a selection in Photoshop. Whether you’re new to Photoshop or just need a refresher, this guide will help you navigate the ins and outs of removing parts of your images. So let’s dive in!
How do I remove part of a picture
To remove part of a picture in Photoshop, follow these steps:
-
Make your selection: Use any selection tool, such as the Marquee, Lasso, or Quick Selection tool, to select the part of the picture you want to remove.
-
Delete the selection: Press the
Deletekey on your keyboard or go toEdit -> Clearto remove the selected area.
What is Ctrl + J in Photoshop
In Photoshop, Ctrl + J is a handy shortcut that duplicates your selected area onto a new layer. This shortcut can be useful when you want to delete a selection from the original layer but keep it on a separate layer for later use.
How do you edit a selection in Photoshop
Once you have a selection in Photoshop, you can easily edit it by following these steps:
-
Activate the selection: Make sure your selection is active by clicking on it with any selection tool.
-
Make edits: Use any of the editing tools, like the Brush, Clone Stamp, or Healing Brush tool, to make changes to the selected area.
How do I select part of an image in Photoshop
To select part of an image in Photoshop, try these methods:
-
Marquee selection: Use the Marquee tool to create a rectangular or elliptical selection around your desired area.
-
Lasso selection: Utilize the Lasso tool to draw a freehand selection around the part of the image you want to select.
-
Quick Selection tool: Select the Quick Selection tool and drag it over the area you want to select. Photoshop will automatically detect the edges and make the selection.
Where is the quick selection tool in Photoshop
In recent versions of Photoshop, you can find the Quick Selection tool in the main toolbar on the left-hand side. It looks like a paintbrush with a dotted circle around it. If you don’t see it, try navigating to Window -> Tools to ensure it’s enabled.
Can you erase part of a drop shadow in Photoshop
Yes, you can erase part of a drop shadow in Photoshop by following these steps:
-
Isolate the shadow: Duplicate the layer containing the drop shadow to work on it separately.
-
Mask the shadow: Create a layer mask and use the Brush tool with black color on the mask to erase the unwanted part of the shadow.
-
Refine if needed: Use additional brushes or adjustment layers to refine the edited drop shadow until it matches your desired result.
How do you remove the outside of a clipping mask in Photoshop
If you want to remove the outside of a clipping mask in Photoshop, follow these steps:
-
Select the mask: Click on the mask thumbnail in the Layers panel to activate it.
-
Expand the selection: Go to
Select -> Modify -> Expandand input a value (e.g., 2 pixels) to expand the mask’s selection. -
Delete the exterior: Press the
Deletekey on your keyboard to remove the selected exterior part of the clipping mask.
Which tool is used to erase a picture or its part from the screen
To erase a picture or part of it from the screen in Photoshop, use the Eraser tool. You can find it in the main toolbar on the left-hand side, represented by an icon resembling an eraser. Select the tool and drag it over the area you want to erase.
How do I deselect a selection in Photoshop
To deselect a selection in Photoshop, simply press Ctrl + D on your keyboard, or go to Select -> Deselect. This will remove any active selection, allowing you to work freely on the image.
Where is the object selection tool in Photoshop
In newer versions of Photoshop, the Object Selection tool is located in the main toolbar. Look for an icon that resembles a rectangle with a dotted outline and a “plus” symbol inside. If you can’t find it, go to Window -> Tools to enable it.
Which toolbar option subtracts from a selection
To subtract from a selection using a toolbar option in Photoshop, look for the “Subtract from Selection” button in the options bar at the top when you have a selection tool active. It usually appears as a square icon with a minus sign inside. Clicking on it allows you to subtract areas from your current selection.
How do I remove a selection in Photoshop
To remove a selection in Photoshop, you have a few options:
- Press
Ctrl + Don your keyboard to deselect the selection. - Select a different tool or click outside the image canvas to remove the selection.
- Go to
Select -> Deselectin the menu to remove the active selection.
How do I delete in Photoshop
To delete a selected area in Photoshop, press the Delete key on your keyboard while the selection is active. Alternatively, you can go to Edit -> Clear in the menu to achieve the same effect.
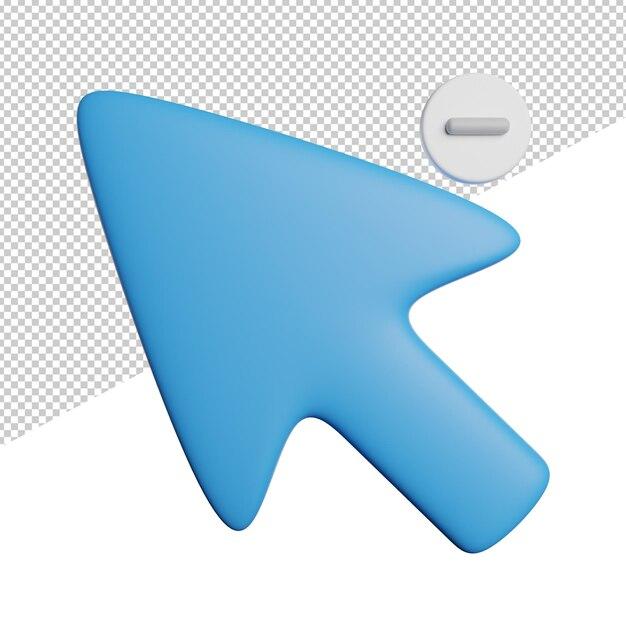
Why is my quick selection tool stuck on minus
If your Quick Selection tool seems stuck on the minus sign (-), it means it is in Subtract mode. To switch back to the default Add mode, look for the option bar at the top and click on the plus sign (+) icon. You can also press the letter A on your keyboard to toggle between Add and Subtract modes.
How do I delete everything but the selection
To delete everything but the selected area in Photoshop, follow these steps:
-
Invert the selection: Go to
Select -> Inverseor pressShift + Ctrl + Ito invert the selection, so everything except the desired area is selected. -
Delete the inverse: Press the
Deletekey on your keyboard or go toEdit -> Clearto remove the selected inverse, leaving only the desired selection intact.
Why can’t I delete in Photoshop
If you’re unable to delete in Photoshop, make sure you have an active selection. If there’s no selection present, the delete functions will be unavailable. Try selecting an area using any of the selection tools before attempting to delete.
How can you deselect a selection
To deselect a selection in Photoshop, you have a few options:
- Press
Ctrl + Don your keyboard. - Choose
Select -> Deselectfrom the menu. - Click outside the image canvas to remove the selection.
How do I delete part of a shape in Photoshop
To delete part of a shape in Photoshop, follow these steps:
-
Select the shape: Use the Path Selection tool or the Direct Selection tool to select the desired shape.
-
Delete the path: Press the
Deletekey on your keyboard or go toEdit -> Clearto remove the selected part of the shape.
How do you cut an object in Photoshop 2023
To cut an object in Photoshop 2023, use the following steps:
-
Make a selection: Use any of the selection tools to select the object you want to cut.
-
Cut the selection: Press
Ctrl + Xon your keyboard or go toEdit -> Cutto remove the selected object from its current location.
How do you select and move in Photoshop
To select and move an object in Photoshop, try these methods:
-
Select the object: Use any of the selection tools to select the object you want to move.
-
Move the object: Click and drag the selected object to the desired location on the canvas.
How does the slice tool work in Photoshop
The Slice tool in Photoshop allows you to divide an image into multiple smaller sections, called slices. Each slice can then be exported separately or used for web design purposes. To use the Slice tool, follow these steps:
-
Select the Slice tool: Locate the Slice tool in the main toolbar on the left-hand side. It resembles a knife cutting through a rectangle.
-
Slice the image: Click and drag on the image to create slices of the desired size and shape.
-
Export or use slices: Once you’re done slicing the image, you can go to
File -> Save for Webto export the slices or utilize them for your web design projects.
How do I delete a quick selection in Photoshop
To delete a Quick Selection in Photoshop, you can follow these steps:
-
Deselect the selection: Press
Ctrl + Don your keyboard to deselect the Quick Selection. -
Delete the Quick Selection history: Open the History panel by going to
Window -> History. Click on the state just before the Quick Selection was made, and then press theDeletekey on your keyboard. This will remove the Quick Selection and revert you to the previous state.
That wraps up our comprehensive FAQ-style guide on how to delete a selection in Photoshop. We hope this information has been helpful and that you can now confidently wield your deletion powers in the wonderful world of Photoshop!
*Note: This blog post is for informational purposes only and does not constitute professional advice. The steps and features mentioned in this article are based on Adobe Photoshop 2023.