Are you a DIY enthusiast looking to add a touch of elegance to your home with baseboard trim? Cutting a 45 degree angle may seem daunting, but fear not! In this blog post, we will guide you through the step-by-step process of cutting a perfect 45 degree angle on baseboard trim without the need for a protractor or compass. We will also tackle common questions like measuring angles, calculating cuts, and finding angle measurements without specialized tools. By the end of this post, you’ll have the confidence and know-how to tackle baseboard trim cuts like a pro.
So, grab your tools, roll up your sleeves, and let’s get started on transforming your space with perfectly angled baseboard trim cuts. Whether you’re a seasoned do-it-yourselfer or a beginner taking on your first home improvement project, we’ve got you covered with expert tips and tricks. Let’s dive in!

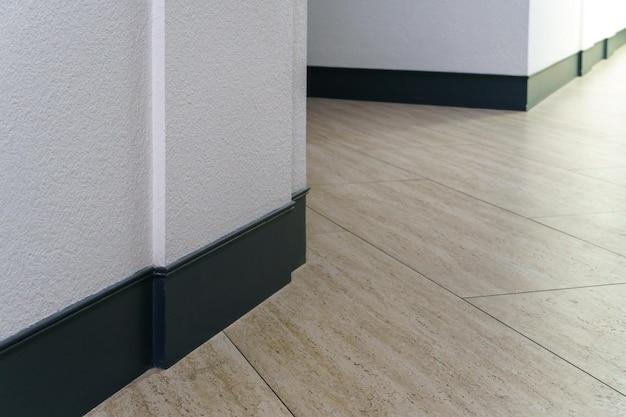
How to Master the Art of Cutting 45-Degree Angles on Baseboard Trim
If you’ve embarked on a DIY home improvement project, chances are you’ll eventually find yourself face-to-face with a baseboard trim that needs a crisp 45-degree angle. But fear not, fellow DIY enthusiasts! In this guide, we’ll unravel the mystery of cutting perfect 45-degree angles on baseboard trim. So grab your tools and let’s dive right in!
Tools You’ll Need
Before we get into the nitty-gritty of cutting those magnificent angles, let’s make sure you have all the necessary tools on hand:
-
Miter Saw: A trusty miter saw will be your best friend throughout this process. If you don’t have one, consider renting or borrowing one, as it’s a worthwhile investment for any DIY enthusiast.
-
Measuring Tape: Precision is key here, so ensure you have a sturdy measuring tape that provides accurate measurements.
-
Pencil: Who knew such a humble tool could be so essential? Use a pencil to mark your measurements and guide your cuts.
-
Safety Gear: Protect yourself like a DIY ninja with safety goggles and gloves. Safety should always be a priority!
Step 1: Measuring Like a Pro
We can’t stress this enough: measure twice, cut once! To ensure a seamless 45-degree angle, follow these steps:
-
Place the baseboard trim against the wall in the desired location.
-
Use your measuring tape to determine the length needed for the first piece of baseboard trim. Don’t forget to account for any corners or angles!
-
Mark the length on the back of the baseboard with your trusty pencil.
Step 2: Adjusting the Miter Saw
Now that you’ve got your measurements down, it’s time to set up your miter saw like a seasoned pro. Follow these simple steps:
-
Start by loosening the miter saw’s lock and adjusting it to a 45-degree angle. Double-check your saw’s manual if you’re unsure how to do this.
-
Align the baseboard trim against the miter saw’s backstop and hold it firmly in place.
-
Ensure the blade is positioned exactly on your previously marked pencil line.
Step 3: Making the Cut
It’s go time! Remember to take a deep breath, stay focused, and let your inner DIY guru shine through:
-
Switch on the miter saw and slowly lower the blade onto the baseboard trim. Let the saw do the work, guiding the trim smoothly through the blade.
-
Once the cut is complete, release the trigger and allow the blade to come to a complete stop before lifting it.
-
Voila! You now have a pristine, expertly cut 45-degree angle on your baseboard trim.
Pro Tip: Practice Makes Perfect
Don’t fret if your first attempt doesn’t yield flawless results. Like any craft, cutting 45-degree angles takes practice. Consider working on some scrap baseboard trim pieces before tackling the real deal. Confidence will come with each successful cut!
A Final Word of Encouragement
Cutting a 45-degree angle on baseboard trim may seem like a daunting task at first, but with the right tools, measurements, and a sprinkle of practice, you’ll be an expert in no time. Remember, DIY projects are all about learning, creativity, and a sense of accomplishment. So go forth, embrace those angles, and show the world what you’re capable of!
Happy cutting, and may all your angles be perfectly precise!
*Disclaimer: This guide is intended for informational purposes only. Always prioritize safety and refer to the manufacturer’s instructions for your specific tools and materials.
FAQ: How To Cut A 45 Degree Angle On Baseboard Trim
Welcome to our informative and entertaining FAQ-style guide on cutting a perfect 45-degree angle on baseboard trim. We understand that trimming corners can be a daunting task, but fear not! With our expert tips and tricks, you’ll be able to tackle those angles like a pro.
Measuring and Cutting Outside Corner Trim
Q: How do you measure and cut outside corner trim?
A: To measure and cut outside corner trim, you’ll need a measuring tape and a miter saw or a miter box. Start by measuring the length of the corner, from floor to ceiling. Take note of the measurement and transfer it to the trim. Using a miter saw set at a 45-degree angle, carefully cut the trim following your marked line. Fit the two pieces together, and voila! You’ve conquered the outside corner trim.
Making a 45 Degree Angle Without a Protractor or Compass
Q: How do you make a 45-degree angle without a protractor or compass?
A: Who needs fancy tools when you’ve got good old-fashioned ingenuity! Grab a regular ruler and place it diagonally across your work surface. Align one end of the ruler with the edge of your trim and extend it until the opposite end lines up with the desired length of your 45-degree angle. Draw a line along the edge of the ruler, and there you have it—an impressively precise 45-degree angle without needing high-tech gadgets.
Measuring a 45 Degree Angle Without a Protractor
Q: How do you measure a 45-degree angle without a protractor?
A: We understand not everyone has a protractor lying around. But worry not, intrepid DIYer! To measure a 45-degree angle without a protractor, you can rely on the trusty 3-4-5 triangle rule. Grab a ruler and mark a point 3 units from the corner on one wall and 4 units from the corner on the adjacent wall. Next, measure the distance between these two marks. If it measures 5 units, then you have a perfect 45-degree angle! If not, adjust your marks accordingly until you achieve that magical 3-4-5 ratio.
Constructing an Angle Without a Protractor or Compass
Q: How do you construct an angle without a protractor or a compass?
A: Who needs protractors and compasses when you have unmatched resourcefulness? To construct an angle without fancy tools, start by drawing a straight line on your work surface using a sturdy ruler. Next, place your ruler with one end on the line and pivot it until the desired angle is achieved. Draw another line along the edge of the ruler. Congratulations, you’ve just constructed an angle through sheer DIY prowess!
Finding the Angle of a Corner
Q: How do you find the angle of a corner?
A: Finding the angle of a corner can be as easy as pie. Grab a protractor and place it in the corner so that one arm lines up with the horizontal surface and the other arm lines up with the vertical surface. Read the angle on the protractor, and there you have it—a clear measurement of your corner angle. Now you can confidently cut your baseboard trim to fit like a puzzle piece!
Cutting Trim Around a Corner
Q: How do you cut trim around a corner?
A: Cutting trim around a corner requires precision and a steady hand. Measure the length of the wall from corner to corner and transfer the measurement onto your trim. Using a miter saw set at a 45-degree angle, carefully cut the trim along the marked line. Test the fit, make any necessary adjustments, and attach the trim using nails or adhesive. With a bit of patience, your trim will fit snugly around the corner, giving your room that flawless finish.
Measuring and Cutting a 45 Degree Angle on Trim
Q: How do you measure and cut a 45-degree angle on trim?
A: Perfectly measuring and cutting a 45-degree angle on trim is simpler than it seems. Measure the length of your trim and mark the desired angle with a pencil. Using a miter saw set at a 45-degree angle, align the blade with your marked line and make the cut. Ensure you have a secure grip on the trim and proceed with caution. Follow these steps, and you’ll achieve crisp, clean corners on your trim every time.
Cutting Baseboards for Corners
Q: What angle do you cut baseboards for corners?
A: For corners, baseboards are typically cut at a 45-degree angle. This angle allows the baseboards to fit together snugly, creating a seamless joint. Remember to measure twice and cut once to ensure a perfect fit. With a bit of practice, you’ll be cutting those baseboard corners like a seasoned carpentry pro!
Calculating Angle Cuts
Q: Do you have to cut baseboards at 45 degrees? How do you calculate angle cuts?
A: While 45 degrees is the most common angle for cutting baseboards, it’s not the only option. The angle you need to cut your baseboards depends on the desired joint you want to achieve. To calculate angle cuts, you’ll need to measure the corner angle with a protractor or apply the handy 3-4-5 triangle rule we mentioned earlier. Remember, the goal is to achieve a clean and tight fit between the baseboards, so take your time and measure accurately.
Measuring a 45 Degree Cut
Q: How do you measure for a 45-degree cut?
A: To measure for a 45-degree cut, start by determining the length of the trim you need. Next, measure the distance from the corner of the trim to the point where you want to make your 45-degree cut. Finally, subtract this distance from the overall length. Now you have the proper measurement to make your 45-degree cut and achieve that perfect fit you’re after!
Measuring for Baseboard Miter Cuts
Q: How do you measure for baseboard miter cuts?
A: Whether you’re a seasoned DIYer or just starting out, measuring for baseboard miter cuts doesn’t have to be intimidating. Begin by measuring the length of the wall, from corner to corner. Take note of this measurement and transfer it onto your baseboard trim. Using a miter saw, set the blade at a 45-degree angle and carefully cut along the marked line. Don’t forget to double-check your measurements to ensure a seamless fit!
Determining the Trim Angle
Q: Is it possible to measure an angle without a protractor? How do you determine the trim angle?
A: Absolutely! You don’t need a protractor to determine the trim angle. Instead, you can use the power of mathematics. First, measure the length of one wall. Then measure the length of the adjacent wall. Divide the length of the adjacent wall by the length of the first wall. Finally, take the inverse tangent of this value using a calculator. The resulting angle is the trim angle you’re looking for! Math truly is a carpenter’s best friend.
Now that you’re armed with these tips and tricks, cutting a perfect 45-degree angle on your baseboard trim will no longer be a source of anxiety. Remember to measure twice, cut once, and embrace your inner DIY guru. With a little practice and a touch of creativity, you’ll achieve stunning corner trims that will leave your guests in awe. So go forth and conquer those angles, one cut at a time!
Note: This blog post is for informational purposes only. Always prioritize your safety when handling tools and follow appropriate safety guidelines.