In home construction, it’s not uncommon to encounter gaps between the floor and the wall. These gaps can occur for various reasons, such as settling of the foundation, expansion and contraction of materials, or uneven installation. Regardless of the cause, these gaps can be unsightly and may even lead to drafts or the accumulation of dirt and debris. That’s why it’s essential to address the issue and find a solution.
In this blog post, we will explore different methods to cover the gap between the floor and the wall. From filling gaps in plywood subfloors to sealing the space between drywall and the floor, we’ll provide you with practical tips and step-by-step instructions. So whether you’re a DIY enthusiast or a homeowner looking to fix this common problem, read on to learn how to achieve a seamless and clean look in your living space.
Keywords: gap between subfloor and wall, expansion gap for plywood underlay, sealing laminate flooring, sealing subfloor, filling gaps in plywood, filling large gap between floor and baseboard, expansion gap for plywood, filling large gap before caulking, sealing gap between drywall and floor, drywall touching the floor, wood filler on subfloor, gap between drywall and floor, filling gaps between laminate and walls, Luan definition, filling large gap in subfloor, using silicone to fill gaps, maximum gap size for caulk
How to Close the Gap Between your Floor and Wall
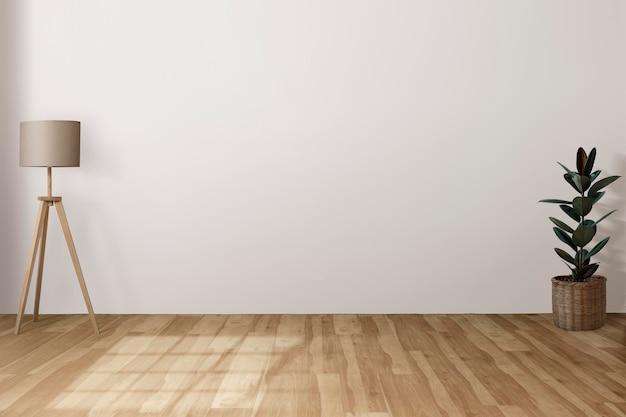
A Sneaky Little Gap
We all have that one spot in our homes where the floor and wall just can’t seem to get along. You know what I’m talking about – that pesky little gap that dares to show its face and ruin the perfect harmony of your beautiful room. Well, fear not, my friend! I’m here to help you bridge the gap between your floor and wall and restore peace in your living space.
Step 1: Measure Twice, Cut Once
Before we dive into the nitty-gritty of gap-closing techniques, it’s crucial to know the size of the gap you’re dealing with. Grab your trusty measuring tape and measure the width and depth of the gap in several places. Remember, precision is key here! The last thing you want is to end up with a bigger gap than you started with.
Step 2: Fill it Up, Buttercup
Now that you have your measurements, it’s time to choose your weapon of choice for gap filling. One popular option is caulk. Not only does it sound fun to say, but it’s also highly effective in sealing off those unwanted gaps. Grab a caulk gun and apply a steady bead of caulk along the gap, making sure to fill it completely. Smooth the caulk out with your finger or a caulking tool and wipe away any excess. Voila! No more gap!
Step 3: Bead it, Don’t Cheat it
If caulk isn’t your cup of tea, fret not! Another fantastic option is to use baseboard molding. This versatile beauty serves a dual purpose – it covers the gap while adding a touch of elegance to your room. Measure your gap, cut the molding accordingly, and attach it securely to the wall using nails or adhesive. Now you have a stylish solution that oozes charm and hides that stubborn gap like a pro.
Step 4: Get Creative
Sometimes, traditional methods just don’t cut it. If you’re feeling a little adventurous, why not explore some alternative options to cover that gap? Vinyl flooring strips or even durable fabric strips can work wonders in disguising the gap and adding a dash of personality to your space. Get crafty and let your imagination run wild!
Step 5: Maintain and Celebrate
Congratulations! You’ve successfully closed the gap and restored harmony to your room. But there’s one more crucial step to ensure it stays that way – maintenance. Regularly inspect and touch up the filled gap to ensure it remains intact and pristine. And remember, the gap is now history, so go ahead and celebrate your victory with a victory dance. You’ve earned it!
Enjoy a Seamless Space!
With these simple steps, you can wave goodbye to that annoying gap between your floor and wall. So go forth, my gap-conquering friend, and enjoy your newly seamless space. Your room will thank you, your guests will thank you, and most importantly, you’ll thank yourself every time you look at that beautifully closed gap. Cheers to a harmonious home in 2023!
FAQ: How to Cover the Gap Between Floor and Wall
Should there be a gap between the subfloor and wall
Yes, it is essential to have a gap between the subfloor and the wall. This gap allows for the natural expansion and contraction of the flooring materials due to changes in temperature and humidity. Without this gap, the flooring could buckle or develop unsightly gaps.
Does plywood underlay need an expansion gap
Absolutely! Plywood underlay, just like any other type of flooring, needs an expansion gap. Even though plywood is more stable than other materials, it still expands and contracts with temperature and moisture changes. To prevent any issues, leave a small gap between the plywood underlay and the wall.
Can you put a sealer over laminate flooring
While it may be tempting to give your laminate flooring a protective coat, it’s generally not recommended to seal laminate flooring. Laminate floors come with a protective layer, and applying a sealer can disrupt this barrier. Instead, simply follow the manufacturer’s instructions for cleaning and maintenance to keep your laminate flooring looking its best.
How do you seal a subfloor
To seal a subfloor, you’ll need to follow these steps:
- Clean the subfloor thoroughly, removing any dirt, dust, or debris.
- Fill any gaps or cracks in the subfloor with a suitable filler or caulking compound.
- Sand the subfloor to create a smooth surface.
- Apply a coat of primer to seal the subfloor and enhance adhesion.
- Finally, apply a high-quality floor covering, such as tile or laminate, to complete the sealing process.
Why is there a gap between my wall and floor
The gap between your wall and floor is not something to worry about; it’s actually intentional. This gap allows for movement and prevents the walls from pushing against the flooring during structural changes. Additionally, it provides space for baseboards and other trim to be installed neatly.
How do you fill gaps in plywood
To fill gaps in plywood, you can use a wood filler or caulk. Follow these steps:
- Clean the gaps by removing any dirt or debris.
- Apply the wood filler or caulk into the gaps, ensuring it reaches the bottom.
- Smooth the filler using a putty knife or a finger.
- Wipe away any excess filler, and let it dry according to the product instructions.
- Sand the filled gaps until they are level with the rest of the plywood surface.
- Finally, apply a suitable finish or paint to match the rest of the plywood.
How do I fill a large gap between the floor and baseboard
If you have a large gap between the floor and baseboard, you can use these steps to fill it:
- Measure the width of the gap.
- Cut a piece of shoe molding or quarter-round trim to the appropriate length.
- Apply an adhesive to the back of the molding.
- Press the molding firmly into the gap, ensuring it sits flush against both the floor and the baseboard.
- Use finishing nails to secure the molding in place.
- Fill any nail holes or small gaps with wood filler, and sand it smooth once dry.
- Finally, paint or stain the molding to match the baseboard for a seamless finish.
How much expansion gap do I need for plywood
For plywood, it is generally recommended to leave an expansion gap of around 1/8 to 1/4 inch. This gap allows the plywood to expand and contract without causing buckling or warping. However, it’s always best to refer to the manufacturer’s guidelines and local building codes for specific recommendations.
How do you fill a large gap before caulking
To fill a large gap before caulking, you can use a suitable backing material. Follow these steps:
- Measure the width and depth of the gap.
- Cut a piece of foam backer rod or a similar material to fit the gap.
- Press the backer rod firmly into the gap until it is level with the surrounding surfaces.
- Apply caulk over the backer rod, ensuring it fills the remaining space.
- Smooth the caulk with a caulk tool or a wet finger.
- Allow the caulk to dry completely before any physical contact.
How do you seal a gap between drywall and floor
To seal a gap between drywall and the floor, follow these steps:
- Clean the gap by removing any dirt or debris.
- Measure the size of the gap to determine the amount of caulk needed.
- Apply a bead of caulk into the gap, ensuring it fills the entire space.
- Smooth the caulk with a caulk tool or a wet finger, removing any excess.
- Allow the caulk to dry according to the manufacturer’s instructions.
- Paint over the caulk to match the color of the walls or baseboards.
Is it OK for drywall to touch the floor
Ideally, drywall should not touch the floor directly. Leaving a small gap between the bottom of the drywall and the floor helps prevent moisture from wicking up into the drywall, which can cause damage. Additionally, it allows for the expansion and contraction of the flooring materials without affecting the stability of the walls.
Can you use wood filler on a subfloor
Yes, wood filler can be used on a subfloor to fill small gaps or imperfections. However, it’s essential to ensure that the wood filler is compatible with the subfloor material. Follow the manufacturer’s instructions for proper application and drying time before proceeding with any floor covering installation.
Should there be a gap between drywall and the floor
Yes, it’s recommended to leave a small gap between drywall and the floor. This gap allows for expansion and contraction due to changes in temperature and humidity. It also helps to prevent the drywall from absorbing moisture from the floor, which can lead to damage or warping.
How do you fill gaps between laminate and walls
To fill gaps between laminate flooring and walls, you can use base shoe molding or quarter-round trim. Follow these steps:
- Measure the length of each wall where the gap appears.
- Cut the shoe molding or quarter-round trim to these lengths at a 45-degree angle.
- Attach the molding to the wall, ensuring it covers the gap and sits flush against the laminate flooring.
- Use finishing nails to secure the molding in place.
- Fill any nail holes or small gaps with wood filler, and sand it smooth once dry.
- Finally, paint or stain the molding to match the baseboard or wall for a seamless finish.
What is a Luan
Luan, short for Philippine mahogany, is a type of tropical hardwood commonly used in construction and woodworking projects. It’s often used as an underlayment for flooring materials like vinyl or laminate. Luan provides a smooth and durable surface for flooring installation.
How do you fill a large gap in a subfloor
For filling a large gap in a subfloor, you can use these steps:
- Clean the gap, removing any debris or loose materials.
- Measure the width and depth of the gap.
- Cut a piece of plywood or another suitable material to fit the gap.
- Apply construction adhesive to the back of the cut piece.
- Press the piece firmly into the gap, ensuring it is level with the surrounding subfloor.
- Secure the piece with screws or nails, following the subflooring guidelines.
- Fill any remaining gaps or seams with a suitable filler or caulking compound.
- Sand the filled area until smooth, and then proceed with the planned flooring installation.
Can you use silicone to fill gaps
Yes, silicone can be used to fill gaps in various construction and home improvement applications. It provides a flexible and durable seal. When using silicone to fill gaps, ensure you choose the appropriate type of silicone sealant for the specific project or material.
How big of a gap can you fill with caulk
Caulk is suitable for filling small to medium-sized gaps, typically up to 1/4 inch wide. For larger gaps, it’s generally recommended to use a combination of a suitable backing material, such as foam backer rod, with caulk. The backing material provides stability and reduces the amount of caulk needed.