Have you ever found yourself dealing with unsightly ceramic tiles or large holes in your walls? Whether you’re renting a space or simply looking for a quick fix, this blog post is here to guide you through the process. We’ll explore different methods and techniques to temporarily cover ceramic tiles and fill in those pesky holes.
From using wall panels to tiling over existing ceramic tiles, we’ll cover a variety of solutions that allow you to update your space without removing the original tiles. Additionally, we’ll delve into repairing acrylic shower walls and fiberglass shower walls, offering tips on how to fix big holes in these surfaces.
So, if you’re looking for ways to update your walls and give them a fresh, new look, keep reading to discover how you can cover ceramic tiles and large holes without hassle or major renovations. With these techniques, you can transform your space and make it feel like new again.
Let’s dive right in, and learn how to tackle these common wall dilemmas head-on!
How to Tackle Ceramic Tile and Those Dreaded Large Holes in Your Walls
So, you’ve just moved into your new place or decided it’s finally time to give your walls a little TLC. But there’s a problem – you’ve got some unsightly ceramic tile and some big holes staring you in the face. Fear not, my friend! In this guide, we’ll show you how to cover those pesky ceramic tiles and patch up those gaping holes, all while keeping your sanity intact. Let’s dive in!
Step 1: Bid Farewell to Ceramic Tile
Now, let’s be honest here – ceramic tiles are like the clingy ex of your walls. They never seem to let go. But worry not! We’ll help you bid them adieu. Start by gathering a few essential items: a hammer, a bolster chisel, and a great deal of determination.
Take a deep breath, channel your inner karate master, and give those tiles a good thwack with your trusty hammer and bolster chisel combo. Remember, this step requires some muscle and finesse, so put on your favorite workout playlist and get ready to show those tiles who’s boss!
Step 2: Hello, Patching Compound!
Now that you’ve triumphantly removed the ceramic tiles from your walls, it’s time to tackle those daunting holes. Enter: the magical patching compound. It’s like the superhero that swoops in to save the day and leaves your walls looking fresh and flawless.
Grab your putty knife and generously apply the patching compound to the holes. Smooth it out like you’re frosting a cake, making sure to blend it seamlessly with the surrounding wall. Remember, perfection takes time, so take a break if you need it. You deserve it!
Step 3: Sand, Baby, Sand!
Once the patching compound has dried, it’s time to bring out the sandpaper and unleash your inner artiste. Carefully sand the patched areas until they’re as smooth as a baby’s bottom. You want your walls to be so smooth that even a snobby art critic would be impressed. Smooth away, my friend!
Step 4: Paint Party!
With the sanding complete and your walls looking fresh and new, it’s time to throw the ultimate paint party. Get your brushes ready and choose a paint color that will make your walls sing. Remember, the right color can do wonders for your mood and the overall ambiance of your space.
Take your time, apply even coats, and let the paint dry between layers. This step may require a good playlist and a dance break or two. Don’t forget to cover your furniture and floors to avoid any accidental paint splatters. We don’t want your place to look like a modern art installation unless that’s what you’re going for!
Step 5: Admire Your Handiwork!
Congratulations, my friend! You’ve successfully covered those pesky ceramic tiles and patched up those intimidating holes. Now, take a step back, bask in the glory of your hard work, and revel in the transformation of your walls.
Invite your friends over, show off your newfound DIY skills, and enjoy the satisfaction of a job well done. Cheers to you and your beautifully revamped walls!
FAQ: How To Cover Ceramic Tile And Large Holes In Walls
How can I temporarily cover a large hole in the wall?
If you find yourself with a gaping hole in your wall and you’re not quite ready to commit to a full repair job, fear not! A temporary fix is just what you need. Grab some sturdy cardboard or plywood and cut it to fit the size of the hole. Then, using some heavy-duty adhesive or even duct tape if you’re feeling adventurous, cover the hole with your makeshift patch. Just remember, this solution is best suited for small to medium-sized holes. If you’re dealing with anything larger, it might be time to call in the professionals.
What to fill holes in tiles with?
Oh, those pesky holes in your beautiful tiles! Luckily, there are a few ways to fill them up and make them disappear. One option is to use a specialized tile grout filler. Apply it to the hole with a putty knife, making sure to fill it up completely. Smooth out the excess and let it dry. Another option is to use epoxy adhesive mixed with a bit of tile dust to create a paste. This DIY concoction will help you seamlessly fill the holes and restore the flawless look of your tiles. Just remember, practice makes perfect!
How do you repair an acrylic shower wall?
Ah, the joy of a pristine acrylic shower wall! But what happens when disaster strikes and you’re left with a crack or hole? Fear not, dear friend, for there is a solution. First, clean the damaged area thoroughly and let it dry. Next, grab some acrylic repair paste and apply it to the damaged spot. Smooth it out with a putty knife and leave it to dry. Once it’s cured, you can sand it down to achieve a seamless finish. Voila! Your acrylic shower wall will be back to its glorious self in no time.
Can you put wall panels over tiles?
Absolutely! If you’re tired of the sight of your outdated tiles but don’t want the hassle of removing them, wall panels are a fantastic alternative. These stylish panels can be installed directly over your existing tiles, saving you time and effort. Simply measure the area, cut the panels to size, and use a high-strength adhesive to secure them in place. It’s a quick and easy way to give your space a fresh, modern look without the daunting task of tile removal.
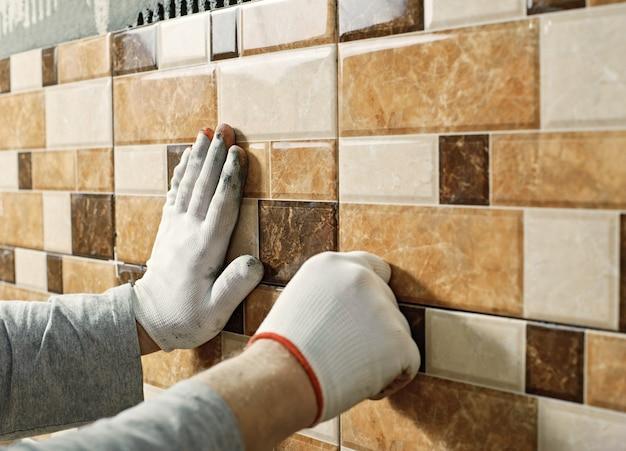
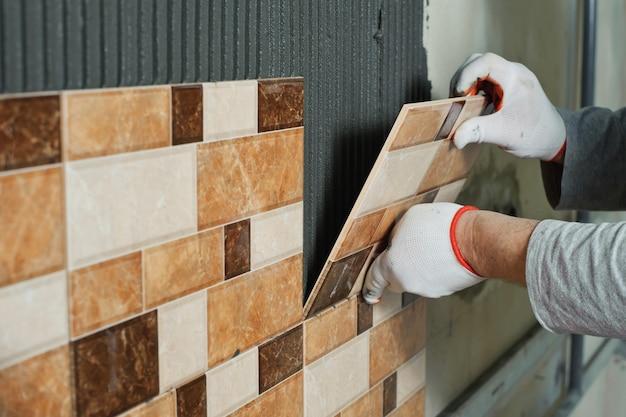
Can you tile over ceramic tile?
Oh, the age-old question: can you tile over ceramic tile? While some might claim it’s a cardinal sin in the world of tiling, the truth is, it can be done! However, there are a few factors to consider. Firstly, ensure that the existing ceramic tiles are in good condition, with no loose or damaged pieces. Next, rough them up a bit using sandpaper to create a better bonding surface. Finally, use a strong adhesive and new tiles to cover the old ones. Just remember, this method will add some height to your floor, so make sure your doors can still swing freely!
How do you cover up ceramic tiles without removing them?
If you’re yearning for a fresh look for your ceramic tiles but don’t want the headache of tearing them out, fear not! There are alternative options available. One trendy solution is to use tile stickers. These nifty decals come in all sorts of styles and designs, allowing you to cover up your ceramic tiles without ripping them down. Simply peel and stick, and watch your space transform before your very eyes. It’s a quick and affordable way to breathe new life into your old tiles!
Can I use grout to fill holes?
Ah, grout, the unsung hero of the tiling world! While it might work wonders for filling in the gaps between tiles, using it to fill holes is not the best idea. You see, grout is not designed to be load-bearing or structurally supportive. It’s best used for its intended purpose: creating a seamless and waterproof surface between tiles. So, when it comes to holes in your tiles, it’s better to opt for a specialized filler or an adhesive that can do the job with finesse. Don’t worry, we’ve got you covered!
How do I fix a big hole in my shower wall?
Oh no, a gaping hole in your shower wall is definitely not what you had in mind for a relaxing bathing experience! But fret not, for we have a fix for you. First, clean the area around the hole and remove any loose debris. Next, cut a piece of drywall slightly larger than the hole and fit it snugly into place. Give it a secure hold using drywall screws. Then, apply some joint compound over the seams, feathering it out to create a seamless finish. Sand, prime, paint, and voila! Your shower wall will be as good as new!
Can you cover ceramic tile?
Certainly! If you’re looking to say goodbye to your old ceramic tiles and give your space a fresh start, covering them up is a great option. One popular method is to use tile paint. With a myriad of colors available, you can easily transform your tiles into a brand new style that suits your taste. All it takes is a bit of preparation, a steady hand, and a few coats of paint. The best part? It’s a budget-friendly way to update your space without splurging on a full tile replacement.
How do you install peel and stick tile over existing tile backsplash?
Ready to give your tired old tile backsplash a makeover? Peel and stick tiles are here to save the day! Start by thoroughly cleaning and drying your existing tiles to ensure a smooth surface. Measure and cut the peel and stick tiles to fit your backsplash area, making sure to account for any outlets or switches. Peel off the backing and carefully press each tile onto the surface, lining them up as you go. Once all the tiles are in place, use a roller to firmly press them down for proper adhesion. Now, step back and admire your transformed kitchen!
How do you fix a big hole in a fiberglass shower?
Oh no, a big hole in your fiberglass shower is definitely not a “fun in the sun” moment! But don’t worry, we’ve got you covered. Start by cleaning the area around the hole and ensuring it’s dry. Next, cut a fiberglass patch slightly larger than the hole and apply a layer of epoxy adhesive to it. Press the patch onto the hole, making sure it’s firmly in place. Smooth out any excess adhesive and let it dry according to the manufacturer’s instructions. Once it’s completely cured, sand it down and apply a waterproof sealant for added protection. Ta-da! Your fiberglass shower will be hole-free once again!
Can you put peel and stick over ceramic tile?
Oh, the wonders of peel and stick tiles! If you’re itching for a change but don’t want the hassle of ripping up your ceramic tiles, fear not! Peel and stick tiles can be installed directly over your existing ceramic tiles, saving you time, effort, and maybe a few tears. Simply clean and dry the ceramic tiles, measure and cut your peel and stick tiles, and press them firmly in place. It’s a quick and easy way to give your space a fresh look without the mess and stress of tile removal. Happy sticking!
Can you fill in holes in tiles?
Absolutely! No need to stare at those unsightly holes in your beloved tiles any longer. You can wave them goodbye with a simple fix. First, clean the area around the hole and ensure it’s dry. Then, grab some tile filler or putty and apply it to the hole, smoothing it out with a putty knife until it’s level with the surface of the tile. Let it dry and use some fine-grit sandpaper to achieve a seamless finish. Finally, use a matching tile paint or touch-up pen to camouflage the repair. Ta-da! Your tiles will look good as new!