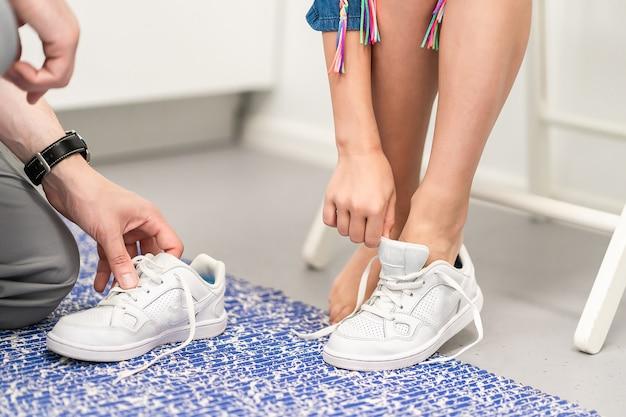
Vans are a classic choice for footwear, known for their comfort, style, and durability. However, over time, the insoles of your favorite Vans can accumulate dirt, sweat, and unpleasant odors. That’s why regular cleaning of your Vans insoles is essential to keep them fresh, hygienic, and looking their best.
In this comprehensive guide, we will answer all your burning questions about cleaning Vans insoles. Whether you have white Vans that need a gentle touch or yellowed Vans that need some serious restoration, we have got you covered. Not only that, but we will also address common concerns such as drying methods, washing alternatives, and dealing with discoloration issues.
So, if you’ve ever wondered how to clean your Vans insoles effectively and efficiently, this is the ultimate blog post for you. Get ready to bring back the freshness and comfort to your Vans as we explore various cleaning methods and provide expert tips to keep your beloved shoes in top-notch condition. Let’s dive right in!
How to Keep Your Vans Insoles Fresh and Clean
We all love our Vans sneakers – they’re comfortable, stylish, and versatile. But after a few months of wear, one small detail can start to ruin the overall experience – smelly and dirty insoles. Fear not, because in this guide, we’ll show you how to clean your Vans insoles and keep them fresh, so you can continue strutting your stuff with confidence.
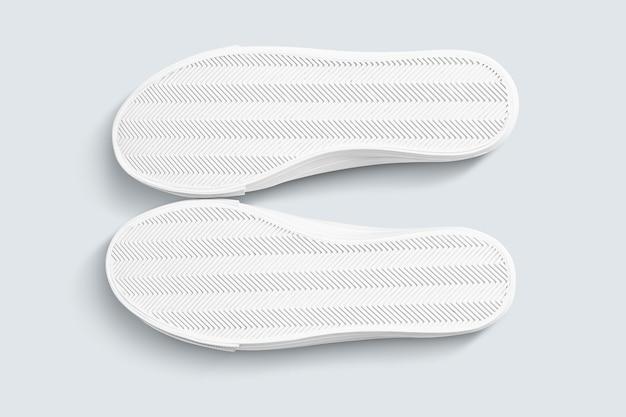
1. Remove Insoles Gently with Love
Before diving into the cleaning process, start by handling your Vans with care. Gently remove the insoles from your sneakers, showing them some love as you go. After all, they’ve been supporting your feet all this time, so a little tenderness won’t hurt.
2. Dust Off Demons with a Good Shake
Now that your insoles have gracefully parted ways with your Vans, it’s time to evict the unwanted guests – dust, dirt, and debris. Take them outside, hold them up high, and give those insoles a good old-fashioned shake. Imagine yourself being the superhero of cleanliness, banishing all the filth from your beloved sneakers.
3. Engage in a Sudsy Encounter
It’s time to give your insoles a luxurious bubble bath. Fill up a sink or basin with warm water and add a small amount of mild detergent. Swish the water around to create a gentle soapy haven for your insoles. Prepare yourself for the ultimate cleansing experience.
4. Scrub-a-dub-dub
Armed with a soft brush or cloth, grab those insoles and start scrubbing away any stubborn stains or odors. Gently work the soapy water into the fabric, getting into every nook and cranny. Remember, you’re not just cleaning – you’re giving those insoles a day at the spa. Satisfyingly scrub away, leaving no doubt that cleanliness is indeed next to godliness.
5. Rinse Off the Past and Welcome the Future
Once the insoles have been thoroughly scrubbed and massaged, it’s time to release any lingering soapy residue. Rinse them under cool water, ensuring that every last bit of suds is swept away. Bid farewell to the past and welcome the fresh, clean future of your squeaky-clean insoles.
6. Dry with Delight
Now that your insoles are cleansed and pure, it’s time to let them bask in the glory of fresh air and sunshine. Place them on a clean towel and let the air do its magic. Avoid the temptation to blast them with a hairdryer or toss them into the microwave – gentle air-drying is the way to go.
7. Sprinkle of Freshness
Before reuniting your insoles with their sneaker partners, sprinkle them with a touch of freshness. Liberally sprinkle baking soda over the surface of the insoles and let it work its deodorizing wonders. Leave it on overnight to absorb any remaining odors, and then tap off the excess in the morning.
8. Reunite and Feel So Good
With your clean, fresh-smelling insoles back in your loving hands, it’s time to reunite them with your Vans. Slide them back into place and admire how refreshed your sneakers feel. Take a deep breath, wiggle your toes, and revel in the joy of walking on clouds once again.
Now that you’re armed with the secrets of how to clean your Vans insoles, you can bid farewell to any worries of funky odors or dirty socks. Remember, keeping your insoles clean and fresh is not just a chore; it’s an act of love and appreciation for your beloved sneakers. So, go forth, my friend, with clean insoles and happy feet, ready to conquer the world, one stylish step at a time.
FAQ: How to Clean Vans Insoles
Welcome to our FAQ-style guide on how to keep your Vans insoles looking fresh and clean! We understand that dirty insoles can be a real buzzkill, so we’ve put together this comprehensive resource to address all your burning questions. From washing methods to stain removal tips, we’ve got you covered. So, let’s dive right in!
Are Vans Dryer Safe
No, Vans insoles are not dryer safe. Putting them in the dryer can cause damage and compromise their shape and cushioning. We recommend allowing the insoles to air dry naturally to ensure they retain their original comfort and functionality. Patience is a virtue, and your Vans will thank you for it!
How Do You Clean White Vans Without Peroxide
If you want to keep your gleaming white Vans in pristine condition but without the use of peroxide, fret not! You can create a simple and effective cleaning solution using everyday household items. Mix equal parts baking soda and water to form a paste, and gently scrub your white Vans insoles using a soft-bristled brush. Once you’re done, wipe off the residue with a clean cloth, and voila! Those white Vans will be back to their dazzling glory.
Can You Wash Canvas Vans in the Washer
Absolutely! Canvas Vans can be safely washed in the washer. Just remember to remove the insoles before tossing them into the machine. Use a gentle cycle with cold water and mild detergent. Avoid harsh chemicals or bleach as they can cause damage. After the wash, let the shoes and insoles air dry separately. Now you can strut those clean canvas Vans with confidence!
How Do You Clean Yellow Vans
Yellowing Vans can be a common frustration. Fear not, for we have a simple solution! Create a mixture of equal parts water and white vinegar, and gently dab it onto the yellowed areas with a cloth or sponge. Let it sit for a few minutes, then rinse with cold water and wipe dry. If the yellowing persists, repeat the process until you’re satisfied. Before you know it, your Vans will be back to looking fresh and vibrant!
How Can I Get My Vans to Dry Faster
We understand that waiting for your Vans to dry can be a test of patience. To speed up the drying process, you can stuff your shoes with crumpled newspaper or dry towels. These absorbent materials will help draw moisture away from the insoles, allowing them to dry more quickly. Just make sure to replace them every few hours until your Vans are fully dry. It’s time to kickstart your adventures in no time!
How Do You Clean Tom Removable Insoles
Cleaning Tom removable insoles is a breeze! Remove them from your Tom shoes and gently hand wash them using mild soap and water. For any tough stains, you can use a soft brush to scrub them away. Rinse thoroughly and allow the insoles to air dry completely before placing them back into your shoes. Now you can enjoy clean and fresh Tom shoes with ease!
How Do You Wash Vans in the Dishwasher
While it may sound tempting to throw your Vans in the dishwasher for a quick clean, we strongly advise against it. The dishwasher’s harsh conditions can damage your shoes, causing glue separation or warping. Stick to more gentle cleaning methods, like hand washing or using the washer on a gentle cycle, to maintain the longevity of your beloved Vans.
Can You Put Shoe Insoles in the Washer
Yes, you can put shoe insoles in the washer! However, it’s essential to check the manufacturer’s instructions before doing so. Many insoles are machine washable, but some may require hand washing to maintain their shape and quality. If you’re unsure, it’s always safer to hand wash them using mild soap and water. Remember, clean insoles mean happy feet!
Can You Wash Shoes in the Dishwasher
Just like with Vans, we advise against washing your shoes in the dishwasher. The intense heat and water pressure can cause irreversible damage, affecting both their appearance and functionality. Stick to more suitable cleaning methods, such as hand washing or using the washer on a gentle cycle. Your shoes will thank you for it!
How Do You Get the Yellow Out of White Vans Without Baking Soda
Baking soda is undoubtedly a superstar when it comes to cleaning, but fear not if you don’t have any on hand. You can create a simple yet effective mixture using equal parts hydrogen peroxide and water, coupled with a few drops of mild dish soap. Gently scrub the yellowed areas with a soft brush, rinse thoroughly, and let them air dry. Your white Vans will be back to their original color in no time!
How Do I Get My Vans White Again
To get your Vans looking bright and white again, follow these steps. First, remove the laces and insoles. Hand wash or machine wash the shoes using a gentle cycle with cold water and mild detergent. For any stubborn stains or yellowing, use a mixture of water, white vinegar, and a bit of baking soda to gently scrub the affected areas. Rinse thoroughly and let them air dry. Once dry, put the insoles and laces back in, and voila! Your white Vans will be ready to hit the streets in style!
Why Do Vans Turn Yellow After Washing
Vans may turn yellow after washing due to a variety of reasons. One possible culprit is the natural aging of the materials, as white rubber and canvas tend to yellow over time. Another factor could be the use of improper cleaning agents, like bleach or strong detergents, which can affect the color. To avoid yellowing, stick to gentle cleaning methods and avoid exposing your Vans to direct sunlight for prolonged periods.
Why Are My Vans Bleeding
If your Vans are bleeding color onto your socks or feet, don’t panic! This is a common occurrence, especially with new and darker-colored Vans. To prevent color bleeding, consider hand washing your Vans separately before wearing them for the first time. This helps remove excess dye that may transfer onto your skin or clothing. Remember to always follow the manufacturer’s recommendations for cleaning to maintain the integrity of your Vans.
Can You Wash Vans Slip-Ons in the Washer
Yes, you can wash Vans Slip-Ons in the washer. Remove any removable insoles and laces, then place the shoes in a mesh laundry bag to protect them during the wash cycle. Use cold water, a gentle detergent, and a gentle cycle. Once the cycle is completed, let them air dry naturally. Slip back into those clean and comfy Slip-Ons without a worry!
Why Are the Inside of My Vans Turning Brown
The discoloration you’re seeing on the inside of your Vans may be due to sweat and natural oils from your feet. To prevent or minimize this brownish tint, wear clean socks and consider using odor-controlling insoles. Regularly cleaning your Vans using the methods outlined in this article will also help keep the insides looking fresh and free from discoloration.
What to Soak Vans In to Clean Them
To give your Vans a deep cleaning, you can create a soaking solution using warm water and mild detergent. Remove the laces and insoles, then let the shoes soak in the mixture for about 30 minutes. After soaking, gently scrub any stubborn stains with a soft brush. Rinse thoroughly and let them air dry. Now you can step into clean and refreshed Vans!
Can You Dry Vans in the Dryer
No, we strongly advise against drying Vans in the dryer. The intense heat can cause shrinkage, warp the shape, or even damage the glue that holds your beloved shoes together. To ensure their longevity and maintain their original fit and comfort, opt for air drying your Vans. Your patience will pay off when you rock those dry, clean, and intact shoes!
That wraps up our comprehensive FAQ section on how to clean and care for Vans insoles. We hope we’ve provided you with the answers you were looking for. Remember, a little TLC goes a long way in keeping your Vans looking fresh and extending their lifespan. Happy cleaning, everyone!
Disclaimer: The information contained in this FAQ guide is for educational and informational purposes only. Always follow the manufacturer’s instructions and guidelines for cleaning your specific Vans model to avoid any potential damage.