Welcome to our blog post on how to clean sticks from outside for crafts! Whether you enjoy DIY projects, making natural decorations, or creating unique crafts, cleaning and preparing sticks from the great outdoors can be an essential part of the process. But how do you ensure that your sticks are clean, sanitized, and ready to be transformed into beautiful creations?
In this guide, we will answer all your questions about cleaning sticks for crafts. We’ll cover everything from preserving and disinfecting wood to removing bark and preparing various types of branches. So if you’ve ever wondered how to keep craft leaves fresh, how to make driftwood from branches, or how to clean tree bark for crafts, you’ve come to the right place!
Stay tuned as we share expert tips, techniques, and recommendations that will help you transform ordinary sticks into extraordinary works of art. Let’s dive in and discover how we can turn nature’s gifts into stunning craft materials!
How to Tidy Up Those Outdoor Sticks for Crafts
So, you’ve been on a nature walk and collected a bunch of sticks for your latest crafting project. However, they seem to be a little on the dirty side, covered in all sorts of mysterious grime. Fear not, my crafty friend, for I have some foolproof methods to help you clean those sticks and get them ready for some serious crafting action!
Assessing the Stick Situation
Before we dive into the cleaning extravaganza, we need to assess the condition of your sticks. Are they covered in mud, dirt, or perhaps a secret sauce from an alien picnic? Whatever the case, it’s important to determine the level of grime to find the most suitable cleaning method. Let’s proceed!
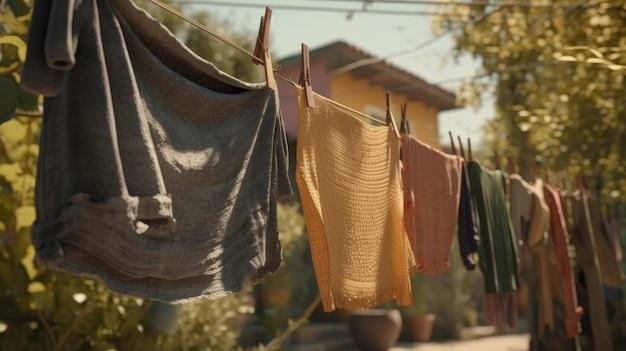
Method 1: Soap and Water Therapy
Ah, the classic soap and water combo, the cure for many of life’s stick-related problems. Simply grab a container large enough to accommodate your sticks (a bucket or sink will do the trick) and fill it with warm water. Add a squirt of gentle dish soap, mix it up, and let the sticks take a dip. Give them a gentle scrub with a soft brush or sponge, paying extra attention to any stubborn stains. Rinse them off with clean water, and voila! Sparkling sticks ready for their starring role in your crafts.
Method 2: Vinegar Magic
If your sticks are harboring some stubborn dirt or grime, it’s time to bring out the big guns – vinegar! Mix equal parts water and white vinegar in a container and let your sticks soak in this tangy concoction for about 30 minutes. The vinegar will work its magic, dissolving dirt and grime like it’s nobody’s business. Once the time’s up, give those sticks a rinse with water and marvel at their newfound cleanliness.
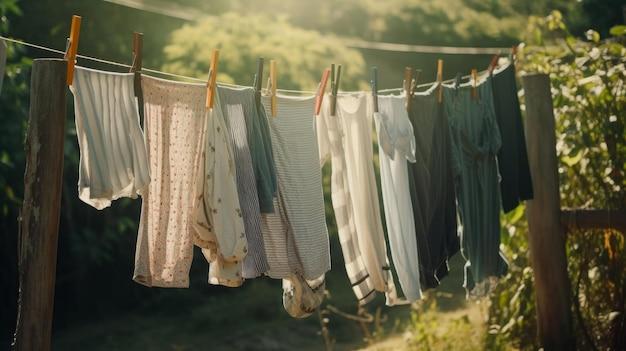
Method 3: Sun and Air Therapy
Some sticks just need a little time in the great outdoors to freshen up. Arrange them on a clean surface in a sunny spot and let Mr. Sun work his magic. The sunlight will help to naturally dry and sanitize the sticks, leaving them feeling fresh and ready for crafting. Just make sure to keep an eye on them, as sticks have a tendency to wander off when left unattended. Trust me, it’s happened to the best of us.
Method 4: Sandpaper TLC
If your sticks are rough around the edges (literally), it’s time to give them a spa treatment with some sandpaper. Gently sand away any rough or splintery areas, working in the direction of the grain. This will leave your sticks smooth and splinter-free, ensuring a seamless crafting experience. Plus, you’ll feel like a true stick whisperer while doing it. It’s a win-win!
Wrapping It Up
There you have it, dear stick-loving crafters! With these tried and true cleaning methods, those outdoor sticks will be gleaming like they just stepped out of a stick salon. So, wipe off that worry sweat and let your imagination run wild with the endless craft possibilities that these clean sticks hold. Happy crafting!
Stay tuned for more crafty adventures and quirky stick-related tips and tricks. After all, sticks are quite fascinating, aren’t they?
FAQ: How To Clean Sticks From Outside For Crafts
If you’re a craft enthusiast like me, you know that using natural materials can add a special touch to your projects. One such material is sticks from outside. However, these sticks often come with dirt, bark, or other debris that needs to be cleaned before you can use them. In this FAQ-style guide, I’ll walk you through the process of cleaning sticks from outside for crafts. So, put on your crafty gloves and let’s get cleaning!
How do you keep craft leaves fresh
Preserving craft leaves can be a tricky task, but fear not! Here’s a simple method to keep those leaves looking fresh:
- Start by picking the leaves you want to use for your craft project.
- Gently wash the leaves with water to remove any dust or dirt.
- Place the leaves between the pages of a heavy book, ensuring they are completely flat.
- Leave the book in a dry and cool place for about a week.
- Voila! Your craft leaves are now preserved and ready to be used in your projects.
How do you clean a branch
Cleaning a branch might sound like a daunting task, but it’s easier than you think. Follow these steps to clean your branch:
- Remove any loose bark or debris from the branch by gently brushing it with a stiff brush.
- Fill a bucket with warm water and add a mild detergent or dish soap.
- Dip a soft cloth or sponge into the soapy water and gently scrub the branch, paying attention to any stubborn dirt or stains.
- Rinse the branch thoroughly with clean water to remove any soap residue.
- Lay the branch flat to dry, preferably in a well-ventilated area away from direct sunlight.
How long does it take for twigs to dry out
The drying time for twigs can vary depending on their size and moisture content. On average, it may take around 1 to 2 weeks for twigs to fully dry out. However, factors like humidity and the thickness of the twigs can affect the drying time. It’s best to check the twigs regularly and ensure they are completely dry before using them in your crafts.
How do you sterilize large branches
When working with large branches, it’s important to sterilize them to remove any bacteria or insects. Here’s a simple method to sterilize large branches for your crafts:
- Start by removing any loose bark or debris from the branches.
- Prepare a mixture of equal parts water and white vinegar in a large container.
- Submerge the branches in the vinegar solution, ensuring they are fully covered.
- Let the branches soak in the solution for at least 24 hours.
- Remove the branches from the solution and rinse them thoroughly with clean water.
- Place the branches in a well-ventilated area to dry completely before using them in your projects.
How do you remove bark from wood
Removing bark from wood can be a challenging task, but don’t worry, I’ve got you covered! Follow these steps to remove bark from wood:
- Start by using a hammer and a chisel to gently pry away the loose bark from the wood.
- If the bark is stubborn, you can use a wire brush or sandpaper to scrub it off.
- Be careful not to damage the wood while removing the bark, especially if you want to preserve the natural texture.
- Once the bark is removed, sand the wood to smoothen it and prepare it for your craft project.
- Clean away any wood particles or dust and you’re ready to go!
How do you preserve craft sticks
Preserving craft sticks can help extend their lifespan and prevent them from rotting or getting infested with insects. Here’s a simple method to preserve your craft sticks:
- Start by thoroughly cleaning the craft sticks to remove any dirt or debris.
- Dip the sticks into a mixture of equal parts water and wood glue, ensuring they are fully coated.
- Lay the sticks flat on a sheet of wax paper and allow them to dry completely.
- Once dry, repeat the process by applying a second coat of the water and wood glue mixture.
- Let the sticks dry again, and they will be preserved and ready to use in your crafts!
How do you disinfect wood from outside
Disinfecting wood from outside is essential to ensure it is free from harmful bacteria or pests. Follow these steps to disinfect your wood:
- Start by cleaning the wood surface with a solution of equal parts water and white vinegar.
- Scrub the wood thoroughly with a brush or sponge to remove any dirt or grime.
- Rinse the wood with clean water to remove the vinegar solution.
- Prepare a solution of water and bleach, with a ratio of 1 part bleach to 10 parts water.
- Apply the bleach solution to the wood surface, ensuring it is completely covered.
- Let the solution sit on the wood for about 15 minutes, then rinse it off with clean water.
- Allow the wood to dry completely before using it for your crafts.
How do you treat outdoor wood indoors
Treating outdoor wood indoors can help provide protection and enhance its longevity. Follow these steps to treat outdoor wood indoors:
- Start by cleaning the wood surface with a mild detergent or wood cleaner to remove any dirt or debris.
- Sand the wood to smoothen it and prepare it for treatment.
- Apply a wood sealant or preservative using a brush or roller, following the manufacturer’s instructions.
- Ensure that the wood is completely coated with the sealant, paying extra attention to any cracks or crevices.
- Allow the sealant to dry according to the recommended drying time.
- Once dry, you can bring the treated outdoor wood indoors and use it for your craft projects without worrying about deterioration.
How do you clean tree bark in crafts
Cleaning tree bark for crafts can add a rustic and natural touch to your projects. Here’s a simple method to clean tree bark:
- Start by gently brushing the bark with a soft-bristled brush to remove any loose dirt or debris.
- Prepare a mixture of warm water and mild dish soap in a bucket or sink.
- Dip a cloth or sponge into the soapy water and gently scrub the bark, removing any stubborn stains.
- Rinse the bark with clean water to remove any soap residue.
- Lay the bark flat to dry, preferably in a well-ventilated area away from direct sunlight.
- Once the bark is completely dry, you can use it in your crafts to add texture and character!
How do you clean birch bark for crafts
Birch bark is a popular choice for crafts due to its unique texture and appearance. To clean birch bark for your projects, follow these steps:
- Start by gently brushing the bark with a soft-bristled brush to remove any loose dirt or debris.
- If there are stubborn stains or residue, you can use a mixture of warm water and mild dish soap to gently scrub the bark.
- Rinse the birch bark with clean water to remove any soap residue.
- Lay the bark flat to dry, ensuring it is not exposed to direct sunlight or heat sources that may cause it to curl.
- Once the birch bark is dry, it’s ready to be used in your crafts, whether it’s for making decorative items or adding a natural touch to gift wrapping!
How do you make driftwood from branches
Creating driftwood from branches can give your crafts a unique and weathered look. Follow these steps to make driftwood from branches:
- Start by selecting branches that are relatively straight and have a good length.
- Remove any loose bark or twigs from the branches.
- Fill a large container or bathtub with water and submerge the branches.
- Let the branches soak in the water for several weeks, changing the water every few days.
- Over time, the water will help soften the branches and give them a weathered appearance.
- Once the branches have achieved the desired driftwood look, remove them from the water and allow them to dry completely before using them in your projects.
How do you preserve tree branches for decorations
Preserving tree branches for decorations is a wonderful way to bring the beauty of nature into your home. Here’s a simple method to preserve tree branches:
- Start by selecting healthy and sturdy branches with the desired shape and size.
- Remove any loose bark or twigs from the branches.
- Gently sand the branches to smoothen any rough edges.
- Apply a wood sealer or preservative to the branches, ensuring they are fully coated.
- Let the branches dry in a well-ventilated area for about 48 hours or according to the manufacturer’s instructions.
- Once dry, you can use the preserved branches in various decorations such as floral arrangements, wreaths, or standalone displays.
How do you remove bark from branches
Removing bark from branches can be a delicate process, but with a little patience, you can do it easily. Follow these steps to remove bark from branches:
- Start by making a lengthwise cut along the branch using a sharp knife.
- Hold the branch firmly and gently peel the bark away from the wood.
- If the bark doesn’t come off easily, you can use a chisel or a paint scraper to carefully loosen it.
- Be mindful not to damage the wood surface while removing the bark.
- Once the bark is removed, you can further smoothen the wood by sanding it if desired.
- Clean away any wood particles or debris, and your bark-free branch is ready for crafting!
How do you bleach wood to look like driftwood
If you want to achieve that beachy, driftwood look on your wood, bleaching is a popular method. Follow these steps to bleach wood to look like driftwood:
- Start by sanding the wood surface to remove any existing finishes or coatings.
- Prepare a solution of equal parts water and bleach in a bucket or container.
- Apply the bleach solution to the wood using a brush or sponge, ensuring it is fully coated.
- Let the solution sit on the wood for about 20 minutes, monitoring the color change.
- Rinse the wood thoroughly with clean water to remove the bleach.
- Allow the wood to dry completely, preferably in a well-ventilated area.
- Repeat the bleaching process if a more weathered look is desired.
- Once dry, your wood will have that beautiful driftwood appearance, perfect for your crafts or coastal-inspired decor!
How do you clean wild wood
Cleaning wild wood can be an adventure in itself, considering the various elements it may have encountered. Follow these steps to clean wild wood:
- Start by removing any loose dirt, debris, or cobwebs by gently brushing the wood with a stiff brush.
- If there are stubborn stains or grime, you can use a mixture of warm water and mild dish soap to scrub the wood.
- Rinse the wood with clean water to remove any soap residue.
- For extra cleaning power, you can use a solution of equal parts water and white vinegar, especially for mold or mildew.
- Rinse the wood again with clean water and gently pat it dry with a towel.
- Leave the wood to air dry completely before using it in your crafts, ensuring it is protected from moisture to avoid warping or mold growth.
How do you clean pine cones for crafts
Pine cones are nature’s little treasures, but they can gather dust and dirt over time. Here’s a simple method to clean pine cones for your craft projects:
- Start by gently brushing the pine cones with a soft-bristled brush to remove any loose dirt or debris.
- If there are sticky substances or insects, you can bake the pine cones in the oven at a low temperature (around 200°F or 93°C) for about 30 minutes. This will help kill any insects and remove any sap or resin.
- Let the pine cones cool down and then gently shake them to remove any loosened debris.
- Optionally, you can soak the pine cones in a mixture of warm water and mild dish soap to remove any remaining dirt.
- Rinse the pine cones thoroughly with clean water.
- Lay the pine cones on a cloth or paper towel to air dry completely before using them in your crafts.
How do you remove bark from birch logs
Birch logs can be a beautiful addition to your crafts, but sometimes removing the bark is necessary. Follow these steps to remove bark from birch logs:
- Start by making a lengthwise cut along the log using a sharp knife.
- Gently pry the bark away from the wood using a chisel or a paint scraper.
- Be careful not to gouge or damage the wood while removing the bark.
- If the bark doesn’t come off easily, you can soak the logs in warm water for a few hours or overnight to loosen the bark.
- After soaking, use a stiff brush to scrub away any remaining bark or debris.
- Rinse the logs with clean water to remove any loosened bark particles.
- Allow the logs to dry completely before using them in your crafts or storing them for future projects.
What can I make out of twigs
Ah, the possibilities with twigs are endless! Here are some creative ideas for what you can make out of twigs:
- Twig picture frames: Arrange twigs into a rectangular shape and secure them together with twine or glue. Add a photo or artwork to create a rustic frame.
- Twig coasters: Glue small sections of twigs onto cork or wood to create unique coasters.
- Twig ornaments: Gather twigs of different lengths and shapes, tie them together with string or wire, and hang them as ornaments on your Christmas tree or as decorative accents.
- Twig candle holders: Attach twigs around a glass jar using strong glue or twine to create a rustic candle holder.
- Twig wreaths: Form a circle with twigs, securing them together with wire or hot glue. Add flowers, leaves, or other decorative elements to make a beautiful wreath.
- Twig mobiles: Hang twigs of varying lengths from a larger twig or branch, creating a whimsical mobile to hang in a nursery or as outdoor decor.
- Twig baskets: