Do you know what to do if you notice air in your cooling system or have a hunch that it needs to be burped? Don’t worry, you’re not alone. Many car owners and DIY enthusiasts face this common issue when trying to maintain their vehicles. Burping the cooling system is an essential task to remove trapped air and ensure proper circulation of coolant, which contributes to the overall performance and longevity of your engine.
In this blog post, we’ll guide you through the process of burping your cooling system without a funnel. We’ll answer common questions like how to burp a heater core, how to know if you have air in your cooling system, and what happens if you don’t bleed air out of the system. So, grab your tools and let’s get started on keeping your engine cool and happy!
How do you burp a cooling system without a funnel
Stay tuned to learn effective techniques and tips for burping your cooling system without a funnel, as well as how to remove trapped air from a central heating system. We’ll also provide insights into whether a cooling system can burp itself, the importance of bleeding your cooling system, the potential consequences of not doing so, and how to identify circulating coolant. Plus, we’ll tackle the issue of airlocks causing overheating and discuss how to fix an airlock in a cooling system. So, let’s dive in and ensure your engine is running smoothly and efficiently.
How to Burp Your Cooling System Without a Funnel
Ah, the joys of car maintenance. Changing oil, checking tire pressure, and burping your cooling system. Wait, burping the cooling system? Yep, you heard that right. Just like how babies burp after a feeding, your car’s cooling system needs a good burp every now and then to stay in optimal shape. Now, you might be thinking, “Who needs a funnel for that?” Well, guess what? In this guide, I’ll show you how to burp your cooling system without a funnel! So grab your wrench and let’s get started.
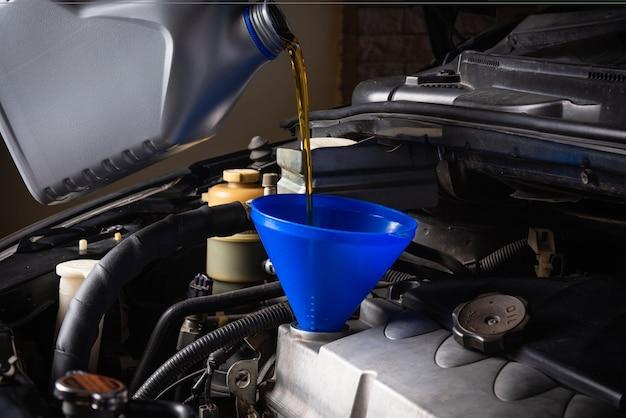
Gather Your Tools and Materials
Before we embark on this burping adventure, let’s make sure we have everything we need. You’ll need a few tools to tackle this task, including a pair of pliers, a rag for any spills, and a bucket to catch any coolant that may come rushing out. Oh, and don’t forget the most important ingredient: a sense of humor! Trust me, it helps make the whole process a lot more enjoyable.
Step 1: Pop the Hood and Locate the Coolant Reservoir
Alright, now it’s time to get down to business. Pop the hood and locate the coolant reservoir, usually a translucent plastic tank with a cap that’s labeled “Coolant” or “Antifreeze.” Don’t worry, we won’t be diving into the deep end of the engine just yet.
Step 2: Check the Coolant Level
Before you start burping, it’s important to check the coolant level. You don’t want to burp an empty tummy, right? So grab that rag and remove the cap from the coolant reservoir. Take a peek inside and make sure the coolant level is between the minimum and maximum markings. If it’s low, go ahead and top it up before proceeding.
Step 3: Start the Engine and Let It Warm Up
Now comes the fun part. Start your engine and let it warm up for a few minutes. We want that coolant to reach its optimal burping temperature, so let it simmer and sizzle like a master chef preparing a gourmet meal.
Step 4: Squeeze the Hoses
Once your engine is warmed up, locate the coolant hoses. They’re like the arteries and veins of your car’s cooling system, carrying the lifeblood of coolant throughout. Carefully squeeze the hoses a few times to help release any trapped air bubbles. We’re giving your car a gentle massage here, so be kind!
Step 5: Burp the System
It’s burping time! With the engine still running, keep an eye on the coolant reservoir. Observe closely as the trapped air makes its escape and bubbles rise to the surface like tiny, less fragrant champagne bubbles. This process may take a few minutes, so be patient and enjoy the show.
Step 6: Keep an Eye on the Coolant Level
As the burping extravaganza unfolds, keep an eye on the coolant level in the reservoir. If it starts dropping significantly, it’s time to top it up again. Remember, a healthy cooling system is a well-nourished one.
Step 7: Recap and Celebrate
With the burping complete, it’s time to recap what we’ve learned today. Burping your cooling system without a funnel isn’t as intimidating as it may seem. Just gather your tools, check the coolant level, warm up the engine, squeeze the hoses, and let the burping magic happen. And don’t forget to celebrate your victorious car maintenance skills with a well-deserved high five!
Congratulations! You’ve successfully burped your cooling system without a funnel. No need to call in the professionals or rely on expensive equipment. With a little know-how and a dash of humor, you can tackle this task like a seasoned mechanic. So go forth, share your newfound wisdom, and make every car owner jealous of your burping expertise. Stay cool, my friends!
Note: This guide is intended for informational purposes only. If you’re unsure or uncomfortable performing any of these steps, it’s always best to consult a professional mechanic. Safety first, folks!
FAQ: How To Burp a Cooling System Without a Funnel
How to Burp a Heater Core
If you need to burp your heater core, it’s best to start by making sure your vehicle is parked on a level surface. Next, turn off the engine and allow it to cool down completely. Once cool, locate the radiator cap (if equipped) or the coolant reservoir cap. Slowly unscrew the cap, taking care not to remove it completely while the engine is still warm, as you could be scalded by hot coolant. After removing the cap, be prepared to catch any coolant that may overflow. Then, start the engine and let it run until the operating temperature is reached. Keep an eye on the coolant level and add more if necessary. As the engine warms up, any air pockets should be released, and you may hear a bubbling sound. Once the bubbling stops and the coolant level remains steady, you can replace the cap. If your vehicle doesn’t have a radiator cap, you can use the coolant reservoir cap to burp the system following a similar procedure.
How to Know if You Have Air in Your Cooling System
Determining whether there is air in your cooling system can be a breeze! Look out for these telltale signs: irregular engine temperature fluctuations, overheating, a heater blowing cold air, or coolant leaking from the radiator. Air bubbles in your coolant reservoir are another indicator. It’s essential to address any air pockets to prevent potential engine damage or reduced fuel efficiency.
What Happens if You Don’t Bleed Air Out of the Cooling System
Neglecting to bleed air from your cooling system can lead to various issues. Air trapped in the system can obstruct the flow of coolant, resulting in inefficient heat transfer and engine overheating. The lack of proper cooling can cause damage to engine components, such as a blown head gasket or warped cylinder heads. Additionally, the presence of air can interfere with accurate temperature readings, leading to faulty readings on the dashboard temperature gauge.
How Long Does It Take to Burp a Radiator
Burping a radiator is usually a quick procedure that can take anywhere from 5 to 15 minutes. However, the exact duration may vary depending on factors like the design of your vehicle’s cooling system and how effectively the air pockets are being expelled. It’s always essential to monitor the process closely and ensure the engine reaches its operating temperature while performing the burping procedure.
How to Remove Trapped Air from a Central Heating System
To remove trapped air from your central heating system, you can follow these steps:
- Start by turning off your heating system, including the boiler and any gas supply.
- Locate the bleed valve on your radiators. It’s usually located at the top and looks like a small square or hexagonal nut.
- Using a radiator key or a flat screwdriver, slowly open the bleed valve by turning it counterclockwise. You will hear a hissing sound as air escapes.
- Keep the valve open until water starts to flow steadily from the bleed valve.
- Close the valve by turning it clockwise. Take care not to overtighten it.
- Repeat this process on all radiators in your system to ensure all trapped air is released.
- Finally, check the pressure gauge on your boiler and adjust if necessary.
Will a Cooling System Burp Itself
Unfortunately, a cooling system doesn’t possess the magical ability to burp itself. It requires a helping hand from its trusty mechanic or car owner. Without proper burping, air pockets can impair the cooling system’s efficiency, potentially leading to unfortunate consequences like overheating. So, don’t leave your cooling system to fend for itself – give it the care it deserves!
Do I Need to Bleed My Cooling System
In most cases, bleeding your cooling system is a crucial maintenance task that ensures optimal performance. It helps to remove trapped air pockets that may hinder the efficient circulation of coolant. However, it’s essential to consult your vehicle’s owner manual or seek professional advice to determine if your specific vehicle requires this procedure and the recommended intervals for performing it.
Can a Faulty Radiator Cause White Smoke
A faulty radiator alone is unlikely to be the direct cause of white smoke. However, if your vehicle’s engine is overheating due to coolant loss or a malfunctioning radiator, it can result in white smoke being emitted from the exhaust. White smoke typically signifies coolant mixing with the combustion process, indicating a potentially serious problem. If you notice white smoke, it’s crucial to have your vehicle inspected by a qualified mechanic to diagnose the underlying issue.
What Will Air in the Cooling System Do
When air infiltrates your cooling system, it can create a multitude of problems. Air pockets hinder the proper flow of coolant, leading to ineffective cooling and potential overheating. Additionally, air bubbles can cause coolant to foam, reducing its ability to transfer heat and potentially leading to localized hotspots. To maintain a properly functioning cooling system, it’s important to ensure that air is regularly removed through proper burping procedures.
Can You Top Up Coolant Without Bleeding
While you can add coolant to your system without bleeding it, it’s generally recommended to perform a bleeding procedure if air is suspected to be present. By bleeding the cooling system, you ensure that any air pockets are expelled, allowing the coolant to circulate freely and effectively cool the engine. So, although topping up coolant is a maintenance task, don’t forget about the importance of bleeding to keep your cooling system in optimal condition.
How to Bleed Air Out of a House Radiator
To bleed air out of a house radiator, you can follow these steps:
- Turn off your heating system.
- Identify the bleed valve on the radiator. It’s usually located at the top and may be concealed by a plastic cap.
- Using a radiator key or a flat screwdriver, slowly open the bleed valve by turning it counterclockwise.
- Keep the valve open until you hear a hissing sound, indicating that air is escaping.
- Once water starts to flow steadily from the bleed valve, close it by turning it clockwise. Take care not to overtighten.
- Perform this process on all radiators in your home that require bleeding.
- Finally, check the pressure gauge on your boiler and top up pressure if necessary.
How to Burp Coolant Without a Radiator Cap
If your vehicle doesn’t have a radiator cap but has a coolant reservoir cap, you can still burp the system. Start by turning off the engine and allowing it to cool completely. Locate the coolant reservoir cap, which may be labeled as “Coolant” or “Engine Coolant.” Slowly unscrew the cap, taking care to avoid removing it completely while the engine is still warm. As the engine reaches its operating temperature, any air pockets should be released. Monitor the coolant level and add more if needed. Once the bubbling stops and the coolant level remains steady, you can replace the cap securely.
How to Get Trapped Air Out of a Radiator
To get trapped air out of a radiator, you can follow these steps:
- Ensure the heating system is turned off.
- Locate the bleed valve on the radiator, typically located at the top.
- Use a radiator key or a flat screwdriver to slowly open the bleed valve by turning it counterclockwise.
- Keep the valve open until you hear air hissing out, indicating the air is being released.
- Once water begins to flow steadily from the valve, close it by turning it clockwise. Avoid overtightening.
- Repeat this process for any radiators experiencing trapped air.
- Check the pressure gauge on your boiler and adjust if necessary.
Can an Airlock Cause Overheating
Yes, an airlock in your cooling system can potentially lead to overheating. When air becomes trapped in the system, it can hinder the flow of coolant, reducing its ability to absorb and dissipate heat. This can cause the engine to overheat, potentially leading to severe engine damage if not resolved promptly. Addressing any airlock issues and ensuring proper coolant circulation is a crucial step in maintaining the cooling performance of your vehicle.
What Happens if You Don’t Bleed the Cooling System
Neglecting to bleed the cooling system can have adverse effects on your vehicle’s performance and longevity. Without proper bleeding, air pockets can obstruct the proper flow of coolant, leading to inadequate cooling and potential overheating. Over time, the engine may experience increased wear and tear, reduced fuel efficiency, and a higher risk of costly repairs. Don’t let a simple procedure like bleeding be the missing piece in maintaining the health of your cooling system.
How to Know if Coolant Is Circulating
To determine if coolant is circulating in your system, you can perform these simple tests:
- Visual Inspection: Observe the coolant reservoir or radiator, checking for movement or swirling of the coolant when the engine is running. If you notice active circulation, it’s a positive sign that coolant is flowing.
- Thermostat Test: After allowing the engine to warm up, feel both the upper and lower radiator hoses. If one hose is significantly cooler than the other, it may indicate a thermostat or circulation problem. Properly functioning coolant circulation will show a noticeable temperature difference between the hoses.
- Temperature Gauge: Observe the temperature gauge on your dashboard while driving. If the needle remains within the normal operating range, it suggests that the coolant is circulating properly. However, if the gauge shows erratic or consistently high temperatures, it could indicate poor circulation.
How to Fix an Airlock in a Cooling System
Fixing an airlock in your cooling system requires a systematic approach. Here’s a step-by-step guide:
- Ensure the engine is cool and switched off.
- Locate the highest point in your cooling system, usually the radiator or coolant reservoir.
- Remove the radiator or coolant reservoir cap, depending on your vehicle’s configuration.
- If necessary, top up the coolant to the specified level.
- Slowly start the engine and allow it to warm up to its operating temperature.
- Monitor the coolant level and temperature while gently squeezing the radiator hoses to assist with air release.
- Once the engine reaches its operating temperature, any remaining air should be released, and the coolant level should stabilize.
- Carefully replace the cap and ensure it is securely fastened.
- Keep an eye on the coolant level in the following days to ensure it remains stable. If necessary, top up the coolant to the recommended level.
Will an Airlock Clear Itself
While it’s possible for small air bubbles to work their way out of a cooling system naturally over time, it’s not always guaranteed. Larger airlocks or persistent air pockets may require manual intervention to ensure proper coolant circulation and prevent potential overheating. It’s best not to rely solely on self-clearing airlocks and instead address any issues promptly with proper bleeding techniques.