Welcome to our blog post on how to build a window sill interior! If you’ve ever wondered about the ins and outs of creating a window sill from scratch, you’ve come to the right place. In this guide, we will cover everything you need to know to tackle this DIY project with confidence.
From understanding the purpose of a sill pan and the materials you can use, to the appropriate dimensions and techniques for installation, we’ve got you covered. We’ll also explore the differences between a window sill and a window ledge, and discuss the best types of wood for window sills.
So whether you’re a seasoned DIY enthusiast or a beginner looking to enhance the look and functionality of your windows, keep reading to learn all about how to build a window sill interior.
How to Craft a Stellar Window Sill Interior
So you’ve gazed longingly out of your window, only to be met with a lackluster window sill that’s seemingly begging for a makeover. Fear not, intrepid DIY enthusiast! In this comprehensive guide, we’ll explore the art of building a window sill interior that not only exudes charm but also serves as a captivating focal point for your space. Let’s dive in and unlock the secrets to a stellar window sill interior.
Gather Your Tools and Materials
Before embarking on this creative endeavor, assemble your trusty arsenal of tools. Think of yourself as a home improvement superhero, armed with a hammer, nails, a measuring tape, sandpaper, wood glue, a saw, and a level. And of course, don’t forget your materials: wood, preferably a durable and visually appealing species like oak or maple, stain or paint, and a touch of imagination.
Measure Twice, Cut Once
As the wise old carpenters say, “Measure twice, cut once.” This maxim holds true when crafting your window sill interior masterpiece. Measure the length, width, and depth of your window sill carefully, jotting down the dimensions like a seasoned architect. Account for any variances or irregularities, as no window sill is created equal, much like snowflakes or the distinguishing quirks of your favorite sitcom characters.
Shape and Beautify
With your measurements in hand, it’s time to transform your timber into a work of art. Carefully cut the wood to match your desired window sill dimensions, ensuring clean lines with the precision of a surgeon and the artistry of a sculptor. Embrace the opportunity to experiment with different shapes and profiles, adding a touch of personality to your creation. Be bold, be daring, be the window sill interior visionary you were destined to become!
Smooth Operator
Once the shape is perfected, channel your inner smooth operator. Grab that sandpaper and gently caress the edges and surfaces, sanding away roughness and imperfections. The aim here is to achieve a silky smooth finish, much like the voice of a velvet-clad crooner serenading you on a balmy summer night. Remember, an impeccably smooth window sill interior brings joy to the fingertips and mesmerizes the eyes.
Beauty is in the Details
Now that your window sill has taken shape and acquired a velvety smoothness, it’s time to delve into the realm of aesthetics. Will you opt for a natural wood finish, allowing the grains to sing their harmonious symphony? Or perhaps a vibrant pop of color that dances in the sunlight? The choice is yours, an artiste of the interior design world. Embrace the power to captivate and mesmerize, leaving your guests awestruck with envy.
A Finishing Touch of Grandeur
To truly elevate your window sill interior to a grander stature, consider adding a finishing touch of grandeur. Crown molding can be the regal frame that enthralls, while decorative corbels create an architectural masterpiece. Experiment with these miniature works of art, balancing elegance and whimsy to create a window sill interior fit for a palace, or at least a charming suburban bungalow.
Bask in the Glory
Step back, my DIY aficionado, and bask in the glory of your handiwork. Your window sill interior now stands as a testament to your creativity, craftsmanship, and ability to tackle home improvement projects like a seasoned pro. Revel in the beauty you have brought to your space, and let your window sill be the envy of the neighborhood. They say a window is the gateway to the soul, and now your soul shines with the brilliance of a thousand sunsets.
In conclusion, building a window sill interior is a journey of creativity, precision, and a sprinkle of humor. Armed with your trusty tools and an unwavering resolve, you can transform a lackluster window sill into a captivating work of art. So go forth, intrepid DIY enthusiast, and let your window sill interior reign supreme in the realm of home improvement accomplishments!

FAQ: How To Build A Window Sill Interior
How does a sill pan work
A sill pan is a protective layer that helps prevent water damage by collecting any moisture that seeps through the window and redirecting it away from the interior. It acts as a barrier, ensuring that water doesn’t seep into the structure and cause rot or mold issues. By installing a sill pan, you can provide an extra layer of defense against water infiltration, keeping your window sill and interior safe and dry.
Can I use plywood for a window sill
While plywood may seem like a budget-friendly option, it is not the best choice for a window sill. Plywood tends to be more susceptible to moisture damage and warping than other materials. Over time, water absorption can cause the plywood to weaken and potentially rot, compromising the structural integrity of the window sill. Instead, it is recommended to use more durable materials such as solid wood or engineered wood products specifically designed for window sills.
How deep is a window sill
The depth of a window sill can vary depending on personal preference and the specific window design. Generally, window sills are around 3 to 5 inches deep, providing enough space for decorative items or plants. However, it’s important to consider the overall dimensions of the window and the wall thickness to ensure the window sill is proportional and aesthetically pleasing.
What is a sill pan on a window
A sill pan on a window is a protective barrier installed beneath the window sill. It is designed to catch any water that may seep through the window, preventing it from damaging the interior of the building. Made of waterproof materials, such as PVC or metal, the sill pan provides an additional layer of defense against potential water leaks around the window, ensuring the longevity and durability of your window sill and preventing costly water damage repairs.
What is the bottom of a window sill called
The bottom part of a window sill is called the window stool or window apron. It is the horizontal ledge or surface that extends beyond the window frame and supports the window sashes. The window stool can be an attractive focal point in your interior design, and it often serves as a platform for displaying decorative items or providing additional seating.
Do you fit window sills before plastering
It is generally recommended to install window sills before plastering. By fitting window sills before plastering, you can ensure a clean and seamless finish around the windows. Plastering after installing the window sills allows for a smoother transition between the wall and the sill, creating a more professional and aesthetically pleasing look. However, it’s important to consult with your contractor or follow any specific instructions provided by the manufacturer to ensure the correct sequence of installation for your specific window sill and plastering system.
How far should a window sill stick out from the wall
The amount that a window sill should stick out from the wall, known as the overhang, can vary based on personal preference and architectural style. Generally, an overhang of around 1 to 3 inches is common and aesthetically pleasing. This dimension provides enough space for water to drip off the sill without causing damage to the wall while offering a visually balanced appearance. However, it’s important to consider the overall proportions of the window and the surrounding architectural elements to achieve the desired look.
What are interior window sills made of
Interior window sills can be made from a variety of materials, including solid wood, engineered wood, stone, concrete, or composite materials. Each material has its own unique characteristics, advantages, and aesthetic appeal. Solid wood, such as oak or pine, is a popular choice for its natural beauty and warmth. Engineered wood and composite materials offer increased durability and resistance to moisture. Stone and concrete provide a more luxurious and robust option that can complement different interior design styles. The choice of material depends on your preferences, budget, and the functionality you desire for your window sill.
Can you use MDF for window sills
MDF, or medium-density fiberboard, can be used for window sills, but it is not the most ideal choice. MDF is a cost-effective material that is easy to shape and work with. However, MDF is prone to moisture damage and can swell or warp when exposed to water. If you decide to use MDF for your window sill, it is important to seal it properly with paint or a waterproof finish to protect it from moisture. Nonetheless, it’s recommended to consider more moisture-resistant materials, such as solid wood or engineered wood products, for better long-term performance and durability.
Which is better, oak or pine
The choice between oak and pine for your window sill depends on your personal preferences, budget, and the desired aesthetic. Oak is a hardwood known for its strength, durability, and rich grain patterns. It provides a timeless and luxurious aesthetic, adding a touch of elegance to any interior. On the other hand, pine is a softwood with a more rustic and natural appeal. It is often less expensive than oak and can be stained or painted to achieve various finishes. Both oak and pine have their own unique charm, so consider your style preferences and requirements when choosing the best option for your window sill.
How wide should a window sill be
The width of a window sill depends on various factors, including the size of the window, the architectural style, and personal preference. As a general guideline, most window sills are between 2 and 6 inches wide. A narrower window sill can give a sleek and modern look, while a wider sill provides more space for decorative items or seating. Consider the overall proportions and balance of the window and the surrounding elements when determining the appropriate width for your window sill.
What is interior window casing
Interior window casing, also known as window trim, refers to the decorative molding or framing that surrounds a window on the inside of a building. It serves to enhance the aesthetic appeal of the window, conceal any gaps between the window frame and the wall, and provide a smooth transition between the window and the wall surface. Interior window casing comes in various styles and profiles, allowing you to customize the look and feel of your windows to match your interior design.
What type of wood is used for window jamb
Window jambs are typically made of solid wood, such as pine or oak, which provide durability and stability. The choice of wood species depends on your preferences, budget, and the desired aesthetic for your window jambs. Pine is a popular choice due to its affordability and workability, while oak offers a more luxurious and sturdy option. Other hardwoods, such as maple or cherry, can also be used to add a unique touch to your window jambs. It’s important to select a wood species that is resistant to moisture and suitable for the specific climate conditions of your location.
What kind of wood do you use for interior window sills
For interior window sills, a variety of wood options can be used depending on your preferences and budget. Solid wood species such as oak, pine, maple, or cherry are popular choices for their natural beauty and durability. Each wood species has its own unique characteristics, grain patterns, and color variations, allowing you to select a material that complements your interior design. Additionally, engineered wood products, such as MDF or composite materials, can offer increased resistance to moisture and enhanced stability for your window sills. Consider factors such as style, maintenance requirements, and budget when selecting the best wood for your interior window sills.
What is the difference between a window sill and a window ledge
The terms “window sill” and “window ledge” are often used interchangeably, but there is a slight difference in their meanings. A window sill refers to the horizontal surface that extends beyond the window, typically on the inside of a building. It provides a platform for placing items or sitting. On the other hand, a window ledge is generally used to describe the horizontal projection on the exterior side of the window, usually part of the exterior wall. While both terms often refer to the same or similar structures, the context and location determine whether we are talking about the interior or exterior part of the window.
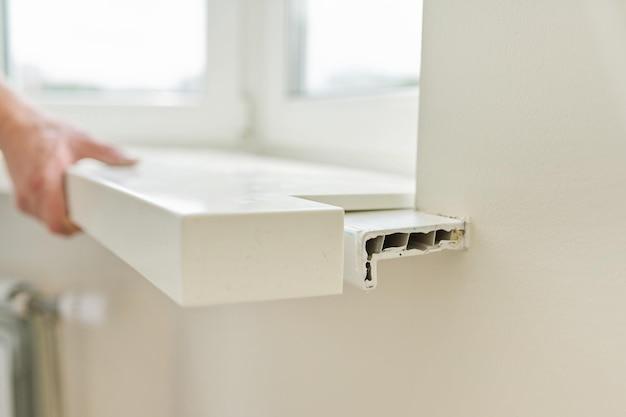
How do you cut an interior window sill
Cutting an interior window sill requires precise measurements and careful execution. Here’s a step-by-step guide:
- Measure and mark the desired length and width of the window sill using a measuring tape and a pencil.
- Use a circular saw or a jigsaw with a fine-toothed blade to make the initial straight cuts along the marked lines.
- Make additional cuts at the corners to remove the excess material, ensuring a clean and precise fit.
- Use a chisel or a router to smooth out the edges and create a finished look.
- Test the fit by placing the window sill in the window opening, making any necessary adjustments for a snug fit.
- Once the window sill fits correctly, secure it in place using screws or construction adhesive, following the manufacturer’s instructions.
- Sand the surface of the window sill to remove any rough edges or imperfections.
- Finish the window sill with paint, stain, or a protective sealant to enhance its appearance and protect it from moisture.
What is best wood for windows
When it comes to choosing the best wood for windows, it is important to consider durability, stability, and resistance to moisture. Hardwoods like oak, mahogany, or teak are excellent choices due to their natural resilience and beauty. These woods have a high natural resistance to decay and moisture, making them ideal for window frames that are constantly exposed to changing weather conditions. Additionally, some engineered wood products, such as clad wood or composite materials, offer enhanced durability and insulation properties while maintaining the beauty of natural wood. Consulting with a window professional or manufacturer can help you determine the most suitable wood type based on your specific needs and location.
Where should you not caulk around windows
While caulk is an essential component for sealing gaps and preventing moisture infiltration around windows, there are specific areas where caulking should be avoided:
- Weep holes: Weep holes are small openings at the bottom of the window frame that allow for water drainage. These holes should remain unobstructed to prevent water from accumulating and causing damage. Do not caulk over or seal weep holes.
- Window tracks: Allow the window tracks to remain uncaulked to ensure the proper movement and function of the windows.
- Hardware components: Avoid caulking over or sealing hardware components such as handles, locks, or hinges. Caulking these areas can interfere with their functionality and make future maintenance or repairs more difficult.
- Exterior window sill edges: The edges of exterior window sills should be left uncaulked to allow for proper drainage of water from the windows.
- Interior window sash gaps: Allow for some airflow between the interior window sash and the frame to prevent condensation and promote ventilation. Avoid caulking these gaps completely.
Do interior windows need a sill
Interior windows do not necessarily require a sill for functionality but having a window sill offers various benefits. A window sill provides a dedicated space to place decorative items, plants, or to enjoy the view by sitting near the window. It can also act as a barrier to prevent items from accidentally falling out of the window. Additionally, a window sill can enhance the overall aesthetic appeal of the window and the surrounding interior space. While not mandatory, a window sill adds functionality, visual charm, and a finishing touch to interior windows.
Is Pine OK for window sills
Pine is a popular choice for window sills due to its affordability, availability, and natural beauty. However, pine is a softwood and may not be as durable as hardwood alternatives. Pine window sills can be suitable for interior use where they are less exposed to harsh weather conditions. To improve the durability of pine window sills, it is important to properly seal them with paint, stain, or a protective sealant. Regular maintenance and monitoring for potential signs of moisture damage are also essential. If you live in an area with high humidity or extreme weather fluctuations, you may want to consider using a more moisture-resistant wood or an engineered wood product for your window sills.
What is the wood under a window called
The wood under a window is commonly referred to as the window sill or window ledge. It is the horizontal surface that extends beyond the window and supports the window frame and glass. The window sill serves both functional and aesthetic purposes, providing a platform for placing items, adding insulation, and enhancing the visual appeal of the window. The term “window sill” or “window ledge” can be used interchangeably to describe this part of the window.
How much overhang should a window sill have
The overhang of a window sill, or the amount it extends beyond the window frame, should typically be around 1 to 3 inches for both aesthetic and functional reasons. This overhang helps to divert water away from the window and prevent it from seeping into the wall or causing damage. Additionally, the overhang provides space for decorative items or seating, adding visual interest and functionality to the window. However, it’s important to consider the overall proportions of the window and the wall to ensure the overhang looks balanced and harmonizes with the surrounding architectural elements.