Welcome to our comprehensive guide on building a crossbuck fence! Whether you’re a homeowner looking to enhance the charm of your property or a farmer in need of a sturdy enclosure for your livestock, a crossbuck fence is a fantastic option that combines functionality and aesthetics. In this blog post, we will walk you through the process of constructing a crossbuck fence, from choosing the right materials to the final installation.
But before we dive into the nitty-gritty details, let’s address some common questions that you might have. Do you need a permit for your fence? What type of wood should you use for the fence rails? How tall should a four-rail fence be? These questions, and many more, are on the agenda for today. So, let’s get started on this exciting journey of building your own crossbuck fence!
Keywords: Do I need a permit to put a fence around my yard?, What type of wood is used for fence rails?, How do you make a rail fence?, How tall should a 4 rail fence be?, How do you build a cross rail fence?, What should you do as you approach a Crossbuck?, Which lasts longer cedar or pressure-treated wood?, How far apart should post and rail fencing be?, How do you build a fence Jack?, How tall is a Crossbuck fence?, What is the cheapest fence to build?, Is it better to use screws or nails on a fence?, How far apart do you put fence posts for horses?, How do I build a cheap horse fence?, How far apart should posts be for post and rail fence?, What wood is used for horse fence?, Do I need pressure-treated wood for fence rails?, What is a Crossbuck fence?, How far apart should fence posts be?

How to Master the Art of Building a Crossbuck Fence
Are you ready to embark on an adventure that would make even the toughest cowboys proud? Well, we’re about to dive deep into the world of building a crossbuck fence. So put on your tool belt and let’s get started!
Choosing the Perfect Materials for Your Fence
When it comes to building a sturdy crossbuck fence, you need to start with the right materials. Look for high-quality, pressure-treated wood that can withstand the test of time and weather. Don’t skimp on the posts and rails – they are the backbone of your fence, after all. And if you want to add some extra flair, consider using galvanized steel for added strength and durability.
Measurements and Planning: No Guesswork Allowed
It’s time to put your math skills to the test. Before grabbing your tools, take accurate measurements of the area where your fence will be installed. You don’t want your fence wandering off into your neighbor’s backyard, do you? Plan the layout carefully, marking the positions of each post and ensuring they are evenly spaced. Remember, a crooked fence is the mortal enemy of any self-respecting cowboy!
Digging Holes: A Workout for Your Muscles and Mind
Now comes the true test of strength – digging the holes. Grab your trusty shovel and start digging holes for the posts. Make sure the holes are deep enough to provide stability. Check for levelness as you go – the last thing you want is a fence that slants like a tipsy cowboy after a night of revelry. Pro tip: put a little gravel in the bottom of each hole to improve drainage and prevent rotting.
Assemble the Crossbucks: It’s Like Putting Together a Puzzle
Ah, the moment you’ve been waiting for – assembling the crossbucks. Attach the rails to the posts with sturdy screws or nails. Use a level to ensure everything is perfectly aligned. If you’re feeling fancy, you can even round the edges of the rails for that authentic rustic look. Remember, a well-assembled crossbuck fence will make your ranch the envy of the entire Wild West!
Finishing Touches: The Devil is in the Details
Congratulations, partner! You’ve almost reached the finish line. Now it’s time to add some finishing touches to make your crossbuck fence stand out. Give it a thorough sanding to smooth out any rough edges. Apply a coat of weather-resistant sealant or paint to protect the wood from the elements. And if you want to showcase your artistic side, why not add some decorative elements like horseshoes or cowboy hats? Yeehaw!
Building a crossbuck fence is no easy feat, but with the right materials, careful planning, and a touch of cowboy spirit, you can create a fence that would make John Wayne himself tip his hat in admiration. So saddle up, grab your tools, and let’s build that legendary fence of yours. Happy fencing, pardner!
FAQ: How To Build A Crossbuck Fence
Do I need a permit to put a fence around my yard?
In most cases, you will need to obtain a permit before putting up a fence around your yard. Different cities or counties might have specific regulations, so it’s essential to check with your local government offices. They can provide you with information about any necessary permits and guidelines you must follow.
What type of wood is used for fence rails?
When it comes to fence rails, there are several options to consider. Cedar and pressure-treated wood are commonly used for fence rails due to their durability and resistance to decay. Both types of wood offer longevity, strength, and a pleasing appearance.
How do you make a rail fence?
Making a rail fence involves a straightforward process. To start, you’ll need to measure the perimeter of your designated area and gather the necessary materials, such as fence rails, posts, and nails or screws. Dig holes for the posts, set them securely, and attach the fence rails horizontally between the posts. Finish by securing everything in place and adding any desired finishing touches.
How tall should a 4 rail fence be?
Typically, a 4 rail fence should be around 4 to 5 feet tall. These measurements provide adequate containment and security while still preserving an open feel. However, you can adjust the height according to your specific needs and preferences.
How do you build a cross rail fence?
To build a cross rail fence, follow these steps:
- Determine the dimensions and layout for your fence.
- Prepare the ground by clearing any obstacles.
- Set the corner posts securely in the ground.
- Attach cross rails horizontally between the corner posts, ensuring they are level and properly spaced.
- Add additional support posts at regular intervals, depending on the fence’s length.
- Secure the cross rails to the support posts, ensuring they are level and sturdy.
- Double-check everything for stability and make necessary adjustments if needed.
What should you do as you approach a Crossbuck?
If you come across a Crossbuck while driving, remember that it indicates a railroad crossing ahead. For safety reasons, slow down, look for oncoming trains, and stop if necessary. Yield to any approaching trains before proceeding. It’s important to exercise caution and follow the appropriate traffic laws when encountering a Crossbuck.
Which lasts longer, cedar or pressure-treated wood?
Both cedar and pressure-treated wood are known for their durability, but pressure-treated wood generally lasts longer. This type of wood undergoes a treatment process that enhances its resistance to rot, insects, and decay. Cedar, on the other hand, naturally contains oils that provide some protection but may require occasional maintenance to prolong its lifespan.
How far apart should post and rail fencing be?
The spacing between posts in a post and rail fence may vary depending on the specific design and material used. As a general guideline, aim to space the posts approximately 8 to 10 feet apart. However, always check local regulations and follow any manufacturer’s recommendations for precise spacing instructions.
How do you build a fence jack?
To build a fence jack, you will need the following materials and tools:
- Two sturdy fence posts
- A long horizontal pole (2×4 or 2×6)
- A car jack
Secure the two fence posts vertically into the ground at the desired location, leaving enough space between them to accommodate the car jack. Then, attach the horizontal pole securely between the two fence posts at a height that allows the car jack to fit underneath. Place the car jack under the horizontal pole, ensuring it is centered and aligned. This fence jack setup will help you maintain tension when installing or repairing a fence.
How tall is a Crossbuck fence?
Typically, a Crossbuck fence stands around 4 to 5 feet tall. However, the specific height can vary depending on personal preference and the intended purpose of the fence. Some people might prefer a slightly taller or shorter Crossbuck fence based on their needs and aesthetic preferences.
What is the cheapest fence to build?
When it comes to cost-effective options, a simple wire fence or chain-link fence is typically the cheapest to build. These types of fences require fewer materials and labor compared to more elaborate fence designs. However, keep in mind that wire fences and chain-link fences may not provide the same level of privacy or aesthetics as other fence options.
Is it better to use screws or nails on a fence?
While both screws and nails can be used to secure your fence, screws generally offer better holding power and durability. They have a lower risk of loosening or popping out over time, especially when subjected to external forces, such as wind or ground movement. Additionally, screws are easier to remove if repairs or adjustments are necessary.
How far apart do you put fence posts for horses?
When installing a fence for horses, the spacing between fence posts is crucial for ensuring proper stability and containment. For most situations, aim to place the fence posts approximately 8 to 10 feet apart. This spacing allows for optimal support and reduces the risk of warping or damage to the fence rails.
How do I build a cheap horse fence?
To build an economical horse fence, consider using materials such as treated wood posts and thick gauge wire. Avoid costly decorative elements and focus on the essential components needed to safely contain the horses. Plan your layout carefully, choose the right materials, and follow proper installation techniques to create a sturdy and affordable horse fence.
How far apart should posts be for post and rail fence?
For a post and rail fence, the spacing between posts is typically between 8 and 10 feet. However, it’s important to note that the distance may vary depending on the specific design and intended purpose of the fence. Always consult local regulations and follow any manufacturer’s recommendations to ensure a structurally sound and aesthetically pleasing fence.
What wood is used for horse fence?
A common wood choice for horse fences is pressure-treated pine. This type of wood offers durability, resistance to decay, and affordability. Pressure-treated pine is strong enough to withstand the elements and the impact of horses, making it a popular choice for creating safe and long-lasting horse fences.
Do I need pressure-treated wood for fence rails?
While pressure-treated wood is not a requirement for fence rails, it is highly recommended. Pressure-treated wood undergoes a treatment process that enhances its resistance to rot, insects, and decay, prolonging its lifespan. By using pressure-treated wood for fence rails, you can help ensure the durability and longevity of your fence.
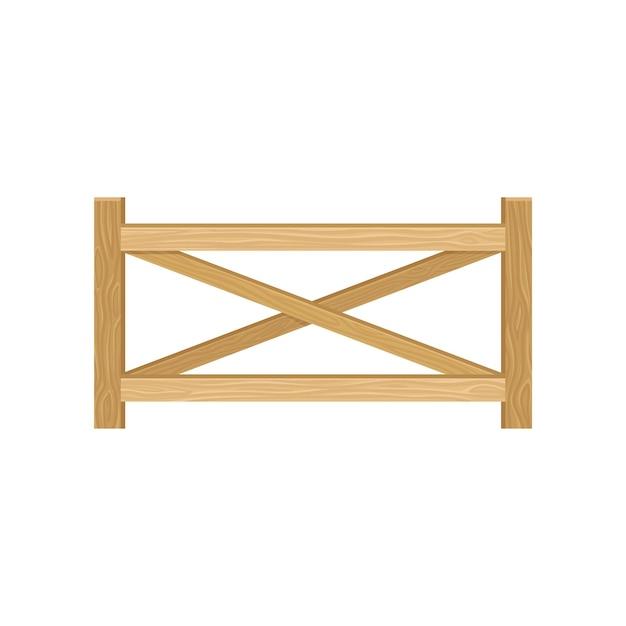
What is a Crossbuck fence?
A Crossbuck fence is a type of fence design that showcases crossed wooden beams, forming an “X” shape. It is commonly associated with railroad crossings and provides both a functional and aesthetic purpose. The Crossbuck design helps indicate the presence of a crossing and adds visual interest to the fence.
How far apart should fence posts be?
The spacing between fence posts can vary depending on different factors, including the type of fence and the local building codes. As a general guideline, the typical spacing for fence posts is around 6 to 8 feet apart. However, for specific requirements, always refer to local regulations and follow any manufacturer’s recommendations to ensure a sturdy and secure fence.