Are you looking to give your cube storage a fresh new look? Adding legs can be a simple yet effective way to transform your storage unit into a stylish and functional piece of furniture. Whether you have a dresser, bookcase, or TV stand, adding legs can elevate its design and make it stand out in any room.
In this blog post, we will explore the process of adding legs to cube storage and provide step-by-step instructions to help you get started. We will also answer common questions such as whether you can add feet to a dresser, if you can put legs on a Billy bookcase, and how to attach legs to IKEA furniture. So, let’s dive in and give your cube storage a makeover that will impress your friends and family!
Keywords: can I add feet to my dresser, can I add legs to Billy bookcase, can I put feet on kallax, how do I spruce up my cube storage, can I put feet on kallax, can you put legs on a cube organizer, how do you put legs on a nightstand, what is the difference between kallax and Eket, how do you attach legs to Ivar cabinets, how do you connect legs to table top, do I have to put the legs on my couch, how do you add legs to IKEA furniture, can I add legs to a TV stand, how do you put sectional legs on, how do you attach chair legs, do Ikea capita legs come with screws, how do you attach legs to a dresser, how do you attach feet to furniture.
How to Amp Up Your Cube Storage Game with Legs
So, you’ve got yourself a trusty cube storage unit. It’s functional, versatile, and oh-so-reliable. But let’s face it, something’s missing. It’s like a well-dressed body without any legs to stand on – just not quite complete. Well, fear not, my fellow storage enthusiasts! In this handy guide, I’ll show you how to add legs to your cube storage like a pro. Trust me, it’s a game-changer!
Materials You’ll Need:
Before we dive into the nitty-gritty of leg installation, let’s gather our materials like a focused squirrel preparing for winter. Here’s the lowdown:
-
Four sturdy legs: wooden or metal, the choice is yours. Just make sure they can handle the weight of your storage unit and the mountains of stuff you plan to store in it.
-
Screws: depending on the type of legs you choose, you’ll need screws to secure them to the base of your cube storage. Opt for something strong and durable – we’re not taking any chances here!
-
Screwdriver: it’s your trusty sidekick in this DIY adventure. Make sure it’s a good fit for the screws you’ll be using.
Step 1: Prepping for Leg Day
First things first, clear the area around your cube storage. You’ll need some maneuvering space to work your magic. Trust me, a cluttered workspace is not conducive to genius-level craftsmanship.
Once you’ve cleared the way, carefully flip your cube storage unit on its back. We’re getting up close and personal with its underbelly, folks – it’s about to get real!
Step 2: Positioning the Legs
Now it’s time to eyeball the perfect spot for your magnificent new legs. Think about the overall aesthetic and functionality you’re aiming for. Want your storage unit to have a hip, mid-century vibe? Position the legs towards the outer edges. Looking for a sleek and modern look? Opt for placing them closer to the center.
Place one leg in each corner of the storage unit’s base. It’s like giving your cube storage its very own superhero stance – ready to tackle clutter and conquer chaos!
Step 3: Securing the Legs
Once you’ve found the sweet spots for your legs, it’s time to bring out the big guns – the screws! Grab your screwdriver and start attaching the legs to the base of your cube storage. Make sure they’re nice and tight, ensuring stability and preventing any wobbly mishaps.
Step 4: The Grand Finale
With the legs safely attached to your cube storage unit, it’s time to stand back and admire your handiwork. Remember, my friend, you’ve just elevated your storage game to new heights – quite literally!
Take a moment to revel in the glory of your newly legged cube storage. Picture it like a majestic gazelle, gracefully prancing through the savanna of your living room or office. Clutter, be warned – your days are numbered!
So, there you have it, fellow storage aficionados! With this simple guide, you’re now equipped to turn your humble cube storage into a stylish and functional masterpiece. It’s time to unleash your inner DIY guru and add some pizzazz to your storage solution. Happy legging!
FAQ: How To Add Legs To Cube Storage
Can I add feet to my dresser
Yes, you can definitely give your dresser a lift! Adding feet to a dresser can instantly transform its look and make it feel more elevated (literally). By attaching stylish legs at the base, you can create a more refined and sophisticated piece of furniture. This simple update can turn your regular old dresser into a statement piece that will have your friends asking where you got it!
Can I add legs to the Billy bookcase
Absolutely! The Billy bookcase is a popular choice for bookworms and organization enthusiasts alike. If you want to add some flair to your Billy bookcase, attaching legs is a fantastic option. By elevating the bookcase, you not only give it some added height but also create an illusion of more space in the room. Plus, it adds a touch of elegance to the overall design. So go ahead and make your Billy bookcase strut its stuff with a set of stylish legs!
Will Kallax hold records
Kallax is not just a pretty face, it’s also incredibly practical! The sturdy construction of Kallax makes it more than capable of holding and organizing your precious record collection. Each shelf is designed to support a significant amount of weight, so you can rest easy knowing your vinyl treasures will be safe and sound. With Kallax, you can showcase your records in style and create a music lover’s paradise!
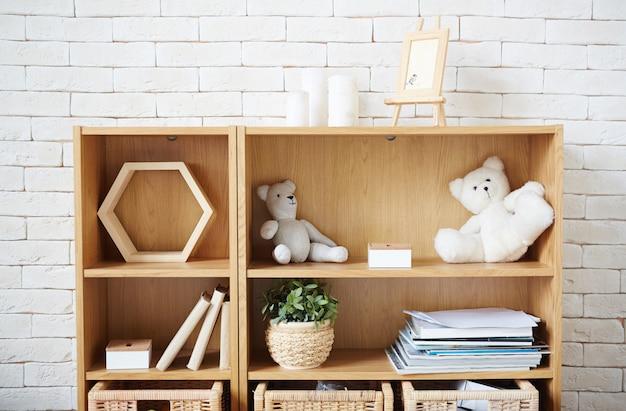
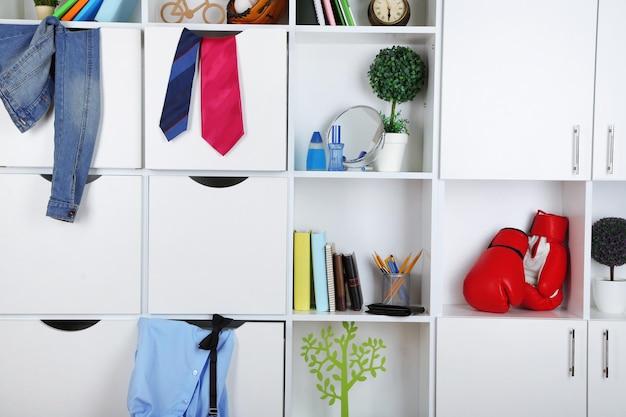
How do I spruce up my cube storage
Ah, the age-old question of how to add a little pizzazz to your cube storage! The good news is, there are plenty of ways to spruce up your cube storage and make it the envy of all your friends. One option is to add decorative fabric bins or baskets to hide clutter and add a touch of color or pattern. Another idea is to incorporate stylish bins or containers that match your room’s decor. Additionally, you can personalize your cube storage by adding decorative labels or even some creative DIY touches. Get creative and have fun with it!
Can I put feet on Kallax
Certainly! Adding feet to your Kallax unit can give it a unique and customized look. Elevating it off the ground not only adds visual interest but also makes it easier to clean under the unit. You can opt for sleek, modern legs or even go for more ornate designs to match your personal style. Whatever style you choose, adding feet to your Kallax is a fantastic way to take its versatility to new heights!
Can you put legs on a cube organizer
Absolutely! Adding legs to your cube organizer is a game-changer. It not only adds stability to the unit but also allows you to easily clean underneath it. By attaching legs to your cube organizer, you can create a more polished and sophisticated look. Plus, it makes moving the unit around a breeze. So go ahead and let your cube organizer stand tall with some stylish legs!
How do you put legs on a nightstand
Adding legs to your nightstand is easier than you might think! First, you’ll want to measure and mark the spots where you want the legs to be attached. Then, using screws or brackets, secure the legs to the bottom corners of the nightstand. Make sure to double-check the stability and adjust as needed. Voilà! Your nightstand is now elevated to new heights, both literally and stylistically.
What is the difference between Kallax and Eket
Kallax and Eket may sound like characters from a Scandinavian sitcom, but they are actually two different series of storage units from IKEA. While both are fantastic options for organization, there are a few notable differences. Kallax units have a more traditional square design, offer more size options, and have pre-drilled holes for easy customization. On the other hand, Eket units have a more modern and minimalist aesthetic, with sleeker lines and a wider variety of color choices. Ultimately, the choice between Kallax and Eket comes down to personal preference and the specific needs of your space.
How do you attach legs to Ivar cabinets
Attaching legs to your Ivar cabinets is a simple and satisfying DIY project. First, determine the desired height of your cabinets and choose legs that match your style. Then, using screws or brackets, securely attach the legs to the base of the cabinets. Make sure to evenly distribute the weight and check for stability. With a little bit of effort, you can transform your Ivar cabinets into stylish and functional pieces that proudly stand on their own four (or more) legs!
How do you connect legs to a tabletop
Connecting legs to a tabletop requires some careful planning and installation. First, you’ll want to make sure you have the right tools and materials, including brackets or hardware specifically designed for attaching legs to tabletops. Measure and mark the spots where the legs will be attached, ensuring they are evenly spaced. Then, using the appropriate screws or brackets, securely attach the legs to the underside of the tabletop. Be sure to check for wobbling and make any necessary adjustments. Now you’re ready to enjoy a table that’s sturdy, stylish, and ready for all your dining or workspace needs.
Do I have to put the legs on my couch
Well, technically speaking, you don’t have to put legs on your couch. However, you’ll definitely want to consider it. Adding legs to your couch can provide a myriad of benefits. It not only enhances the overall look and style of the couch but also makes cleaning underneath a breeze. Plus, it can improve airflow, preventing that musty smell that sometimes lingers in dark, hidden corners. So why not give your couch a lift and let it stand tall on its stylish legs?
How do you add legs to IKEA furniture
Adding legs to IKEA furniture is a popular and rewarding DIY project. First, you’ll want to select legs that complement the style and height you desire. Then, using the provided mounting plates or brackets, attach the legs securely to the bottom of the piece. Make sure to follow the instructions carefully to ensure stability. With a little bit of effort and creativity, you can personalize your IKEA furniture and turn it into one-of-a-kind pieces that reflect your unique style and personality.
Can I add legs to a TV stand
Definitely! Adding legs to a TV stand is a great way to give it a stylish upgrade. By elevating the stand, you create a more open and airy feel in your living space. Choose legs that match the overall design of your TV stand and use brackets or screws to attach them securely. Now you have a TV stand that not only showcases your entertainment center but also adds a touch of sophistication to your room.
How do you put sectional legs on
Putting sectional legs on your furniture is as easy as pie! First, determine the desired height of your sectional and choose legs that fit the style and aesthetic of your furniture. Then, simply attach the legs to the designated spots on the bottom of each section using the provided screws or brackets. Make sure to tighten them securely for stability. Now your sectional is ready to stand tall and be the centerpiece of your living room!
How do you attach chair legs
Attaching legs to a chair is a relatively simple process. First, you’ll want to remove the existing legs if necessary. Then, line up the new legs with the designated spots on the chair’s base. Using screws or brackets, attach the legs firmly, making sure they are evenly spaced. Test for stability by sitting on the chair and adjusting as needed. Now you can enjoy the upgraded look and sturdiness of your newly legged chair!
Do IKEA Capita legs come with screws
Absolutely! When you purchase IKEA Capita legs, they typically come with the necessary screws for installation. IKEA is known for their attention to detail, and they understand the importance of providing everything you need to complete your DIY projects. So you can rest assured knowing that your IKEA Capita legs will arrive complete with screws, making the installation process a breeze.
How do you attach legs to a dresser
Attaching legs to a dresser is easier than you might think! First, measure and mark the desired spots on the base of the dresser where the legs will be attached. Then, using screws or brackets, securely fasten the legs to the dresser. Make sure to distribute the weight evenly and check for stability. Now you have a dresser that not only provides ample storage but also adds a stylish touch to your bedroom decor!
How do you attach feet to furniture
Attaching feet to your furniture is a simple process that can make a big difference in its overall appearance and functionality. First, determine the desired height and style of feet for your furniture. Then, using screws or brackets, attach the feet securely to the base of the furniture. Make sure to evenly distribute the weight and check for stability. Once attached, your furniture will stand proudly on its newly acquired feet, ready to showcase its upgraded look.
And there you have it – a comprehensive FAQ-style guide on how to add legs to cube storage. Whether you’re looking to elevate your dresser, spruce up your cube storage, or transform your IKEA furniture, this guide has got you covered. So go ahead, get creative, and let your furniture stand tall with some stylish legs!