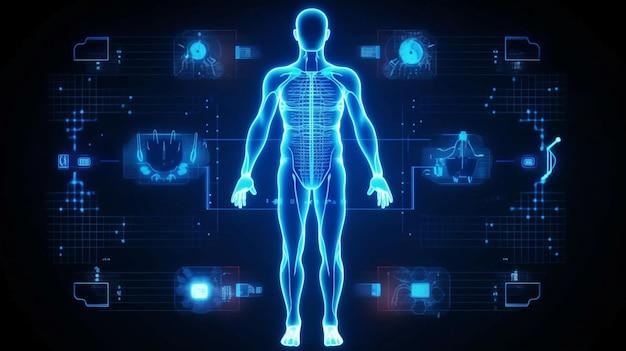
Are you a beginner in the world of Unity game development and looking to add bones to your character model? Look no further! In this comprehensive guide, we will walk you through the process of adding bones to your Unity project.
Adding bones, also known as creating an armature, is an essential step in bringing your 3D character models to life. With bones, you can rig your characters and create realistic animations that add depth and movement to your game. But don’t worry if you’re new to animation – we’ll break down the process in simple, easy-to-understand steps.
Whether you’re a fan of 2D or 3D animation, Unity offers a versatile platform to bring your ideas to life. So let’s dive in and discover how to add bones in Unity and take your game development skills to the next level!
Keywords: How do I add armature to mesh, Is animation really hard, How do I add animations in Unity 3D, Is Bone getting an animated series, What version of Unity is VRChat, Is Unity 3D free, What is IK in unity, Is anime a cartoon, What is fixed joint, Are anime 2D or 3D, Can quest avatars have dynamic bones, What is ellipsoid joint, Is Family Guy in 2D, Is Mango animate free, How do you get bones in Unity, How do you attach things to bone blender, How do you add spring bones in Assassin’s Creed Unity, What are dynamic bones, What is 2d skeletal animation, How do you use spring bones, Which is better 2D or 3D animation, How do you move bones in Assassin’s Creed Unity, How do you add bones to an existing armature?
How To Add Bones in Unity
Welcome back, fellow game developers! Today, we’re diving deep into the intricate world of Unity and exploring the quirky art of adding bones. Yes, you heard that right – we’re giving life to our game characters by adding skeletons to them. But fear not, my friends, because this process is as fun as it is essential for bringing our virtual worlds to life. So grab your thinking caps, flex your creative muscles, and let’s get bone-ing in Unity!
Setting the Stage
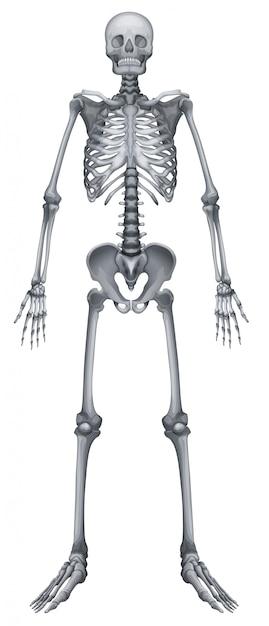
Before we jump headfirst into the bone-addition extravaganza, let’s set the stage for our grand performance. Picture this: you’ve painstakingly crafted a magnificent 3D model for your game character. Its design is on point, its textures are fabulous, but there’s something missing – the ability to move! Fear not, brave developer, for that’s where bones come in. With bones, we can create a skeletal structure that brings our character to life, enabling it to mimic human-like movement and animation. It’s time to give our masterpiece the range of motion it deserves!
Step 1: Rigging Up
To begin our bone-adding adventure, we first need to rig our character. Rigging, my friends, is the magical process of attaching a skeleton to our model. Just like adding an exoskeleton to a bug (without the creepiness), rigging allows us to create a hierarchy of bones that control specific parts of our character. Think puppetry, but with digital strings! So let’s grab our trusty Unity software, put on our rigging hats, and get ready to make our character dance!
Step 2: Bone-ning Connections
Now that our character is rigged up, it’s time to establish connections between those bones. We want our lovely model to have a sense of unity (pun intended!) and cooperation among its skeletal parts. This is where the Unity Humanoid Rigging system truly shines. With this outstanding system, we can define how each bone relates to its neighbors, how they interact, and their limits of movement. After all, we want our character’s bones to work together harmoniously – like a well-choreographed dance routine!
Step 3: Weighing In
If you thought we were done, hold on – we’re just getting warmed up! Now that our bones are connected, we need to assign weights to each one. No, not the kind you find at the gym! In Unity, weights determine how much influence each bone has over a specific vertex or point on our character’s model. Just like a puppeteer gracefully pulling strings, these weights control how our character moves in response to animations. It’s like magic, but with numbers!
Step 4: The Animation Connection
We’re almost there, dear developers! With the bones in place and their weights assigned, it’s time for the grand finale – animations! This is where our character truly comes alive, thanks to the power of Unity’s Animation system. By creating animations that manipulate the bones, we can make our character dance, jump, run, or even moonwalk (if it’s in their style). The Animation system allows us to control bone movements with keyframes, transitions, and a touch of developer creativity. So get ready to play director and bring our character’s movements to the center stage!
And just like that, we’ve unlocked the mystical secret of adding bones in Unity. Our characters can now break free from their static molds and embrace the joy of movement! We’ve rigged, connected, weighed, and animated our way to creating lifelike interactions that will captivate players. So go forth, my friends, and bring your game characters to life with bones – the unsung heroes of the virtual world! Happy developing, until our next bone-tingling adventure!
References
Unity. (2023). Unity Documentation. Retrieved from https://docs.unity3d.com/
FAQ: How to Add Bones in Unity
In this FAQ-style subsection, we’ll explore some common questions about adding bones in Unity, providing you with comprehensive answers and helpful insights. So let’s dive into the wonderful world of armatures, animation, and bone-related queries!
How do I add armature to a mesh
To add an armature to a mesh in Unity, follow these steps:
- Select the mesh object you want to attach an armature to.
- Go to the GameObject menu, then 3D Object, and choose Armature.
- Unity will create an armature that serves as a skeletal structure for your mesh.
- You can modify and adjust the armature by selecting it in the Scene view and using Edit Mode to manipulate the bones.
Is animation really hard
While animation can be complex and time-consuming, it doesn’t have to be as challenging as deciphering an encrypted message from an undercover alien. Unity offers a convenient and user-friendly animation system that allows you to bring life to your creations with relative ease. However, it still requires patience, practice, and a touch of creativity. So put on your animation gloves and prepare to dance with those keyframes!
How do I add animations in Unity 3D
Adding animations in Unity 3D is as easy as giving a high-five to your best buddy. Here’s the scoop:
- Select the object you want to animate in the Hierarchy window.
- Open the Animation window by going to Window > Animation.
- Click the Create button in the Animation window to generate a new animation clip.
- You can then create and manipulate keyframes to bring your object to life. Shake those tweens and make your creation groove!
Is Bone getting an animated series
Oh, wouldn’t that be something! As of now, our friend Bone, the lovable adventurer from Jeff Smith’s graphic novel series, hasn’t made his way to the small screen for an animated adventure. Yet, we can still dream of an epic Bone animated series that combines humor, adventure, and epic storytelling. Keep your fingers crossed, and let’s hope our bony hero gets his time in the spotlight someday!
What version of Unity is VRChat
While VRChat itself is built with Unity, it’s like that spicy salsa you love – it comes in different flavors! Currently, VRChat is based on Unity 2019.4 LTS (Long Term Support). But remember, technology keeps evolving faster than a cheetah on roller skates, so future VRChat versions may vary. Stay up to date with the latest VRChat shenanigans to know the exact Unity version they’re rocking!
Is Unity 3D free
Ladies and gentlemen, prepare to be pleasantly surprised! Unity offers a version called Unity Personal that is absolutely free, like a magical unicorn granting you access to a world of creation without any cost. With Unity Personal, you can build your games, create mind-blowing interactive experiences, and embark on endless artistic adventures. So go forth, fellow creator, and let the world marvel at your masterpiece!
What is IK in Unity
IK stands for Inverse Kinematics, but let’s not get overwhelmed by fancy terms. In simple words, IK is like having your own personal wizard who magically calculates the movement of bones based on the positions of other objects. It saves you time and effort, enabling your virtual characters to interact with their surroundings more realistically. So think of IK as the secret ingredient that gives your animations that extra sprinkle of realism!
Is anime a cartoon
Ah, the age-old debate that has stirred the souls of otakus and cartoon enthusiasts alike! Technically, anime refers to animation originating from Japan, while cartoons encompass a broader range of animated content. So you could say that all anime are cartoons, but not all cartoons are anime. Whether you’re Team Anime or Team Cartoon, let’s continue embracing the wonderful world of animated storytelling in all its diverse forms!
What is a fixed joint
A fixed joint is like an unbreakable bond between two objects, keeping them tightly together like a pair of magnets that refuse to let go. In Unity, a fixed joint allows you to connect two rigid bodies in a way that they move as a single entity. It’s perfect for creating structures, simulating hinges or sturdy connections, and even building your own virtual Frankenstein’s monster. The power of unity compels you to harness the might of fixed joints!
Are anime 2D or 3D
Ah, the world of anime, where dragons soar, emotions run high, and 2D rules the realm! While some anime productions incorporate 3D elements, the core essence of anime lies predominantly in its 2D artistry. Those dreamy eyes, the expressive gestures, and the beautifully hand-drawn worlds make anime a visual feast for the senses. So let’s cherish the magic of 2D animation that has captivated hearts around the globe!
Can quest avatars have dynamic bones
Indeed, they can! Quest avatars can don the mystical power of dynamic bones, granting them flexible and physics-driven movement. However, it’s important to keep in mind that Quest devices have certain performance limitations. To ensure optimal performance and avoid melting your GPU like a popsicle in the desert, it’s recommended to use dynamic bones sparingly and cleverly. So go forth, mighty Quest avatar, and frolic with physics-based delight!
What is an ellipsoid joint
An ellipsoid joint might sound like a mysterious alien technology, but it’s just another fascinating component in Unity. In simple terms, an ellipsoid joint allows you to simulate a connection between two objects in a way that they interact as if linked by an elliptical shape. This versatile joint opens doors for creating different types of movements, rotations, and even wacky contraptions that defy the laws of nature. Embrace the power of ellipsoids and let your imagination run wild!
Is Family Guy in 2D
Ah, Family Guy, the hilarious animated series that has tickled our funny bones for years! While it mesmerizes us with its vibrant characters and witty humor, Family Guy is primarily a 2D production. However, it incorporates occasional 3D elements, like Peter Griffin’s positively spherical belly or Stewie’s diabolical gadgets. Thus, Family Guy is like a colorful blend of 2D and 3D, delivering comedy gold in its signature animated style!
Is Mango animate free
Sadly, no. As of 2023, Mango Animate is not available as a free software. But don’t let that discourage you, aspiring animator! There are several free alternatives out there that can quench your thirst for animation adventures. So dive into the world of open-source animation tools, unleash your creative prowess, and bring your characters to life without spending a single dollar!
How do you get bones in Unity
Getting bones in Unity is easier than making a skeleton crew of disco-loving zombies! Just follow these simple steps:
- Create or import a 3D model with a skeletal structure, often called an armature.
- Select the 3D model in the Project window.
- In the Inspector window, check the Rig tab.
- Choose the desired Animation Type (e.g., Humanoid or Generic).
- Click the Configure button next to Avatar Definition.
- Unity will automatically generate a humanoid avatar with bones ready to groove!
How do you attach things to bone blender
Ah, the art of attaching things to bones in Blender! Here’s a quick rundown to get you started:
- Open your Blender project, ideally one not haunted by mischievous spirits.
- Go to the Scene collection and find your desired object or mesh.
- Select the object and press Shift + S.
- Choose Cursor to Selected to move the cursor to the object’s origin point.
- Select the object you want to attach to the bone.
- Shift-select the armature structure containing the desired bone.
- Go to Object > Parent > Object and, voila, the object becomes connected to that bone!
- You can now perform impressive feats, like making a puppet dance or causing a mesh to morph in unspeakable ways!
How do you add spring bones in Assassin’s Creed Unity
Alas, adding spring bones in Assassin’s Creed Unity isn’t a feature out of the Animus simulation. Spring bones, which create realistic and bouncy movements, are typically used in game engines like Unity to enhance character animations. However, the glorious realm of modding might hold secret treasures that unlock these springy wonders in your personal Unity adventures. Just remember to abide by the Creed and consult the Animus gods for guidance!
What are dynamic bones
Dynamic bones are the magical ingredients that bestow realistic and physics-driven movement upon your creations, like sprinkling a little pinch of wonder dust. In Unity, dynamic bones refer to a system that allows you to add secondary motion to objects or characters. Whether it’s hair gently swaying in the breeze or a tail wagging with enthusiasm, dynamic bones bring life and vitality to your animations. Let the laws of physics guide you as you master the art of dynamic movement!
What is 2D skeletal animation
Prepare to embark on a fascinating journey through the realms of 2D skeletal animation, where characters come alive like puppets on a whimsical stage! In its essence, 2D skeletal animation involves breaking down characters into separate bones and limbs, allowing for more flexible and dynamic movement. With the power of software like Unity, you can manipulate these bones and create fluid and mesmerizing animations. So let the strings of creativity guide your characters’ dance!
How do you use spring bones
Using spring bones in Unity is like watching a trampoline transform into a ballet dancer right before your eyes! Here’s a quick step-by-step guide to get you started:
- Import and set up the respective Unity plugin that provides spring bone functionality.
- Create an armature or skeletal structure that defines the bones.
- Attach the desired spring bones to specific bones in your armature.
- Configure the spring bone properties, such as stiffness and damping, to achieve the desired effect.
- Add colliders where necessary to ensure the spring bones interact with the environment or other objects.
- Press play, and behold the magnificent dance of spring bones in action!
Which is better, 2D or 3D animation
Ah, the eternal clash between dimensions! The answer to this question depends on your personal preferences, the project requirements, and the story you want to tell. 2D animation captures the essence of soulful artistry, while 3D animation adds depth and realism to your creations. The key lies in finding the style that best suits your vision and brings your narrative to life in the most captivating way. So embrace the dimension that resonates with your artistic heart, dear animator!
How do you move bones in Assassin’s Creed Unity
Ah, the dance of the bones in Assassin’s Creed Unity! To move bones in Unity, follow these steps:
- Open the Unity Inspector window.
- Select the armature or skeletal structure containing the bones you want to move.
- Enter Pose Mode by clicking the respective button.
- Now you can manipulate individual bones by selecting and rotating or translating them.
- Let your creative instincts guide their movement, just like a dance choreographer shaping his troupe!
- Remember to have fun and enjoy the mesmerizing art of bone manipulation!
How do you add bones to an existing armature
To add bones to an existing armature in Unity, follow these simple steps:
- Select the armature you want to expand in the Hierarchy window.
- Go to Pose Mode by clicking the respective button.
- Select a bone that will serve as the parent for the new bone you’re adding.
- Press Shift + S and choose Cursor to Selected to place the cursor at the selected bone’s position.
- Go to Add > Single Bone.
- Unity will create a new bone connected to the selected parent bone.
- Repeat the process for each additional bone you wish to add, expanding your armature like the branches of a growing tree!
This concludes our FAQ-style exploration of adding bones in Unity. We hope these questions and answers have provided you with clarity, inspiration, and a touch of bone-related amusement! Now go forth, fellow digital puppeteer, and create animations that will make your virtual characters dance with joy!