Welcome to our blog post on a common question for DIY enthusiasts: How much adhesive is needed for vinyl flooring? Installing vinyl flooring can be a cost-effective and versatile option for beautifying your home. But before you dive into this project, it’s essential to understand the adhesive requirements to ensure a successful installation.
In this blog post, we’ll address the different factors that influence the quantity of adhesive needed for vinyl flooring. We’ll also explore other related questions, such as whether adhesive is necessary, how to remove adhesive from vinyl flooring, and how to prep a concrete floor for vinyl installation. By the end, you’ll have a clear idea of the amount of adhesive required, along with useful tips to make your vinyl flooring installation a smooth and stress-free process.
So, let’s dive right in and discover the secrets to perfectly installing vinyl flooring with the correct amount of adhesive. But first, let’s answer the question, “Do you need adhesive for vinyl flooring?”
How Much Adhesive Do I Need For Vinyl Flooring
So you’ve decided to upgrade your floors with vinyl flooring. Congratulations! Now comes the important question: How much adhesive do you actually need? Don’t worry, we’ve got you covered. In this guide, we’ll dive deep into the world of vinyl flooring adhesive and help you determine the right amount to ensure a seamless installation.
The Magic Formula: Floor area + Waste factor = Total adhesive needed
Let’s start with the basics. The amount of adhesive you need for your vinyl flooring installation depends on two key factors: the floor area you’ll be covering and the waste factor. The floor area is simply the size of the room or space you’ll be flooring. The waste factor, on the other hand, accounts for any irregularities, errors, or simply the offcuts you’ll need to discard during the installation process.
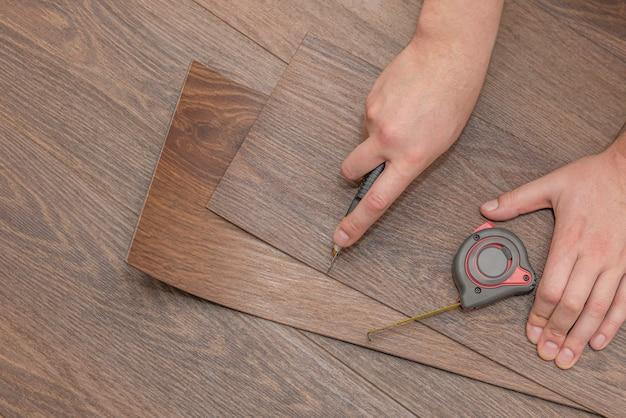
Measuring the Floor Area
To determine the floor area, grab your trusty measuring tape and measure the length and width of the room. Multiply these two numbers together to get the total square footage or square meters. If your room has any alcoves or protrusions, make sure to measure and calculate those separately before adding them to the total.
The Dreaded Waste Factor
Ah, waste—every DIYer’s nemesis. While it’s tempting to skip this step and hope for the best, trust us, accounting for waste is crucial for a successful vinyl flooring installation. The waste factor generally ranges from 5% to 20%, depending on the complexity of the room layout and your skill level.
For simple rectangular rooms, a waste factor of around 10% should suffice. However, if you have a complex layout with lots of corners, alcoves, or angles, it’s best to go with a waste factor of 15% or even 20% to be on the safe side. Remember, it’s always better to have a little extra than to run out of adhesive mid-installation!
Time to Crunch the Numbers
Now that you have your floor area and waste factor, it’s time for some good old-fashioned math. Multiply the floor area by the waste factor (in decimal form) to get the extra square footage or square meters needed for waste. Round up to the nearest whole number to ensure you have enough adhesive. Add this number to the original floor area to calculate the total area you’ll be covering.
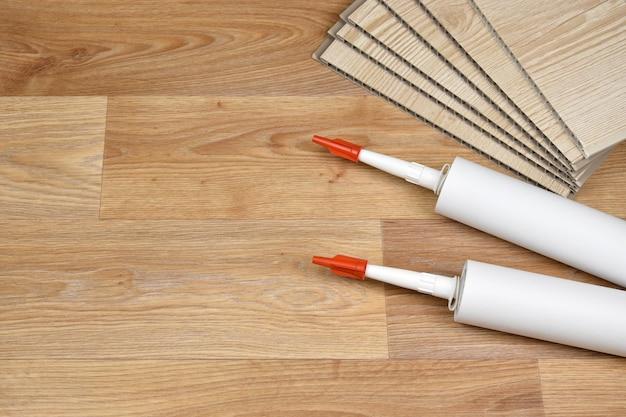
Adhesive Coverage: The Fine Print
Before you rush off to buy the adhesive, it’s important to understand how the product is typically labeled. Adhesive coverage is measured in square feet per gallon (or square meters per liter) and can vary depending on the type and brand of adhesive you choose. The typical coverage for vinyl flooring adhesive ranges from 150 to 200 square feet per gallon (or 3.7 to 4.9 square meters per liter).
To find out how many gallons (or liters) of adhesive you need, divide the total area by the adhesive coverage. Round up to the nearest whole number to ensure you have enough adhesive to cover the entire installation.
Don’t Forget the Acclimation Period
Before you go all-in with the adhesive, remember that vinyl flooring needs to acclimate to its environment before installation. This usually involves leaving the flooring in the room where it will be installed for at least 24 to 48 hours before starting the installation process. Be sure to account for this acclimation period when estimating the amount of adhesive you’ll need.
A Quick Recap
To summarize, here’s a step-by-step guide to determining how much adhesive you need for vinyl flooring:
- Measure the length and width of the room to calculate the floor area.
- Determine the waste factor based on the complexity of your room.
- Multiply the floor area by the waste factor to get the extra square footage or square meters needed for waste.
- Add the waste to the original floor area to get the total area you’ll be covering.
- Check the adhesive coverage label to find out how many square feet or square meters the adhesive will cover per gallon or liter.
- Divide the total area by the adhesive coverage to determine the number of gallons or liters you need.
- Account for the acclimation period before starting the installation.
Follow these steps, and you’ll be well-equipped to tackle your vinyl flooring project with confidence. Remember, it’s always better to buy a little extra adhesive than to be left short-handed. Happy flooring!
Get Rolling with Your Vinyl Flooring Project
Now that you know how much adhesive you need for your vinyl flooring installation, it’s time to roll up your sleeves and get to work. Enjoy the process, embrace the occasional DIY mishap, and soon you’ll be enjoying your beautiful, durable, and easy-to-clean vinyl floors. Good luck, and may your floors be forever in your favor!
FAQ: How Much Adhesive Do I Need for Vinyl Flooring
Do you need adhesive for vinyl flooring?
Yes, adhesive is typically required for vinyl flooring installation, especially for glue-down vinyl. Adhesive ensures a secure bond between the flooring and the subfloor, preventing shifting or movement over time.
How do you remove vinyl flooring adhesive?
Removing vinyl flooring adhesive can be a sticky situation, but fear not! Here are the steps:
1. First, try scraping off as much adhesive as possible using a putty knife or scraper.
2. If there is still adhesive residue left, apply a commercial adhesive remover according to the manufacturer’s instructions.
3. Allow the adhesive remover to sit for the recommended time, then gently scrape or wipe away the loosened adhesive.
4. Finally, clean the floor thoroughly to ensure a smooth surface for your new flooring.
Can vinyl flooring be glued to concrete?
Absolutely! Vinyl flooring can be glued directly to a concrete subfloor. However, proper surface preparation is crucial to ensure a strong bond. Make sure the concrete is clean, dry, and free of any cracks or imperfections that could affect adhesion.
Do I need to screed a concrete floor for vinyl?
In most cases, screeding is not necessary for installing vinyl flooring over a concrete subfloor. However, if your concrete floor is uneven or has significant imperfections, screeding can help create a level surface. Consult a flooring professional to determine if screeding is necessary for your specific situation.
What adhesive do you use to put down vinyl flooring?
When it comes to adhesive for vinyl flooring, you’ll want to choose a high-quality vinyl flooring adhesive specifically designed for your type of vinyl flooring. Follow the manufacturer’s instructions and recommendations for the best results. It’s always a good idea to consult with a flooring specialist to determine the right adhesive for your particular vinyl flooring.
How do you stick vinyl flooring to concrete?
To stick vinyl flooring to concrete, follow these steps:
1. Ensure that the concrete subfloor is clean, dry, and free of any dust, dirt, grease, or debris.
2. Apply the recommended adhesive evenly to the subfloor using a trowel or a recommended application method.
3. Lay the vinyl flooring onto the adhesive, pressing it firmly into place.
4. Use a roller or a weighted object to ensure proper adhesion and remove any air bubbles.
5. Allow the adhesive to dry completely before placing any furniture or walking on the flooring.
Is it better to glue or float vinyl plank flooring?
Both methods have their pros and cons, so it ultimately depends on your specific needs and preferences. Glue-down vinyl plank flooring offers exceptional stability and minimizes movement, while floating vinyl plank flooring allows for easier installation and potential reuse in the future. Consider factors such as subfloor condition, desired installation time, and personal preference when deciding which method is best for you.
Do you need a moisture barrier under vinyl flooring?
In most cases, a moisture barrier is not required for vinyl flooring. However, if you are installing vinyl flooring in a high-moisture area such as a basement or a bathroom, it’s a good idea to use a moisture barrier to provide an extra layer of protection against potential moisture damage. Consult with a flooring professional to assess your specific situation.
What are the problems with vinyl plank flooring?
Vinyl plank flooring has many advantages, but like any other flooring material, it’s not without its potential issues. Some common problems with vinyl plank flooring include:
1. Scratches and dents from heavy furniture or sharp objects.
2. Moisture damage if not properly installed or in high-moisture areas.
3. Fading or discoloration when exposed to direct sunlight over time.
4. Peeling or curling edges if adhesive is not applied correctly.
5. Difficulty repairing individual planks as they are often interlocked.
Can I use Liquid Nails on vinyl flooring?
While Liquid Nails is a popular adhesive for various projects, it’s not recommended for use with vinyl flooring. Vinyl flooring requires specific adhesives designed for its installation to ensure a proper bond and longevity. Using the wrong adhesive can result in poor adhesion, lifting, or other problems with your vinyl flooring. Consult the manufacturer’s recommendations or seek professional advice for the best adhesive to use.
How do you prepare a floor for vinyl flooring?
To prepare a floor for vinyl flooring installation, follow these steps:
1. Remove any existing flooring, such as carpet, tile, or hardwood, and thoroughly clean the subfloor.
2. Repair any cracks, holes, or uneven areas on the subfloor.
3. Ensure the subfloor is clean, dry, and free of dust, grease, or debris.
4. If necessary, apply a recommended primer or sealer to improve adhesion and prevent moisture penetration.
5. Allow the primer or sealer to dry completely before proceeding with the vinyl flooring installation.
Do you need an expansion gap for vinyl flooring?
Yes, an expansion gap is essential for vinyl flooring, just like with other types of flooring. This gap allows for natural expansion and contraction of the material due to changes in temperature and humidity. Consult the manufacturer’s instructions for the recommended size of the expansion gap based on the specific vinyl flooring you are installing.
Do I need underlayment for vinyl flooring with attached pad?
If your vinyl flooring already has an attached pad, you generally don’t need an additional underlayment. However, it’s crucial to follow the manufacturer’s recommendations. Some vinyl flooring products may require an underlayment for specific installation scenarios or to address subfloor irregularities. Always consult the manufacturer’s instructions and product specifications to ensure proper installation.
What happens if you don’t put underlayment under vinyl plank flooring?
Without proper underlayment, you may experience several issues when installing vinyl plank flooring:
1. Reduced comfort and cushioning underfoot, especially on hard subfloors.
2. Increased noise transmission, as underlayment helps reduce impact sound.
3. Poor subfloor protection, as underlayment acts as a moisture barrier and can help prevent damage caused by subfloor imperfections.
4. Potential voiding of warranty if the manufacturer requires underlayment for proper installation.
It’s important to note that underlayment requirements may vary based on specific vinyl plank flooring products, so always refer to the manufacturer’s instructions.
Can you use Evo stick on vinyl?
Evo-Stik is a well-known brand of adhesive, but it’s not typically recommended for use on vinyl flooring. It’s crucial to choose an adhesive specifically designed for vinyl flooring to ensure proper adhesion and long-term durability. Using the wrong adhesive can lead to issues such as adhesive failure or lifting of the vinyl flooring. Check the manufacturer’s recommendations or seek professional advice for the best adhesive to use.
How much vinyl adhesive do I need?
The amount of vinyl adhesive you need depends on various factors, including the size of the room, the type of vinyl flooring, and the recommended coverage rate of the adhesive manufacturer. Always refer to the product instructions or consult a flooring professional to determine the precise amount of adhesive required for your specific installation. Remember, it’s better to have a little extra than not enough!
Can you use spray adhesive on vinyl flooring?
While some spray adhesives may work for certain applications, it’s generally not recommended to use spray adhesive for vinyl flooring installation. Spray adhesives may not provide the necessary bond strength and may result in lifting or other issues. It’s best to choose an adhesive specifically formulated for vinyl flooring and follow the manufacturer’s instructions for optimal results.
Do you put anything under vinyl flooring?
In most cases, you don’t need to put anything under vinyl flooring. However, depending on the specific vinyl flooring product and installation scenario, an underlayment or moisture barrier may be recommended. Always consult the manufacturer’s instructions to determine if any additional layers, such as underlayment or padding, are necessary for your vinyl flooring installation.
Can I install vinyl flooring myself?
Absolutely! Many vinyl flooring options are designed for DIY installation. With proper preparation, the right tools, and following the manufacturer’s instructions, you can achieve professional-looking results. However, if you are unsure or have a complex installation situation, it’s always advisable to consult a flooring professional for guidance and assistance.
Why is my vinyl floor not sticking?
If your vinyl floor is not sticking properly, several factors could be at play:
1. Surface preparation: Ensure that the subfloor is clean, dry, and free of any debris that could prevent proper adhesion.
2. Incorrect adhesive: Verify that you are using the correct adhesive for your particular vinyl flooring and subfloor type.
3. Insufficient adhesive application: Make sure you have applied the adhesive evenly and in the recommended amount.
4. Ambient conditions: Check that the temperature and humidity levels during installation were within the manufacturer’s recommended range.
If problems persist, consult a flooring professional for further evaluation and guidance.
What can I put under vinyl flooring on concrete?
When installing vinyl flooring on concrete, it’s generally recommended to use a moisture barrier or vapor retarder to prevent moisture-related issues. This barrier can be made of materials such as polyethylene or specialized moisture barrier underlayment specifically designed for vinyl flooring. Always follow the manufacturer’s instructions and consult with a flooring professional to determine the best option for your specific installation scenario.
Remember, successful vinyl flooring installation relies on proper preparation, following manufacturer guidelines, and occasionally seeking professional advice. With the right approach and a dash of DIY spirit, you’ll have stunning vinyl flooring that sticks with style and durability.