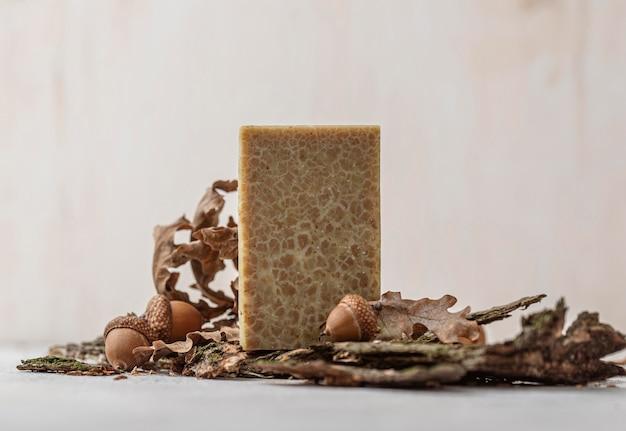
Salt bars are a popular choice among soap enthusiasts for their unique texture and skin benefits. If you’re wondering how long it takes for DIY salt bars to cure, you’ve come to the right place. In this blog post, we’ll explore the curing process of salt bars and provide you with essential tips to ensure your bars turn out perfectly.
Curing is a crucial step in soap making that allows the bars to harden and for any excess moisture to evaporate, resulting in a longer-lasting and milder soap. While the curing time for traditional cold process soaps is typically around 4-6 weeks, salt bars require a bit more patience. These bars contain a high concentration of salt, which can extend the curing time to 6-8 weeks or even longer. So, if you’re planning to make DIY salt bars, make sure you allocate enough time for the curing process.
Now that you know the general timeframe for curing DIY salt bars, let’s dive deeper into the process and explore some common questions related to salt bars, packaging, and more. So, grab your apron and let’s get started on our salt bar adventure!

How Long Do DIY Salt Bars Take to Cure
Curing, much like waiting for your favorite TV show to release new episodes, requires patience. But unlike waiting for your show to return, you can’t binge-watch your salt bars once they’re cured—they have other plans! So, if you’re wondering how long it takes for your DIY salt bars to cure, grab a snack, get comfortable, and let’s dive into the salty world of soap making.
The Waiting Game: Awaiting Salt Bar Perfection!
Curing, a Magical Transformation
When it comes to DIY salt bars, curing is the secret sauce that transforms a humble mixture of ingredients into a delightful, skin-loving soap. During the curing process, soap undergoes a chemical reaction called saponification—where the oils and lye combine to create soap and glycerin. This chemical ballet takes time to unfold and develop that rich, luxurious lather we all know and love.
Setting Realistic Expectations
Now, come close, let’s set some expectations, shall we? While it would be marvelous if salt bars could cure overnight, unfortunately, they don’t follow our impatient whims. You’ll need to give them some time to perform their magic. Remember, good things come to those who wait!
So, How Long Will It Take
The Standard Cure Duration
On average, DIY salt bars take around 4 to 6 weeks to cure properly. During this time, moisture evaporates from the soap, making it harder and milder. Think of it as a wise old wizard gaining power and wisdom with each passing day. So, resist the temptation to rush into using your soap too soon; you’ll thank yourself for it in the end!
Factors That Influence Curing Time
Now, don’t get discouraged if your salt bars seem slower than a sloth on a lazy Sunday. Several factors can influence the curing time. The salt type, bar size, fragrance, humidity, and even the phase of the moon (well, maybe not the last one) can all play a role in how long it takes for your salt bars to reach their prime.
The Waiting Game: Tips and Tricks
Channeling Your Inner Zen
While your salt bars work their magic, it’s crucial to find your inner Zen and embrace the art of patience. Resist the temptation to poke, prod, or rush the curing process. Remember, a watched pot never boils, and a constantly poked salt bar won’t cure faster. Distractions, hobbies, or binge-watching other shows can help you pass the time in a delightful way.
Keeping Track
To avoid slipping into a parallel universe where time stands still, keep a log to document when you made your salt bars and when the anticipated cure date will arrive. This way, you can celebrate the countdown and keep yourself motivated during the waiting game. Marking the calendar is like crossing off the days until your favorite show returns!
The Final Countdown: It’s Worth the Wait!
Reaping the Rewards
Finally, the moment arrives—you’ve reached the end of the waiting game! As your salt bars complete their curing journey, they transform into the perfect blend of cleansing and moisturizing goodness. You’ll be rewarded with a long-lasting, creamy lather that will make your skin sing with joy. Trust us, it’s worth every second in the land of patience!
So, my friend, as tempting as it may be to rush things, allow your DIY salt bars the time they need to mature and transform into magnificent treats for your skin. Remember, just like waiting for your favorite show, the anticipation and suspense make the final outcome all the more satisfying. Now go forth, embark on your salt bar journey, and let the patience game begin!
FAQ: How Long For DIY Salt Bars To Cure
How do you prevent salt bars from sweating
One of the challenges with salt bars is that they tend to attract moisture and sweat. However, you can take several measures to minimize this issue:
- Use a dehumidifier in the curing area to control the humidity levels.
- Opt for a well-ventilated space that allows air circulation, reducing the chances of condensation.
- Wrap the salt bars in breathable materials like wax paper or unbleached parchment paper, which absorb excess moisture while still allowing the bars to cure.
How can I package soap without plastic
For eco-conscious soap packaging, try these alternative options that eliminate the need for plastic:
- Wrap your soap in recyclable materials like biodegradable kraft paper, which not only reduces waste but also gives your soap an attractive rustic look.
- Consider using reusable and sustainable packaging, such as bamboo soap dishes or cotton muslin bags, which can be used to store or transport the soap.
How do I keep my bar soap dry
To prolong the life of your soap and prevent mushiness, follow these tips:
- Invest in a soap dish with drainage holes that allows water to drain away from the soap, keeping it dry between uses.
- Avoid leaving soap in standing water or high humidity areas, as this can hasten the soap’s dissolution.
- Allow soap to fully air dry between uses by placing it on a soap rack or an elevated dish that promotes air circulation.
Can I use pink Himalayan salt in cold process soap
Absolutely! Pink Himalayan salt can be a fantastic choice for cold process soap. Not only does it provide exfoliating properties, but it also adds a beautiful natural color to your bars. Just remember to grind the salt to avoid any sharp edges that may irritate the skin.
Is sodium lactate considered a salt
While the name might suggest otherwise, sodium lactate is not your typical table salt. It is a derivative of lactic acid, a chemical compound found in milk. Sodium lactate is often used in soap making as a humectant, which helps retain moisture and prolong the soap’s shelf life.
What role does sea salt play in cold process soap
Sea salt serves multiple purposes when used in cold process soap making:
- It helps harden the soap, making it longer-lasting and less likely to dissolve quickly.
- Sea salt also provides a gentle exfoliation effect, allowing dead skin cells to slough off, leaving behind a refreshed and smoother skin texture.
- Additionally, the minerals present in sea salt can provide some nourishing benefits to promote healthy skin.
How do you incorporate Himalayan pink salt into soap making
To add Himalayan pink salt to your soap, follow these steps:
- Grind the salt using a coffee grinder or a mortar and pestle to achieve a finer consistency.
- Prepare your soap mixture as usual, whether it’s a cold process or hot process recipe.
- Once the soap reaches a light trace, add the ground Himalayan pink salt and blend it evenly into the soap batter.
- Pour the soap mixture into your desired mold and allow it to cure for the recommended time.
Can I substitute salt for sodium lactate in soap making
While both salt and sodium lactate can have similar effects on soap, they are not direct substitutes. Salt can help harden the soap and provide exfoliation, but it doesn’t offer the same humectant properties that sodium lactate does. If you don’t have sodium lactate on hand, you can experiment with using salt as an alternative, though the results may vary.
How do I prevent soap from becoming soggy
To prevent your soap from turning into a soggy mess, try these preventative measures:
- Ensure your soap has proper drainage by using a soap dish or soap saver with grooves or holes to allow excess water to escape.
- Keep the soap away from direct contact with water or splashback from showers and faucets.
- Store unused soap bars in a dry, well-ventilated area, away from humidity and moisture sources.
Why does my soap turn mushy
Soap can turn mushy when it absorbs excess moisture. Factors that contribute to mushiness include:
- Insufficient curing time: If the soap hasn’t had enough time to cure and dry properly, it can soften and lose its firmness.
- Exposure to high humidity: Humid environments can introduce moisture to the soap, causing it to lose its original texture.
- Inadequate drainage: If the soap is constantly exposed to standing water or lacks proper drainage, it can become mushy over time.
Is sea salt soap beneficial for the skin
Yes, sea salt soap can be highly beneficial for the skin. Its mineral content, which includes magnesium, potassium, and calcium, can help nourish, exfoliate, and cleanse the skin. Sea salt soap has been known to assist in detoxifying the skin, promoting a smoother complexion and potentially soothing certain skin conditions.
How should I package my homemade soap
When it comes to packaging your homemade soap, you have a few options:
- Wrap the soap in eco-friendly and biodegradable materials like brown kraft paper, colorful tissue paper, or even fabric scraps tied with twine.
- Utilize attractive soap boxes made from recycled or recyclable materials to protect the soap and create a visually appealing presentation.
Can I incorporate sea salt into my cold process soap
Yes, you can certainly add sea salt to your cold process soap. It can enhance the hardness of the soap bar and provide exfoliation properties. However, it’s important to note that when using salt in cold process soap, it’s necessary to ensure your recipe has enough oils to compensate for the potential drying effect of the salt.
Is sodium lactate the same as table salt
No, sodium lactate is not the same as table salt. Sodium lactate is a sodium salt derived from lactic acid, while table salt is sodium chloride. Sodium lactate is commonly used in soap making as a humectant and preservative, while table salt is generally not used in soap making due to its potential drying effect on the skin.
How does salt affect soap making
Salt can have several effects on soap making:
- Hardening: Salt can help make the soap bar harder, allowing it to last longer and resist mushiness.
- Exfoliation: The addition of salt particles provides gentle exfoliation, removing dead skin cells and leaving the skin soft and smooth.
- Lather enhancement: Salt can contribute to increasing the lather of soap, creating a more satisfying cleansing experience.
Can I add sea salt to my black soap recipe
Certainly! Adding sea salt to your black soap recipe can be an excellent choice. The combination of sea salt’s exfoliating properties with the nourishing benefits of black soap can result in a fantastic skincare product. Just ensure you adjust the amount of water added and consider the potential drying effects of salt.
Can I incorporate Himalayan salt into my soap recipe
Yes, Himalayan salt can be a delightful addition to your soap recipe. Its unique pink color and exfoliating properties can enhance the visual appeal and texture of your soap. Remember to grind the salt to a finer consistency to avoid sharp edges that may scratch the skin.
Why is common salt added during soap making
Common salt, also known as table salt or sodium chloride, is occasionally added to soap making for specific purposes, such as:
- Increasing hardness: Salt helps make the soap bars longer-lasting and firm.
- Enhancing soap color: In some cases, common salt can intensify the soap’s color by reducing oxidation during the curing process.
- Controlling lather: Salt can impact the viscosity of soap, allowing for variation in the lathering properties.
What type of paper is suitable for wrapping soap
Wrapping soap in an attractive and functional way is essential. Consider using materials like:
- Wax paper: It is an excellent choice for wrapping soap as it absorbs excess moisture while still allowing air to circulate.
- Unbleached parchment paper: Parchment paper provides a natural and eco-friendly option for wrapping soap, reducing waste and maintaining freshness.
Is sodium lactate necessary for soap making
While sodium lactate is not an essential ingredient in soap making, it does offer beneficial properties that soap makers often appreciate. Sodium lactate acts as a humectant, helping the soap retain moisture and prolong its shelf life. Additionally, it can aid in unmolding the soap faster and contribute to a smoother texture.