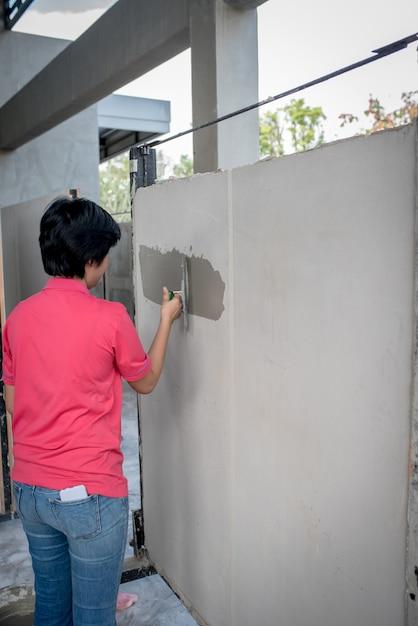
If you’re planning to undertake a skim coating project, you might be wondering how long it takes for a skim coat to dry. Skim coating is a popular technique used to create a smooth, flawless surface on walls and ceilings. It involves applying a thin layer of joint compound, also known as skim coat, to even out imperfections and create a seamless finish.
The drying time of a skim coat can vary depending on several factors such as humidity, temperature, and the type of joint compound used. In this blog post, we will discuss the average drying time for skim coat, how to speed up the drying process, and important considerations to ensure a successful project. So, let’s dive in and find out how long you should wait before proceeding to paint or complete your wall transformation!
How Long Does It Take for Skim Coat to Dry
Understanding the Drying Time of Skim Coat
One crucial stage of any DIY home renovation or painting project is applying a skim coat. It’s an essential step to achieve a smooth and flawless finish on your walls or ceilings. However, once you’ve expertly applied the skim coat, you might find yourself pondering the age-old question: “How long does it take for the skim coat to dry?” Fear not, my fellow DIY enthusiasts, for I shall impart upon you the wisdom I have acquired.
The Magic of Drying Time
-
Initial Drying Time: After applying the skim coat, you might be eager to move on to the next step. But hold your paint rollers! The initial drying time for a skim coat can range from twenty-four to forty-eight hours. The drying time depends on various factors, such as humidity levels and room temperature. So, sit back, relax, and let time work its magic.
-
Humidity Matters: Ah, humidity—the arch-nemesis of drying paint. While you eagerly await your skim coat to dry, keep in mind that high humidity levels can significantly extend the drying time. So, if you live in a tropical paradise or happen to be experiencing a particularly muggy day, exercise patience, my friend. Good things come to those who wait.
-
Temperature Is Key: Just like Goldilocks searching for the perfect porridge, your skim coat also seeks the optimum temperature. Ideally, the room temperature should be around 70°F (21°C). Remember, warmer temperatures accelerate the drying process, but be cautious not to crank up the heat too much; you don’t want your skim coat to feel like it’s in a sauna.
Factors Influencing the Drying Time
-
The Thickness Factor: The thickness of your skim coat determines the drying time. The deeper the layer, the longer it will take to dry. Think of it like baking a cake—the thinner the batter, the quicker it bakes. So, in the words of a wise philosopher, “spread thy skim coat with a gentle hand.”
-
Ventilation, Ventilation, Ventilation: Adequate airflow is like a breath of fresh air for your skim coat, facilitating the drying process. To speed things up, open some windows, switch on those fans, and let the gentle breeze embrace your walls. Just remember to secure any loose papers before the wind takes them on a delightful journey.
Patience, Grasshopper
In conclusion, the drying time of a skim coat can be as elusive as a ninja in the dark. It requires your unwavering patience, favorable environmental conditions, and a sprinkle of hope. So resist the temptation to touch and prod your freshly applied skim coat, for haste will only lead to imperfections. Instead, find solace in the knowledge that a well-dried skim coat will provide the foundation for a stunning paint job. Embrace the wait, my friend, and soon enough, you shall witness the marvels of a perfectly dried skim coat.
Now, go forth, armed with this newfound knowledge, and conquer your DIY projects with confidence and a touch of humor. May your walls be smoothened and your ceilings be flawless. Cheers to the art of skim coating!
FAQ: How Long Does It Take For Skim Coat To Dry
Are you looking to freshen up your walls with a smooth and flawless finish? Skim coating is a popular technique for achieving that clean and polished look. However, before diving into the process, you likely have a few burning questions. Don’t worry, we’ve got you covered! In this FAQ-style guide, we’ll answer all your queries about skim coat drying time, painting over it, and more!
Should You Primer Over Old Paint
Absolutely! When it comes to painting, preparation is key. Priming over old paint provides a smooth and stable surface for your new skim coat. It also helps the skim coat adhere better, ensuring a longer-lasting finish.
What Is the Purpose of a Skim Coat
A skim coat serves multiple purposes. It helps repair damaged or uneven walls, covers up imperfections, and creates a smooth canvas for painting. Whether you’re dealing with cracks, rough textures, or just want to refresh the look of your walls, a skim coat is your secret weapon!
How Long Does It Take to Skim Coat a Room
The time it takes to skim coat a room depends on various factors, such as the size of the room, the condition of the walls, and your skill level. On average, it can take anywhere from a few hours to a couple of days to complete the skim coat process for an entire room.
Can You Paint Directly on Skim Coat
Absolutely! Once the skim coat is dry, you can paint directly on it. The smooth surface provides a perfect foundation for your paint, ensuring a flawless and professional-looking finish. Just make sure to give the skim coat ample time to dry before reaching for that paintbrush!
Is Skim Coat Waterproof
While a skim coat can help improve the overall durability of your walls, it is not inherently waterproof. If you’re looking to waterproof your walls, consider using a specialized waterproofing product or sealant after the skim coat has dried.
Do I Need to Skim Coat Before Painting
Skim coating is not always necessary, especially if your walls are in good condition. However, if you’re dealing with cracks, uneven textures, or old paint that needs to be covered up, skim coating is highly recommended. It helps create a smooth and even surface, resulting in a more professional-looking paint job.
Why Is My Skim Coat Cracking
Cracks in a skim coat can occur due to various reasons. Insufficient drying time, improper application techniques, or even movement in the underlying structure can lead to cracks. To prevent cracking, make sure to allow the skim coat to dry fully, follow proper application techniques, and address any underlying structural issues.
Is Skim Coating Difficult
Skim coating might seem intimidating, but with the right tools and techniques, it can be a manageable DIY project. Practice, patience, and a positive mindset are key. And remember, even if you encounter a few bumps along the way, they can always be smoothed out with another coat!
How Smooth Does Skim Coat Need to Be
The smoothness of a skim coat depends on your personal preference and the desired end result. However, achieving a level 4 or level 5 finish is recommended for the best paint application. A level 4 finish is smooth to the touch and suitable for most paint finishes, while a level 5 finish is even smoother and ideal for glossy paints or lighting conditions that may highlight slight imperfections.
What Happens If You Don’t Do a Mist Coat
Skipping the mist coat step can result in poor paint adhesion and an uneven finish. A mist coat, which is a diluted layer of paint, helps seal the skim coat, control absorbency, and create a uniform surface. Skipping it could mean your paint may not bond properly or result in patchy and uneven color distribution. So don’t forget to mist before you paint!
What Happens If You Paint Plaster Too Soon
If you paint plaster before it has fully dried, you may encounter a host of problems. Moisture trapped within the plaster can cause the paint to bubble, crack, or flake off. It is crucial to allow the plaster to cure completely before applying any paint. Patience is key, and you’ll be rewarded with a beautiful and long-lasting finish.
Is Skim Coating Expensive
Skim coating can be a cost-effective way to transform your walls compared to other alternatives like complete wall replacement or extensive plastering. While the exact cost may vary based on factors such as the size of the room and whether you choose to hire a professional or tackle it as a DIY project, it’s generally more affordable.
Do I Need to Skim Coat After Removing Popcorn Ceiling
Whether to skim coat after removing a popcorn ceiling depends on the condition of the ceiling and the result you desire. Popcorn ceilings often have rough textures that are difficult to paint over or clean. Skim coating can help create a smooth and fresh surface, eliminating the need for popcorn. However, if the ceiling is in good condition and you like the texture, you may choose to skip skim coating.
What Is the Best Joint Compound for Skim Coating
Choosing the right joint compound is crucial for a successful skim coat. Look for a high-quality, lightweight, and easily sandable joint compound. Some popular options include ready-mixed joint compounds or setting-type compounds like quick-drying joint compound or hot mud. Experiment with different products to find the one that suits your needs and application style.
Should I Sand Between Skim Coats
Sanding between skim coats can help achieve a smoother and more even finish. However, it’s not always necessary. If the previous coat is smooth and any imperfections have been addressed, you can proceed with the next coat without sanding. Use your judgment and assess the surface before deciding whether sanding is required.
Is Skimming Cheaper Than Plastering
Skimming is generally more cost-effective than traditional plastering. Plastering involves applying multiple layers of plaster to create a new surface, which can be labor-intensive and time-consuming. Skimming, on the other hand, involves applying only a thin layer of joint compound, making it a quicker and more affordable option for achieving a smooth finish.
Do You Prime After Skim Coat
Yes, priming after the skim coat has dried is essential. Priming helps seal the skim coat, improve paint adhesion, and create a uniform surface for your paint. Choose a high-quality primer suitable for your project and apply it before painting for a professional and long-lasting finish.
How Do You Paint After Skimming
To paint after skimming, start by selecting a high-quality paint suitable for your desired finish. Make sure the skim coat is fully dry and dust-free before applying a coat of primer. Once the primer has dried, proceed with your paint application. Apply multiple coats as needed, allowing each coat to dry fully before adding the next.
How Soon Can You Prime After Skim Coat
The drying time required before priming can vary based on factors such as humidity levels and the thickness of the skim coat. In general, it’s best to wait at least 24 hours for the skim coat to dry before applying primer. However, it’s always a good idea to check the manufacturer’s instructions for the specific product you’re using to ensure the recommended drying time is followed.
How Long to Let Skim Coat Dry Before Painting
Patience is key when it comes to letting the skim coat dry before painting. On average, it can take anywhere from 24 to 48 hours for a skim coat to dry completely. Factors such as humidity, temperature, and the thickness of the skim coat can affect drying time. To be safe, always wait for the skim coat to feel dry to the touch before moving on to paint application.
How Long After Skim Coat Can I Paint
After the skim coat has dried completely, you can typically start painting. As mentioned earlier, this can take around 24 to 48 hours. However, it’s always best to follow the manufacturer’s instructions for the specific product you used for the skim coat. Once the skim coat is dry, you’ll be ready to bring your walls to life with a fresh coat of paint!
That’s a wrap for our FAQ on the drying time of skim coat! Armed with this knowledge, you’re now well-equipped to tackle your next DIY project or discuss your vision confidently with a professional. Remember, patience and attention to detail are key to achieving that flawless finish. Happy painting, folks!