Have you ever noticed those annoying water bubbles forming on your ceiling? Whether it’s a small bubble or a huge one that’s causing concern, they can be an eyesore and potentially indicate underlying water damage. Fortunately, there are ways to fix this issue and restore your ceiling to its pristine condition. In this blog post, we will explore the causes of water bubbles in ceilings, discuss how to address them, and answer frequently asked questions such as whether to pop the bubbles or not. Let’s dive in and learn how to tackle this common household problem!
Fixing a Water Bubble in Your Ceiling: No More Soggy Surprises
A bubbly surprise awaits you!
So, you’ve just noticed a peculiar water bubble in your ceiling, huh? Well, I hate to break it to you, but those spongy pockets of water aren’t going to fix themselves. But fear not! I’ve got some tips and tricks up my sleeve to help you bid farewell to that unwelcome ceiling inhabitant. Let’s dive in!
Assess the situation: Water you waiting for
Before you roll up your sleeves and tackle the task at hand, it’s important to assess the situation. First and foremost, locate the source of the water leak, which is probably the culprit behind that inflated bubble. Look for dripping pipes, roof leaks, or even some mischievous rainwater sneaking into your home. Once you’ve found the root of the problem, it’s onward to the next step!
Safety first: Don’t let gravity rain on your parade
Now that we’ve established the source of your watery intruder, it’s time to think about your safety. Before you embark on the journey to fix that saggy ceiling, put on your protective gear, like gloves and goggles, to shield yourself from any unexpected waterworks. A soggy surprise is never a fun surprise, after all.
Pop and drop: The art of bubble-bursting
Ah, the time has come to give that bubble a taste of its own medicine! Grab a pin or a small needle, sanitize it, and carefully poke a tiny hole at the edge of the bubble. Pssst! Hear that? It’s the sound of water excitement dwindling as the bubble deflates. Slowly and gently, let the water flow out into a bucket strategically placed below. Time to wave goodbye to that damp predicament!
Dry it up: Good riddance, water!
Now that we’ve dealt with the watery bubble, it’s time to address its remnants. Dry up the affected area thoroughly using towels or a fan. Ensuring thorough drying is crucial to prevent mold growth and any potential damage to your ceiling.
The big fix: Making amends
Once the area is dry and clear of any bubble remnants, repairing the ceiling is next on the agenda. Depending on the extent of the damage, you may need a professional to patch up the affected area. Don’t fret, though; with a little patience and perseverance, that ceiling will be as good as new!
Prevention is key: Let’s not have a repeat performance
Now that you’ve triumphed over the water bubble, let’s address future prevention. Regularly inspecting your pipes, roof, and windows can help nip any potential leaks in the bud. Additionally, maintaining proper insulation and ventilation in your home will keep moisture at bay. Remember, it’s better to be safe than soggy!
The final word: Bursting with confidence
Congratulations, my friend, you’ve tackled the challenge of fixing a water bubble in your ceiling like a champ! Just remember to approach the process with caution, prioritize safety, and address the source of the leak. With these tips by your side, you’re armed and ready to tackle any more bubbly surprises that may come your way. Happy fixing!
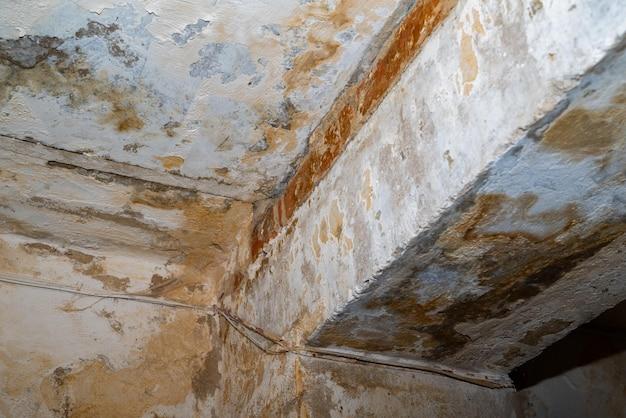
Bubbles in Ceiling Plaster
One moment you’re peacefully relaxing in your living room, and the next, you notice something peculiar above your head. Oh no, is that a bubble in my ceiling plaster? If this scenario sounds all too familiar, fear not! We’re here to burst those worries and provide you with some essential tips for dealing with this pesky predicament.
The Bubble Woes
So, you’ve spotted a bubble delicately forming in your ceiling plaster. How did it get there? Well, there are a few possibilities. Perhaps there was a water leak from your upstairs bathroom that made its way down, infiltrating the plaster. Or maybe the ceiling material was applied incorrectly during construction, causing air to become trapped and create these unsightly bubbles.
Inspect and Prepare
Before embarking on your quest to remedy this situation, it’s crucial to assess the bubble’s size and condition. Is it small and isolated, or has it grown to become a significant eyesore? If it’s the former, you may be able to handle it yourself. However, for larger bubbles that hint at deeper issues, it’s best to call in the professionals.
DIY Solutions
If the bubble appears to be a minor inconvenience, don your proverbial DIY hat and gather your supplies. Grab a utility knife, a putty knife, some sandpaper, joint compound, and a bucket filled with warm water.
The Bubble’s Demise
Using the utility knife, carefully cut a small “X” into the center of the bubble. This will allow any trapped air or water to escape. Then, take the putty knife and gently smooth out the area, removing any loose plaster or debris. Next, dampen the surrounding plaster with the warm water, preparing it for the joint compound, which you will apply in thin layers with the putty knife. Allow each layer to dry before adding the next, patiently building up until the surface is smooth and even. Finally, use the sandpaper to achieve a seamless finish, and voila! Say goodbye to that bubble!
Professional Help
If the bubble is stubborn, recurring, or indicative of a larger issue, it’s time to bring in the experts. Don’t worry; they won’t burst your bubble of hope. Hiring professionals ensures a thorough inspection, pinpointing the cause and providing a solution that will stand the test of time.
Embrace the Smooth Ceiling
In the end, whether you tackle this bubble trouble yourself or seek professional assistance, know that a smooth, bubble-free ceiling awaits you. Bid adieu to those unsightly imperfections and revel in the beauty of a pristine plastered surface. Cheers to a hassle-free home!
So there you have it, an amusing and informative dive into the world of bubbles in ceiling plaster. Now go forth and conquer those pesky blimps in your ceiling with confidence and a touch of humor!
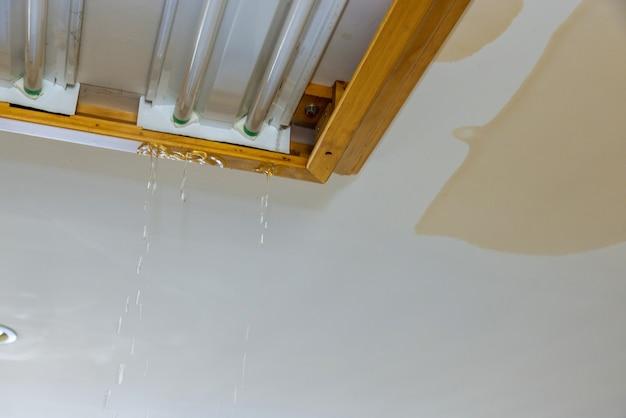
Huge Water Bubble in Ceiling
What to Do When Your Ceiling Looks Like a Watermelon
So, you wake up one morning and walk into your living room only to find that the ceiling resembles a giant water bubble. Panicked thoughts of a sudden indoor swimming pool race through your mind. Fear not, my friend! Here’s your step-by-step guide on how to handle this unexpected water balloon situation with style and humor.
Assess the Bubble’s Magnitude
Before launching into action, take a moment to appreciate the sheer size of this masterpiece that has formed above your head. You might think that it’s a rare work of abstract art, but alas, this is not the time to channel your inner art critic. Instead, summon your inner plumber and grab your toolkit. It’s time to pop this bubble!
Call in the Professionals…or Not
Now, you might be tempted to call in the professionals right away, but where’s the fun in that? Let’s be brave and tackle this bubble ourselves. But hey, if you’re unsure about your DIY skills or if fear has paralyzed you, it’s totally fine to bring in the cavalry. Just make sure they appreciate your sense of humor.
Take Cover and Get Popping
Make sure you’re wearing your best superhero cape because it’s time to pop that bubble! However, before you unleash your piercing skills, be sure to protect your precious eyes and face. Safety goggles and a face mask are a must if you want to emerge from this mission feeling like a water bubble superhero.
Release the Inner Bubble Slayer
Ready, aim, poke! With a needle in hand, approach the bubble slowly and carefully. Now, for the moment of truth: press the tip of the needle gently into the bubble’s center, like you’re performing acupuncture on your ceiling. And there it goes – pop! You may want to have a trusty bucket handy to catch any escaping droplets.
Dry Out and Assess the Damage
Congratulations! Your ceiling is no longer auditioning for a role as an alternative water source. Now it’s time to dry out the affected area. Grab a trusty fan, crank up some tunes, and let the airflow work its magic. Once everything’s dry, inspect the area for any signs of lingering damage or leaks that may need further attention.
A Happy Ending
And voilà! You’ve successfully turned a potentially dreadful situation into a hilarious DIY adventure. Whether you choose to be your own superhero or call in the pros, dealing with a huge water bubble in your ceiling doesn’t have to be a cause for despair. Just remember to stay safe, embrace the humor, and don’t forget to bring your cape. Happy bubble-popping!
Small Water Bubbles on Ceiling: A Tiny Trouble
Water Bubbles: Nature’s Attempt at Pop Art
Imagine walking into your living room, looking up, and seeing what appears to be tiny water balloons gracefully hanging from your ceiling. No, it’s not a magical party trick; it’s the result of small water bubbles forming on your ceiling. While this unexpected decoration may seem like a mischievous prank from the plumbing gods, it’s actually a sign that something is amiss in your humble abode.
The Culprits: Condensation and Humidity
These petite water bubbles are often caused by condensation and high humidity within your home. When warm air collides with a cold surface, such as your ceiling, it transforms into droplets of moisture. Think of it as if your ceiling is throwing a surprise pool party, and the water bubbles are the guests who failed to RSVP! But fear not, for this is a fixable hiccup in your otherwise peaceful home.
Debunking the Myths: It’s Not Raindrops from Above
Before we dive into the solutions, it’s crucial to dispel a common misconception. Contrary to popular belief, these water bubbles are not the result of a leaky roof or errant raindrops finding their way indoors. Instead, the cause lies within your home’s internal environment. So, you can rest easy knowing that Mother Nature isn’t conspiring against you in a watery plot.
Solution A: Tackle the Humidity Head-On
To bid farewell to these pesky water bubbles, your best course of action is to address the root of the issue: humidity. Start by investing in a dehumidifier, whose sole mission is to suck up excess moisture from the air. Additionally, make sure your home is properly ventilated by opening windows, using exhaust fans, or even installing a ventilation system. By taking these steps, you’re letting the water bubbles know that their cameo appearance is no longer welcome.
Solution B: Fans to the Rescue
If you’re not afraid to get a little breezy, another effective solution is to bring out the fans. Positioning a fan near the affected area will encourage air circulation, preventing moisture from settling on your ceiling. It’s like giving those water bubbles a refreshing gust of wind, prompting them to retreat and make way for clear skies ahead!
Solution C: The Power of Heat
Finally, harnessing the power of heat can also vanquish these unwelcome ceiling companions. Grab a hairdryer, set it to a low heat setting, and gently blow warm air towards the water bubbles. This will aid in the evaporation process and bid farewell to those stubborn droplets. Just be sure to keep the hairdryer moving and at a safe distance to avoid any mishaps – we’re aiming to fix the ceiling, not your hairstyle!
The Epilogue: Adios, Pesky Water Bubbles
By tackling the humidity, promoting air circulation, and embracing the warmth, you can bid adieu to those small water bubbles adorning your ceiling. Remember, laughter is the best medicine, and a lighthearted approach to this tiny trouble will keep your spirits high. So go forth, my fellow bubble battlers, and restore your ceiling to its pristine, bubble-free glory!
Bubble on Ceiling, but No Water
What’s That Bubble Doing There
So, you walk into your living room and notice a strange bubble on the ceiling. You look up, expecting to see water dripping down, but to your surprise, there’s not a single drop. What could be causing this mysterious bubble? Let’s dive into the fascinating world of ceiling bubbles with no water!
The Battle of the Bubbles: Air vs. Moisture
You may think that bubbles in the ceiling are always a sign of water damage, but that’s not necessarily the case. Sometimes, the culprit behind these bubbles is simply trapped air. Yep, you heard it right – air bubbles have taken up residence in your ceiling, throwing a bubble party without any water involved.
How Do Air Bubbles Get Trapped
Air bubbles can form in your ceiling due to a variety of reasons. Improperly installed insulation or vapor barriers can allow air to become trapped in the space between the ceiling and the roof. Temperature changes can also cause air to expand and contract, leading to those peculiar bubbles.
The “Just Pop It” Dilemma
Now that you’ve discovered the bubble, your first instinct may be to grab a pin and release the air. However, before you start popping, it’s important to assess the situation. If the bubble is small and shows no signs of growing or affecting the structural integrity of the ceiling, you can go ahead and pop it without worry. But beware – larger bubbles or those recurring in the same spot may require professional attention.
Prevention is Key
To prevent these fun-loving bubbles from appearing, it’s essential to address the underlying causes. If poor insulation or vapor barriers are the culprits, you may want to consult a professional to properly seal and insulate the affected area. Regular maintenance and inspections can also help catch potential bubble buddies before they even have a chance to party.
Say Goodbye to Ceiling Shenanigans
In conclusion, a bubble on your ceiling without any water doesn’t necessarily mean you’ve got a major issue on your hands. Most likely, it’s just a friendly gathering of trapped air bubbles looking to have a good time. However, if you notice any changes or concerns, it’s always best to consult a professional to ensure your ceiling remains bubble-free and your home is as cozy as can be.
And there you have it! The mystery of the bubble on the ceiling, minus the water. Now, you can impress your friends with your extensive knowledge of air bubble shenanigans. So go forth and conquer those bubbles – just remember, proceed with caution and always prioritize the safety of your home. Happy bubble popping!
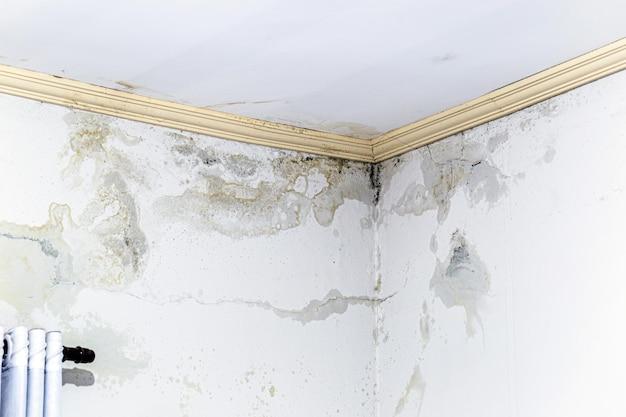
Can You Fix a Water Damaged Ceiling
Assess the Damage
Before attempting to fix a water damaged ceiling, it’s important to assess the extent of the damage. Take a good look at the water bubble in your ceiling and try not to panic. It’s just water, right? Well, maybe a little more than that.
Locate the Culprit
The next step is to play detective and locate the source of the water damage. This may involve some Sherlock Holmes-level investigation skills. Is it a leaky pipe? A faulty roof? Or maybe your upstairs neighbor has a penchant for water balloon fights. Whatever the case may be, you need to find the root cause.
Play the Waiting Game
While your inner handyman may be itching to jump right in and fix the problem, sometimes it’s best to play the waiting game. Give the ceiling some time to dry out naturally. This will prevent further damage and help you assess the true extent of the problem. Plus, it gives you an excuse to binge-watch your favorite TV shows. Win-win!
Call in the Professionals
If you’re not the handy type or if the damage seems too severe, it’s time to call in the professionals. These guys know what they’re doing and can fix your water damaged ceiling in no time. Just make sure to do your research and hire a reputable company. You don’t want to end up with a ceiling that looks like it belongs in a modern art museum.
Don’t Be a DIY Hero
Now, this is the part where we have to burst your bubble (pun intended). While it may be tempting to channel your inner Bob the Builder and fix the ceiling yourself, it’s important to know your limits. Water damage can lead to structural issues, mold growth, and a host of other problems. So, unless you’re a licensed professional, it’s best to leave it to the experts.
Prevention is Key
As they say, an ounce of prevention is worth a pound of cure (or in this case, a gallon of water). To avoid future water damaged ceilings, be sure to take measures to prevent leaks and keep your home well-maintained. Trust us, it’s much easier (and cheaper) to prevent a water bubble in the ceiling than to fix it.
Now, armed with this knowledge, you’re ready to tackle that water damaged ceiling like a pro (or call in the pros if needed). Remember, take a deep breath, put on your detective hat, and let the repair journey begin. Happy ceiling fixing!
How to Tackle Water Bubbles in Your Drywall
Finding a Watery Surprise
So, you’ve discovered a mysterious water bubble on your ceiling, huh? Well, no need to panic! It’s not exactly the most glamorous gift from your house, but with a little bit of know-how, you can fix it. Let’s dive into the bubbly world of drywall repair and bid adieu to those unwelcome water bubbles!
Step 1: Play Detective
First things first, let’s play detective and find the source of this watery mischief. Is it caused by a leaky roof, a burst pipe, or maybe even an accidental monopoly on water balloon fights? Investigate with a keen eye and a desire to solve this watery whodunit.
Step 2: Call in Reinforcements
Once you’ve cracked the case and identified the root cause of your bubble trouble, it’s time to bring in the cavalry. Call a professional plumber to fix any plumbing mishaps or reach out to a skilled roofer if your ceiling’s culprit is an overzealous drippy roof. Trust me, you don’t want to tackle these issues solo unless you’re the next MacGyver!
Step 3: Say Goodbye to Your Bubbly Buddy
Now that the root cause is taken care of, it’s time to wave a not-so-fond farewell to that pesky bubble. Grab a utility knife, carefully cut a small slit in the middle, and gently press the bubble. Caution: you might want to step back, as it can be a bit of a watery party!
Step 4: Drywall Magic
With the bubble deflated, it’s time to work some drywall magic. Grab your joint compound and a putty knife, and gently apply a thin layer of compound over the slit. Smooth it out and let it dry like a champ. Repeat this process until you’ve beautifully hidden the evidence of bubble-induced chaos.
Step 5: Finishing Touches
Finally, it’s time to sprinkle some finishing touches. Sand down any uneven areas, wipe away the dust, and apply a coat of primer to ensure a seamless finish. Once the primer is dry, unleash your inner Picasso and paint away! Choose a color that brings joy to your heart and helps you forget about all the bubble drama.
No More Bubbles, No More Troubles
And just like that, you’ve triumphed over those water bubbles like a true DIY champion! You can admire your handiwork, pat yourself on the back, and dance a little victory jig. Remember, while water bubbles may be a rude guest, you’re now equipped with the knowledge to banish them forever. So go forth, my friend, and embrace your newfound drywall wisdom!
Should I Pop a Water Bubble in My Ceiling
So, you woke up one morning and noticed a water bubble in your ceiling. “What on earth is this?” you ask yourself, scratching your head in confusion. Fear not, my friend, for you are not alone in this bizarre phenomenon. Many homeowners have faced the same conundrum, and the question that often arises is, “Should I pop a water bubble in my ceiling?”
The Temptation to “Pop it Like a Balloon”
It’s tempting, isn’t it? That little water-filled bubble just hanging there, practically begging to be popped. You might be thinking, “Well, it’s just a tiny bubble. What harm could it do?” But let me tell you, my dear reader, popping that innocent-looking bubble might not be the wisest move.
Seek the Source, Sherlock
Before you go all “bubble-popping mania,” it’s crucial to determine the underlying cause of that watery bulge in your ceiling. Is it a plumbing issue? Perhaps a leaky pipe or a burst seal? Or could it be a problem with your roof, such as a cracked shingle or clogged gutter? Channel your inner Sherlock Holmes and investigate the source!
Popping the Bubble: Curse or Cure
Okay, let’s address the elephant in the room (or rather, the bubble in the ceiling). Popping that bubble might provide temporary relief, but it won’t fix the root of the problem. In fact, it might exacerbate the situation. Bursting the bubble could release a torrent of water, causing further damage to your ceiling, walls, or even your furniture. So, hold your horses and put that pin away for now!
Call in the Cavalry
When facing a mysterious water bubble, it’s best to call in the professionals. Plumbers and roofers are the superheroes of the home improvement world, armed with the knowledge, experience, and tools to tackle these water-filled villains. They will assess the situation, identify the cause, and propose a solution to fix both the bubble and its source.
Prevention: The Best Medicine
As they say, prevention is better than cure. To avoid future watery surprises, it’s crucial to stay vigilant. Regularly inspect your pipes, roof, and gutters for any signs of leakage or debris buildup. Addressing these issues promptly can save you a considerable amount of time, money, and headaches down the road.
So, my dear reader, resist the urge to play “Bubble Bobble” with your ceiling. Instead, be a responsible homeowner and call in the professionals to solve the mystery of the water bubble. Remember, prevention is key to keeping your home dry and bubble-free. Stay proactive, stay informed, and bid farewell to the water bubble woes!
Sources:
– Home Water Damage: How to Spot It and Act Fast
– Roof Leaks: Causes and Solutions
– 5 Common Plumbing Issues and How to Fix Them
What to Do If You Spot a Water Bubble in Your Ceiling
So, you’re minding your own business, enjoying a lazy Sunday afternoon, when suddenly you notice something suspicious above you. Is it a bird? Is it a plane? No, it’s a water bubble in your ceiling! Before you panic and start constructing conspiracy theories about leaky aliens, take a deep breath. We’ve got you covered with some simple steps to tackle this watery predicament.
Step 1: Remain Calm (and Dry)
First things first, don’t lose your cool over this bubbly surprise. Panicking won’t solve anything; it will only make matters worse. Instead, channel your inner Zen master, take a deep breath, and prepare to handle this situation like a pro.
Step 2: Inspect and Investigate
Now, it’s time to put on your detective hat and conduct a thorough investigation. Gently touch the water bubble to see if it’s squishy or firm. Does it seem ready to burst like a tiny water bomb, or is it just chilling up there? Take note of any stains or discoloration around the bubble as well. This information will be crucial for the next step.
Step 3: Call for Backup
As much as we love a good DIY project, dealing with a water bubble in your ceiling is not the time to unleash your inner Bob the Builder. This calls for professional help. Reach out to a reputable plumber or a handyman who specializes in fixing ceiling water issues. They have the expertise and tools to handle this situation safely and effectively.
Step 4: Clear the Area
While you wait for your trusty repair person to arrive, it’s essential to clear the area around the water bubble. Move valuable items, furniture, and pets (if you can convince them to move) away from potential harm’s way. No one wants their beloved antique vase or Fido to take an unexpected shower!
Step 5: Play the Waiting Game
Once you’ve done everything you can, it’s time to embrace the art of patience. While you anxiously wait for your hero in overalls to arrive, resist the urge to stare at the water bubble like it’s a captivating piece of modern art. Instead, distract yourself with a good book, a Netflix binge session, or even a daring attempt at origami.
Step 6: Celebrate Victory (and a Dry Ceiling)
Hooray! The repair person has finally arrived, armed with tools and a determination to vanquish the water bubble once and for all. Sit back, relax, and let them work their magic. Before you know it, your ceiling will be back to its normal, dry self, and you can breathe a sigh of relief.
Remember, when it comes to water bubbles in your ceiling, it’s crucial to act quickly and seek professional assistance. So, keep calm, follow these steps, and bid adieu to your watery intruder, because you deserve a dry and peaceful home!