Are you tired of seeing those annoying spiderweb-like cracks, known as crazing, on your gelcoat surfaces? Don’t worry, you’re not alone. Crazing is a common issue faced by many boat owners and fiberglass enthusiasts. Whether you’re dealing with gelcoat crazing on your boat, bathtub, or other fiberglass surfaces, this blog post has got you covered.
In this comprehensive guide, we’ll answer all your burning questions about gelcoat crazing. From understanding what crazing looks like and its causes to the step-by-step process of fixing deep scratches and gouges, we’ve got all the information you need. So, if you’re wondering how to stop crazing, paint over crazing, or even if it’s possible to fix crazing at all, keep reading! We’ll provide you with expert tips, techniques, and answers to ensure a seamless repair. Say goodbye to those unsightly cracks and hello to a beautifully restored gelcoat finish!
Let’s dive right in and explore the world of gelcoat crazing and how you can fix it effectively.

How to Mend Gelcoat Crazing Like a Pro
Identifying the Mysterious Cracks in Your Gelcoat
If you’ve noticed a web of tiny cracks webbing their way across your gelcoat, fear not, my friend! You’ve encountered what the boating community charmingly refers to as “gelcoat crazing.” But worry not, this is not some contagious condition that will turn your boat into a floating madhouse. Rather, it’s a common phenomenon where hairline cracks develop on the surface of the gelcoat.
Unraveling the Culprits Behind Gelcoat Crazing
Now, before we delve into the magical art of fixing gelcoat crazing, it’s crucial to understand what brings forth this aesthetic blight. A variety of factors can conspire to create those little cracks that send boaters into a frenzy. Ultraviolet (UV) exposure, temperature fluctuations, and good ol’ wear and tear are the usual suspects responsible for this mariner’s headache.
Tools of the Trade: Gathering Your Gelcoat Repair Arsenal
Fear not, intrepid sailor, for like the knights of old, you shall have your trusty arsenal to aid you in your quest to vanquish gelcoat crazing. To repair this cosmetic nuisance, you’ll need a few essentials:
- Gelcoat Paste: Be sure to pick a matching color to ensure your repair work blends seamlessly, leaving no evidence of your heroic ordeal.
- Acetone: This mighty solvent is your trusted ally in preparing the damaged area for a fresh coat of gelcoat.
- Sandpaper: Armed with sandpaper of various grits (ranging from 180 to 600), you’ll be able to smoothen out the rough edges of the cracks.
- Polishing Compound: Once the repairs are complete, a good polish will make your gelcoat gleam like a lighthouse on a stormy night.
Mastering the Art: Step-by-Step Crazing Restoration
-
Prep Work: Begin by ensuring the affected area is clean, removing any dirt, grime, or barnacles that might attempt to sabotage your success. Use a cloth dampened with acetone to wipe away the unwanted debris.
-
Sand, Sand, Sand: Grab your sandpaper, starting with a coarse grit and working your way up to a finer grit. Gently sand the crazed surface, easing the cracks into submission. Remember, slow and steady wins the race.
-
Filling in the Gaps: Once you’ve tamed those cracks, it’s time to fill ’em up! Apply the gelcoat paste to the damaged area, using a small brush or a handy putty knife. Smooth it out and ensure it’s level with the surrounding gelcoat.
-
The Waiting Game: Patience, my friend. Let the gelcoat paste cure for the recommended time, usually mentioned on the packaging. This is when the magic happens and your boat’s battle scars begin to fade away.
-
The Polishing Touch: Now it’s time for the victorious final step. Buff away the excess gelcoat paste with the help of a polishing compound. Watch in awe as your boat is restored to its former glory, dazzling all who dare to gaze upon it.
Safeguarding Your Gelcoat: Prevention is Better Than Cure
As the adage goes, “An ounce of prevention is worth a pound of cure.” To shield your gelcoat from crazing calamities in the future, consider these measures:
- Wax On, Wax Off: Regularly waxing your gelcoat serves as a UV-resistant shield, protecting it from the sun’s harsh rays.
- Mind the Temperature: Avoid abrupt temperature changes and store your vessel in a temperature-controlled environment whenever possible.
- Give it Some TLC: Keep your boat clean and tidy by routinely washing away salt, grime, and other unholy invaders. Regularly inspect your gelcoat for signs of trouble and deal with any issues promptly.
There you have it, adventurer of the open seas! With a touch of patience, a splash of elbow grease, and a dash of gelcoat wizardry, you can bravely conquer gelcoat crazing and keep your vessel shimmering like a beacon of nautical elegance. Now, set sail and show the world how craziness can be tamed! Ahoy!
FAQ: How Do You Fix Gelcoat Crazing
Gelcoat crazing can be a frustrating issue for boat owners and enthusiasts. But fear not! We’ve compiled a list of frequently asked questions to help you understand and fix gelcoat crazing with ease. So, grab your reading glasses and let’s dive in!
How do you stop crazing?
Prevention is key! To stop crazing, it’s important to maintain a well-maintained gelcoat surface. Regular cleaning and waxing serve as your first line of defense. Additionally, avoiding sudden temperature changes and using the right cleaning products can minimize crazing.
How do you paint over crazing?
Painting over crazing requires careful preparation. Start by sanding the affected area and applying a suitable primer. Then, follow up with multiple coats of paint, ensuring proper drying time between each layer. Remember, patience is a virtue when it comes to achieving a smooth and flawless finish!
How do you fix deep scratches in fiberglass?
Deep scratches can be a bit trickier to tackle. Begin by cleaning the area and sanding it down to remove any loose or damaged fibers. Next, apply a fiberglass repair kit, ensuring a smooth and level surface. Lastly, match the color with a gelcoat repair kit and apply it to blend in seamlessly. Voila! Those pesky scratches will vanish into thin air!
Can you paint over gelcoat crazing?
Absolutely! Painting over gelcoat crazing is a popular option. However, to achieve a lasting finish, it’s crucial to address the crazing before painting. Follow the steps mentioned earlier, including proper sanding, priming, and painting techniques, for a fresh and flawless look.
Can I add filler to gelcoat?
Yes, you can! Adding filler to gelcoat helps repair deeper cracks and imperfections. After thoroughly cleaning the area, choose a suitable gelcoat filler and apply it according to the manufacturer’s instructions. Once dry, sand the surface smooth, and you’re good to go! Say goodbye to those blemishes!
Is crazing common?
Oh, crazing is a common occurrence in the gelcoat world! If your boat has seen a fair share of sunny days, temperature variations, or even the occasional bump, chances are you might encounter crazing. But hey, with the right knowledge and a touch of humor, you’ll be able to fix it like a pro!
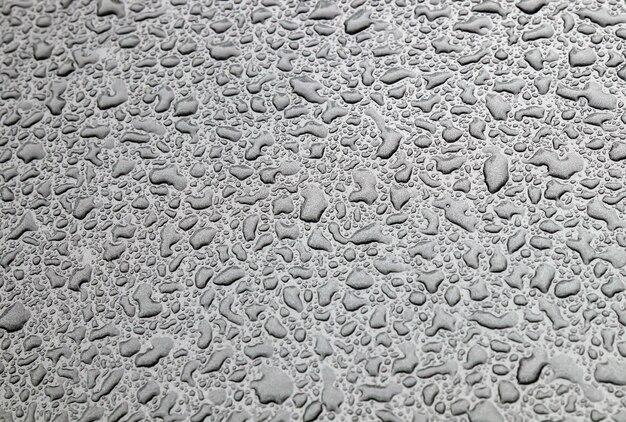
What does crazing look like?
Imagine a spider’s web casually making itself at home on your gelcoat’s surface. That’s crazing! It appears as a network of fine cracks that can give your boat an aged or worn-out look. But don’t worry, with a little elbow grease and some repair know-how, you can easily bid adieu to those unsightly spiderwebs.
Can you gelcoat over primer?
Absolutely! In fact, applying gelcoat over primer is a recommended step to ensure a smooth and durable finish. Make sure the primer is fully cured before proceeding with the gelcoat application. Follow the application instructions, allow it to cure, and witness the magic unfold before your eyes!
How do you fix deep gouges in gelcoat?
Deep gouges can be quite the eyesore. But fear not! Start by cleaning the gouge thoroughly, removing any debris. Fill the gouge with a gelcoat repair paste, ensuring a slightly overfilled surface. Once dry, sand the area to a smooth and level finish. Finish off with some buffing, and your glossy gelcoat will be proud once again!
How long does it take gelcoat to cure?
Ah, patience is a virtue when it comes to gelcoat curing! The exact curing time depends on various factors such as temperature and humidity. Generally, gelcoat will take around 24 to 48 hours to cure fully. Bear in mind, though, that it may take a bit longer in colder or more humid conditions. Take a deep breath and give it the time it needs!
How do you get cracks out of gelcoat?
Cracks in gelcoat can be quite the party poopers! To bid them farewell, start by cleaning the cracked area and sanding it down gently. Next, apply a gelcoat crack repair solution, following the manufacturer’s instructions. Once the gelcoat has fully cured, sand it smooth, and voila! Wave goodbye to those pesky cracks!
What is gelcoat paste?
Ah, gelcoat paste, the superhero of gelcoat repairs! Gelcoat paste is a thick, viscous gelcoat that can fill deeper cracks, gouges, or imperfections. It acts as a fantastic bond and finish all rolled into one, making it an essential tool in your gelcoat repair arsenal. Embrace the magic of gelcoat paste and let your boat shine!
Are gel coat cracks bad?
While gelcoat cracks can be a cosmetic inconvenience, they are not usually significant structural issues. However, it’s essential to address them sooner rather than later to prevent further damage or water intrusion. By fixing those cracks, you’ll not only restore the beauty of your boat but also ensure its long-lasting integrity. Let’s crack on with the repairs!
Can you gelcoat over bottom paint?
Indeed, you can gelcoat over bottom paint! However, it’s vital to prepare the surface properly. Start by thoroughly cleaning the bottom paint and sanding it until smooth. Then, apply gelcoat following the usual application process. Just remember, a smooth and well-prepped surface is the key to a successful gelcoat job!
How much does gelcoat repair cost?
Ah, the golden question! The cost of gelcoat repair can vary depending on factors such as the extent of damage, size of the affected area, and the specific materials needed. On average, though, gelcoat repair can range from $200 to $800. Remember to explore different options and consult professionals to find the best solution for you and your boat!
What causes crazing in gelcoat?
Ah, the culprits behind the crazing! Crazing is often caused by a combination of factors, including exposure to UV rays, temperature fluctuations, stress, or even improper gelcoat application. It’s like a recipe for disaster served with a side of fine cracks. But with some TLC and a touch of repair magic, you’ll be the master chef of gelcoat perfection!
What causes spider cracks in gelcoat?
Spider cracks…the unsolicited guests on your gelcoat’s surface! These fine, interconnected cracks are typically caused by flexing or stress on the gelcoat. Temperature changes, impacts, or even the natural aging process can invite them to the party. But don’t worry, with a bit of patience and the right repair techniques, you can send those unwanted arachnids packing!
How do you fix a crazing sink?
Ah, a crazing sink, the bathroom’s version of a gelcoat issue! To fix it, start by cleaning the sink thoroughly. Then, use a fine-grit sandpaper to sand the crazed area gently. Next, apply a specialized sink repair solution, following the manufacturer’s instructions. Once the solution has dried, sand it smooth, and voila! Say hello to a gleaming sink that’s ready to handle any washing mishaps!
Can you fix crazing?
Of course, you can fix crazing! With the right techniques and materials, addressing crazing in your gelcoat is well within your reach. By following the steps mentioned earlier, including cleaning, sanding, and applying a suitable gelcoat repair solution, you’ll be able to tackle crazing head-on. Embrace the challenge and let your inner repair guru shine!
Now that you’re armed with the knowledge to conquer gelcoat crazing, it’s time to get your repair gloves on and give your boat the love and care it deserves. Remember, fixing gelcoat is not just about restoring its beauty; it’s about preserving the memories and adventures that await on the open waters. Happy repairing, folks!