Leaky faucets can be a real nuisance. Not only do they waste water and increase your utility bills, but they can also cause damage if left unattended. If you have an old-fashioned faucet that’s dripping incessantly, you’ve come to the right place! In this blog post, we’ll walk you through the step-by-step process of fixing a leaky old-fashioned faucet.
But before we dive into the nitty-gritty of faucet repair, let’s address some common questions. What happens if you don’t fix a leaky faucet? How much does a plumber charge to fix it? And should you always use plumber’s putty? We’ll provide answers to these queries, along with many others, to help you tackle your leaking faucet effectively and affordably.
Whether you’re a seasoned DIY enthusiast or just a regular homeowner looking to save some money, you don’t want to miss this comprehensive guide on fixing a leaky old-fashioned faucet. So, let’s roll up our sleeves and put an end to that annoying dripping sound once and for all!
How to Stop a Leaky Old Fashioned Faucet from Driving You Up the Wall
Understanding the Inner Clockwork of Your Darn Old Faucet
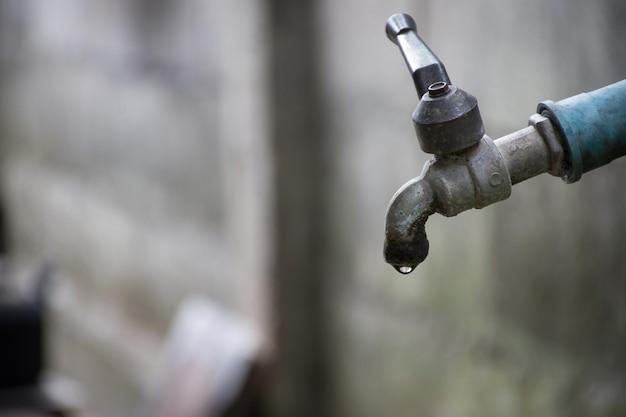
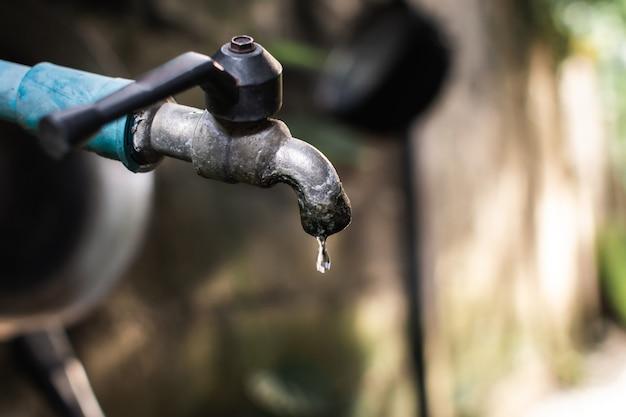
Picture this: it’s the dead of night, you’re drifting off to sleep, and suddenly you hear it – that oh-so-annoying drip, drip, drip sound coming from your ancient faucet. It’s like a never-ending symphony composed by a water torturer. If you’ve ever found yourself in this predicament, fear not! In this guide, we’ll unravel the mysteries of your leaky old faucet and arm you with the knowledge to fix it, so you can finally wave goodbye to those sleepless nights.
Step 1: Gear Up, Super Plumber!
Before we begin our quest to conquer the annoying drip, you’ll want to gather your trusty toolkit. Think of yourself as a superhero in disguise, ready to save the day. Here’s what you’ll need:
- Flathead screwdriver – for unscrewing those sneaky faucet handles.
- Philips screwdriver – for tackling any screws that dare stand in your way.
- Adjustable wrench – for all those tight faucet nuts.
- Plumber’s tape – to ensure a watertight seal once the job is done.
- Bucket – to catch any disobedient drops of water that try to escape your grasp.
Step 2: Taming the Wild Beast – Shut Off the Water Supply
Now that you’re suited up, it’s time to tame that wild beast – but first, we need to make sure the water supply is safely shut off. No need to flood your bathroom like the Titanic, right? Locate the shutoff valves under the sink and give them a gentle twist to the right. If you can’t find them, no worries! Just shut off the main water valve for your entire house. Safety first, my friend!
Step 3: Taking Apart the Faucet – Guts and Glory
You’ve made it this far, and now it’s time to delve into the inner workings of your mysterious faucet. This is where the real action begins. Grab your screwdriver and start removing any visible screws that are holding the faucet handles in place. Once those handles are free, you’ll be able to expose the hidden wonders residing within.
Step 4: Diagnosing the Culprit – Oooh, It’s a Washer!
Ah-ha! We’ve uncovered the main troublemaker: the washer. Like a tiny superhero itself, this small rubber or silicone disk is often the cause of your leaky faucet. With time, it can become worn out, hardened, or even disintegrate, leading to those pesky droplets. Remove the old washer, take it with you to the hardware store (yes, it deserves a field trip), and find its perfect replacement. Trust us, your faucet will thank you for it.
Step 5: Reassembling Your Faucet – Time for the Grand Finale
Now that you’ve triumphed over the evil washer, it’s time to put everything back together. Make sure all the components are in their rightful places, align the handles, and gently tighten those previously rebellious screws. Not too tight, though – we don’t want any cracked handles on our watch.
Step 6: Victory Dance – Turn on the Water and Rejoice!
The moment of truth has arrived! Slowly twist the shutoff valves to the left and let the water flow once more. Take a deep breath, hold your excitement, and watch as your leaky faucet transforms into a silent warrior. With the power of your newfound knowledge, you’ve successfully banished that incessant dripping. Oh, the joy! Give yourself a pat on the back and revel in the triumph of a job well done.
So, my friend, there you have it – a step-by-step guide to fixing your leaky old faucet, putting an end to those midnight serenades. Armed with your trusty tools and a sprinkle of determination, you’ve overcome the challenges of the past and emerged victorious into a drip-free future. Now go forth, spread your newfound wisdom, and let peace reign in every faucet you encounter!
P.S. If your neighbor’s old fashioned faucet is also testing their sanity, be a hero and share this guide with them. Together, you’ll save not only your sleep but also the sanity of the entire neighborhood. Happy fixing!
FAQ: How To Fix A Leaky Old Fashioned Faucet
Leaky faucets can be quite a nuisance, causing wasted water, annoying drips, and even potential damage to your home. If you’re struggling with a leaky old-fashioned faucet, you’ve come to the right place. In this FAQ-style guide, we’ll address common questions about fixing a leaky faucet and provide you with the knowledge you need to tackle this plumbing problem like a pro.
What happens if you ignore a leaky faucet
Ignoring a leaky faucet is not a wise choice. Besides the irritating sound of constant dripping, you may face several consequences. First and foremost, you’ll be wasting water, which negatively impacts the environment and your water bill. Additionally, the continuous moisture can lead to mold and mildew growth, potentially causing damage to your fixtures and even compromising the structural integrity of your home. So, it’s crucial to address a leaky faucet promptly.
Is it better to use plumber’s putty or silicone
When it comes to sealing a faucet, both plumber’s putty and silicone are popular choices. Plumber’s putty is suitable for non-pressurized fixtures, such as drains and sink strainers. On the other hand, silicone is a more versatile option that can be used in both pressurized and non-pressurized applications. It provides a durable, watertight seal and is ideal for sealing the base of a faucet. So, for fixing a leaky old-fashioned faucet, silicone is generally the better choice.
Why does my faucet continue to drip after I turn it off
If your faucet drips after you’ve turned it off, there are a few potential causes. One common culprit is a worn-out or faulty washer. When the washer deteriorates over time, it may no longer create a tight seal, resulting in a persistent drip. Other possible causes include a damaged valve, worn-out seals, or even high water pressure. If the issue persists even after replacing the washer, it may be best to consult a professional plumber to diagnose and fix the problem.
Should I use plumber’s putty on a kitchen faucet
While plumber’s putty can be used on various fixtures, it’s not recommended for kitchen faucets. Kitchen faucets often come with a rubber gasket, which provides a secure seal between the faucet and the sink. Plumber’s putty can deteriorate rubber over time, leading to leaks. Instead, consider using a non-toxic silicone sealant specifically designed for kitchen faucets to ensure a reliable and long-lasting seal.
What causes a ceramic tap to drip
A dripping ceramic tap can be caused by several factors. One common cause is a worn-out cartridge or disc assembly within the tap. Over time, the internal components can wear down, resulting in leaks. Additionally, sediment buildup, mineral deposits, or a faulty ceramic disc can cause a ceramic tap to drip. If you’re facing this issue, it’s best to consult a professional plumber who can identify the exact cause and repair or replace the necessary components.
How much does a plumber charge to fix a leaking faucet
The cost to fix a leaking faucet can vary depending on several factors, such as the severity of the leak, the type of faucet, and the plumber’s rates. On average, you can expect to pay between $75 to $200 for a professional plumber to fix a leaking faucet. However, keep in mind that prices may vary in different regions. To get an accurate estimate, it’s best to contact local plumbers and request a quote based on your specific situation.
Can a dripping tap cause a flood
While a dripping tap may not directly cause a flood, it can contribute to water damage over time. Even a small drip can waste a significant amount of water if left unattended, leading to increased water bills. Additionally, the continuous moisture can weaken your fixtures and potentially cause leaks or burst pipes, which could lead to water damage and flooding if not addressed promptly. So, it’s in your best interest to fix that dripping tap sooner rather than later.
Do I always need to use plumber’s putty for faucet installation
No, plumber’s putty is not always necessary for faucet installation. Whether or not you need to use it depends on the type of faucet and the manufacturer’s instructions. Some faucets come with a rubber gasket or a foam seal already attached, eliminating the need for plumber’s putty. Always refer to the manufacturer’s guidelines to determine the appropriate sealing method for your specific faucet.
Is it bad to let a faucet drip
Leaving a faucet to drip may seem wasteful, but in certain situations, it can actually be beneficial. During freezing temperatures, allowing a faucet to drip slightly can help prevent frozen pipes by relieving the pressure that builds up within the pipes. However, this should only be a temporary measure and should not replace repairing a leaky faucet. Once the risk of freezing has passed, it’s essential to address the issue and fix the leak to conserve water and prevent further damage.
Who should I contact for repairing a leaking tap at home
When facing a leaking tap at home, your best bet is to contact a professional plumber. Plumbers have the expertise and specialized tools to diagnose and fix the issue correctly. They can help determine the root cause of the leak and provide a reliable solution, ensuring that your faucet is properly repaired. Attempting to fix the problem yourself without proper knowledge and experience may result in further damage and more costly repairs in the long run.
Can ceramic taps be repaired
In most cases, yes, ceramic taps can be repaired. However, the specific repair method will depend on the severity and type of the issue. Oftentimes, repairing a ceramic tap involves replacing faulty internal components, such as cartridges or ceramic discs. In some instances, the entire tap may need to be replaced. It’s best to consult a professional plumber who can assess the situation and recommend the appropriate repair or replacement options.
How do I seal the base of a faucet
To seal the base of a faucet and prevent leaks, follow these steps:
- Clean the surface: Ensure the area is clean and free of any debris or old caulking.
- Apply sealant: Apply a bead of silicone sealant around the base of the faucet.
- Position the faucet: Carefully position the faucet on the sink or countertop, pressing it firmly into place.
- Wipe off excess sealant: Use a damp cloth or sponge to remove any excess sealant around the base.
- Allow it to cure: Let the sealant cure according to the manufacturer’s instructions before using the faucet.
By properly sealing the base of your faucet, you’ll create a watertight barrier that minimizes the risk of leaks and ensures a secure installation.
Can silicone be used as an alternative to plumber’s putty
Yes, silicone is an excellent alternative to plumber’s putty in many plumbing applications. It provides a durable and watertight seal, making it suitable for various fixtures, including faucets. Whether you’re installing a new faucet or repairing a leak, silicone sealant can be used instead of plumber’s putty to ensure a reliable and long-lasting seal. Just ensure that you’re using a high-quality, waterproof silicone sealant specifically designed for plumbing purposes.
What causes a ceramic disk faucet to leak
A ceramic disk faucet can develop leaks due to several reasons. Common causes include worn-out seals, mineral deposits or sediment buildup, damaged ceramic disk assemblies, or loose or deteriorated O-rings. If you’re experienced with plumbing repairs, you may attempt to fix some of these issues yourself. However, for more complex problems or if you’re unsure of the underlying cause, it’s best to consult a professional plumber who can diagnose and repair the faucet effectively.
Can I fix a dripping tap myself
Fixing a dripping tap yourself is possible, depending on your level of experience and the complexity of the issue. Simple fixes, such as replacing a washer or O-ring, can often be done by homeowners with some basic plumbing knowledge and the right tools. However, if you’re unfamiliar with plumbing repairs or the problem persists after attempting a fix, it’s advisable to seek professional help. Remember, improperly repaired taps can lead to more significant problems, so it’s essential to know your limits and seek assistance when needed.
Why should a leaking tap be repaired immediately
Repairing a leaking tap immediately is crucial for several reasons. First, the continuous dripping can waste a significant amount of water over time, impacting both your wallet and the environment. Second, leaks can lead to damage to your fixtures, sink, or countertop, causing costly repairs or replacements. Additionally, stagnant water from leaks can attract pests and contribute to the growth of mold and mildew, which can be harmful to your health. So, don’t delay—fix that drip and save yourself from unnecessary headaches.
Why is the base of my faucet leaking
A leaking base of a faucet can be caused by loose connections, worn-out washers or O-rings, or a faulty sealing surface. The constant flow of water can compromise the seal around the base, leading to leaks. To address this issue, make sure to tighten any loose connections and inspect the washers and O-rings for signs of wear or damage. If the problem persists, it’s recommended to replace the worn-out components or consult a professional plumber for a thorough inspection and repair.
Can a handyman fix a leaky faucet
Yes, a handyman can typically fix a leaky faucet. If the problem is a simple fix, such as replacing a washer or tightening a connection, a handyman with plumbing experience should be able to handle the repair. However, for more complex issues or if there is a need for specialized knowledge or equipment, it may be best to hire a professional plumber. Plumbers have extensive training in all aspects of plumbing and can ensure that the repair is done correctly to prevent any further complications.
Will plumber’s putty stop leaks
Plumber’s putty is primarily used for creating a watertight seal during the installation of certain fixtures, such as drains, sink strainers, and some faucets. While it does provide an effective seal, plumber’s putty is not designed to fix leaks that are already occurring. If you have a leaky faucet, it’s best to address the root cause of the problem and replace any worn-out or damaged components to ensure a proper and lasting repair.
How do I stop my kitchen tap from dripping
To stop your kitchen tap from dripping, follow these steps:
- Turn off the water supply: Locate the shut-off valves under the sink and turn them clockwise to stop the water flow.
- Plug the sink drain: Close the sink drain or use a plug to prevent small parts from falling down.
- Remove the handle: Depending on the type of faucet, you may need to unscrew the handle or use a hex key to remove it.
- Replace the washer or cartridge: Inside the faucet body, you’ll find a washer or cartridge. Carefully remove it and replace it with a new one of the same size and type.
- Reassemble and test: Put the faucet handle back in place, ensuring it is tightened securely. Turn on the water supply and test the faucet to ensure the drip has stopped.
By following these steps and replacing the faulty washer or cartridge, you should be able to put an end to that pesky kitchen tap drip.