In the world of DIY home improvement, skim coating is a popular technique used to achieve smooth, flawless walls. But before jumping into the skim coating process, many homeowners are left wondering if priming is a necessary step. In this blog post, we’ll dive into the question of whether or not you need to prime before skim coating, and explore the reasons why it may or may not be essential.
Preparation is key when it comes to any painting or wall-finishing project, and skim coating is no exception. By applying a thin layer of joint compound or plaster to the walls, skim coating can help hide imperfections and create a polished, even surface. But to ensure the best results, it’s important to properly prep the walls beforehand. One crucial aspect of this preparation is determining whether or not to prime the walls before skim coating.
So, do you need to prime before skim coating? Join us as we delve into the details and discover the pros and cons of priming, the steps for proper wall preparation, and address common concerns. Whether you’re a seasoned DIY enthusiast or a first-time skim coater, this blog post will provide you with the knowledge and guidance you need to tackle your next home improvement project with confidence.

Do I Need to Prime Before Skim Coating
So, you’re embarking on a skim coating project to give your walls a smooth and flawless finish. You’ve got all your materials ready, a lake of patience, and your DIY spirit roaring. But wait, do you need to prime before you dive into the skim coating pool? Let’s dive right in and find out!
What Exactly is Skim Coating Again
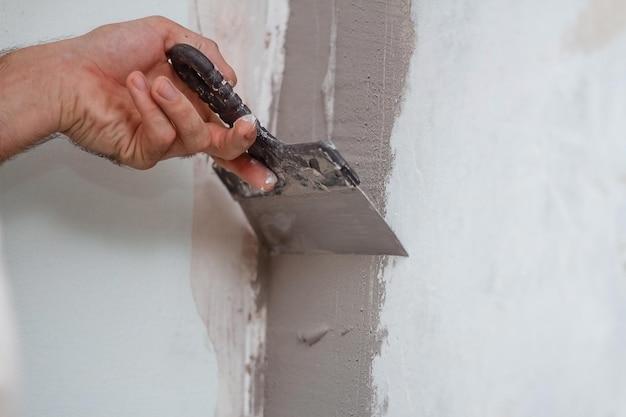
Before we answer the pressing question at hand, let’s have a quick refresher on skim coating. Skim coating is a technique used to create a smooth and even surface on walls or ceilings. It involves applying a thin layer of joint compound or plaster over the existing surface to conceal imperfections such as dents, scratches, or uneven texture.
The Importance of Priming
Now, back to the main query: do you need to prime before you start skim coating? The answer, my friend, is a resounding YES! Priming is a crucial step that should never be skimped on. Here’s why:
1. Promotes Adhesion
Priming acts as a bonding agent between the old surface and the skim coat. When you prime before skim coating, you create a strong foundation for the skim coat to adhere to. Without a primer, your skim coat might not stick as well, leading to potential peeling or cracking down the road. And let’s face it, we don’t want our walls to end up looking like a hot mess, do we?
2. Enhances Durability
By applying a primer, you’re not just improving the adhesion of the skim coat; you’re also boosting its durability. A well-primed surface ensures that your skim coat resists wear and tear better, keeping your walls looking fabulous for years to come. Plus, durability is the name of the game when it comes to skim coating, especially if you’ve got kids or pets wreaking havoc in your home.
3. Prevents Stains and Discoloration
Here’s a scenario for you: you spend hours meticulously applying your skim coat, achieving a smooth finish that would make Picasso jealous. But alas, a few weeks later, you notice unsightly stains seeping through your masterpiece. What a nightmare! But fear not, because priming can save the day. A good primer acts as a barrier, preventing stains and discoloration from bleeding through your skim coat and ruining your hard work.
4. Saves Time and Money
I know what you’re thinking: “But priming adds an extra step to the already time-consuming skim coating process!” Hear me out: investing a little extra time in priming upfront actually saves you time and money in the long run. How, you ask? Well, priming creates a smooth and even surface, reducing the need for multiple coats of skim coat. Less skim coat, less sanding, less effort. Need I say more?
Choosing the Right Primer
Now that we’ve established the importance of priming before skim coating, let’s touch on choosing the right primer for the job. The best primer for skim coating depends on your unique situation, but here are a few pointers:
1. PVA Primer for Drywall
If you’re working on a drywall surface, a PVA (Polyvinyl Acetate) primer is your go-to choice. PVA primers work wonders on absorbent surfaces like drywall, ensuring optimal adhesion and a smooth finish. Just make sure to follow the manufacturer’s instructions for application and drying times.
2. Oil-Based Primer for Tough Stains
For surfaces with stubborn stains or high humidity areas like bathrooms or kitchens, an oil-based primer is your secret weapon. Oil-based primers provide excellent stain-blocking properties and are resistant to moisture, making them ideal for challenging environments.
3. High-Build Primer for Rough Surfaces
If your walls resemble the rugged terrain of the Rocky Mountains, a high-build primer can be a game-changer. As the name suggests, high-build primers have a thicker consistency and are designed to fill in grooves and minor imperfections in rough surfaces. They create an ultra-smooth canvas for your skim coat to work its magic.
Primer: The Skim Coating MVP
In conclusion, priming before skim coating is a no-brainer. It not only improves adhesion and durability but also prevents stains and saves you time and money in the long run. So, as tempting as it may be to skip this crucial step, take the time to prime your walls and set yourself up for skim coating success. Trust me, your walls will thank you, and you’ll be basking in the glory of a flawlessly smooth finish.
Now that we’ve got the priming sorted, let’s dive right into the nitty-gritty of skim coating techniques in our next section. Stay tuned!
Do I Need to Prime Before Skim Coating: FAQs
FAQs about preparing walls, applying skim coat, and painting
Do I need to seal skim coat
When it comes to skim coating, sealing is not always necessary. However, in some cases, particularly if your walls have a particularly porous surface or are prone to moisture, it can be beneficial to seal the surface before skim coating. Sealing the wall helps create a uniform surface and prevents the skim coat from absorbing into the wall too quickly, allowing for easier application and better results.
How do you prep a wall for skim coating
Prepping the wall before skim coating is crucial for achieving a smooth and flawless finish. First, remove any loose or damaged plaster or paint. Next, thoroughly clean the surface to remove dirt, dust, and grease. Fill any holes or cracks with a suitable patching compound and sand them down to ensure a level surface. Finally, wipe down the wall with a damp sponge to remove any remaining debris and allow it to dry completely before applying the skim coat.
What type of plaster should I use for skimming
For skim coating, it’s best to use a specific type of plaster known as “skim coat plaster” or “finishing plaster.” This type of plaster is specially formulated to provide a smooth and even finish on walls and ceilings. Skim coat plaster is typically premixed, making it easier to work with and ensuring consistent results. Be sure to choose a high-quality product that suits your specific needs and follows the manufacturer’s instructions for application.
Can joint compound be used as a skim coat
Yes, joint compound can be used as a skim coat in certain situations. Joint compound, also known as drywall mud, is commonly used to fill and finish seams between drywall panels. It can also be applied as a skim coat to smooth out minor imperfections on walls or ceilings. However, keep in mind that joint compound is not as durable as skim coat plaster, so it may not be suitable for high-traffic areas or surfaces that require long-term durability.
How do you paint skim coats
After the skim coat has dried and cured, it’s ready for painting. Before painting, make sure to thoroughly clean the surface to remove any dust or debris. Then, apply a coat of primer to enhance adhesion and ensure a consistent paint finish. Once the primer has dried, you can proceed to paint the skim coat using your desired color and type of paint. It’s recommended to use a roller or brush suitable for the texture of the skim coat to achieve the best results.
How smooth does skim coat need to be
The smoothness of a skim coat depends on your personal preference and the purpose of the surface. Generally, a skim coat should be smooth enough to cover imperfections and provide a uniform base for painting or applying wallpaper. However, keep in mind that achieving a perfectly smooth finish can be challenging, especially for beginners. Aim for a surface that feels even to the touch and looks visually appealing, but don’t stress over minor imperfections that can be corrected during the painting process.
Can I skim coat over primer
Skim coating over primer is possible, but it’s not always necessary or recommended. If the primer provides a suitable surface for the skim coat and there are no issues with adhesion, you can proceed with skim coating directly over the primer. However, it’s important to keep in mind that primer is typically used to enhance the adhesion of paint, not skim coat plaster. Before deciding to apply the skim coat over primer, check the manufacturer’s instructions and consider consulting with a professional for the best results.
When should I apply a second skim coat
The need for a second skim coat depends on the condition of the surface and the desired final result. If the first skim coat was not enough to achieve the desired smoothness or to cover imperfections, applying a second skim coat may be necessary. It’s important to allow the first skim coat to fully dry and cure before applying the second coat. Once the first coat is dry, evaluate the surface and determine if a second coat is needed. Remember to sand and clean the surface before applying the second coat for optimal results.
Can I put a skim coat over a painted wall
In most cases, it is possible to apply a skim coat over a painted wall. However, there are a few factors to consider. The paint must be in good condition, without peeling or flaking, and free from contaminants that could affect adhesion. It’s also important to roughen up the painted surface slightly with sandpaper to help the skim coat adhere better. Keep in mind that skim coating over paint may require additional preparation and may not produce the same level of smoothness as applying the skim coat to a bare surface.
What happens if you paint plaster too soon
If you paint plaster too soon, before it has fully dried and cured, it can lead to various issues. The paint may not adhere properly, resulting in poor adhesion and potential peeling or flaking. Painting too soon can also trap moisture within the plaster, leading to unsightly bubbles or blisters. To ensure the best results, always follow the manufacturer’s instructions for drying and curing times before applying paint to freshly skim coated surfaces.
How long does skim coat take to dry
The drying time of a skim coat can vary depending on various factors such as temperature, humidity, and the thickness of the applied coat. Generally, skim coat plaster takes around 24 to 48 hours to dry. However, it’s essential to follow the manufacturer’s instructions for specific drying times, as different products may have different requirements. Keep in mind that thicker coats and higher humidity levels can extend the drying time, so patience is key.
How much does it cost to plaster a 4-bedroom house in the UK
As of 2023, the cost to plaster a 4-bedroom house in the UK can vary depending on several factors, including the size of the rooms, the condition of the existing walls, and the location. On average, you can expect to pay anywhere between £2500 to £6000 for a complete plastering job. It’s always best to obtain multiple quotes from qualified professionals to get an accurate estimate for your specific project.
Is skimming cheaper than plastering
Skimming is generally more cost-effective than plastering an entire wall or room. Skimming involves applying a thin layer of plaster to create a smooth finish over an existing wall, while plastering involves covering and reinforcing the entire wall with a thicker layer of plaster. Skimming is often the preferred choice if the existing walls are in good condition and only require a cosmetic update. However, if the walls have significant damage or require structural repairs, plastering may be necessary.
Can I skim coat over Gardz
Yes, you can skim coat over Gardz. Gardz is a popular wall primer that helps seal porous surfaces and problem areas such as damaged drywall, wallpaper adhesive residue, or patched areas. Skim coating over Gardz can provide a smooth and uniform surface for applying the skim coat plaster. Make sure to follow the manufacturer’s instructions for applying Gardz and allow it to fully dry before proceeding with the skim coat for the best results.
Should I prime before skim coating
Priming is not always necessary before skim coating, but it can have several benefits. Priming the surface helps improve adhesion, reduces the absorption of the skim coat into the wall, and ensures a more even application. Primer also helps create a uniform and stable base for the skim coat, allowing for better results. While it’s not mandatory to prime before skim coating, it is generally recommended, especially if you’re working with a challenging surface or trying to achieve a flawless finish.
Why is my skim coat bubbling
If you notice bubbles forming in your skim coat, several factors could be causing this issue. Bubbling can occur due to improper wall preparation, such as not sealing or priming the surface correctly. It can also happen if the skim coat is applied too thickly, trapping air pockets within the plaster. Additionally, high humidity or rapid drying can cause bubbles to form. To prevent or fix bubbling, make sure to follow proper wall preparation techniques, apply the skim coat evenly, and allow sufficient time for drying and curing.
What is the purpose of skim coat
The primary purpose of a skim coat is to create a smooth and uniform surface on walls or ceilings. Skim coating helps cover minor imperfections, such as small cracks, bumps, or texture variations, resulting in a clean and visually appealing finish. It also provides a suitable base for painting, wallpapering, or applying other decorative finishes. Skim coating is an effective way to rejuvenate or update the appearance of a space without resorting to major renovations or extensive wall repairs.
Can you skim coat with a roller
While it’s possible to skim coat with a roller, it’s not the most common or recommended method. Skim coating requires a thin and smooth application of plaster, which is typically achieved using a trowel or a wide putty knife. Rollers are generally used for applying paint or primer and can create a textured or uneven surface when used for skim coating. For the best results, stick to traditional skim coating techniques using the appropriate tools and follow proper application methods.
How long after skim coat can I paint
After skim coating, it’s crucial to allow sufficient time for the plaster to dry and cure before painting. On average, you should wait at least 24 to 48 hours before applying paint to a freshly skim coated surface. However, drying times can vary depending on factors such as temperature, humidity, and the thickness of the skim coat. To ensure optimal results, it’s always best to follow the manufacturer’s instructions for drying and curing times before proceeding with paint application.
Hopefully, this FAQ-style subsection has answered some of your burning questions about priming, skim coating, and painting. Now, armed with this knowledge, you can confidently tackle your wall renovations with a touch of humor and a sense of adventure. Remember to prep your walls properly, choose the right materials, and take your time to achieve that flawless finish. Happy skim coating!