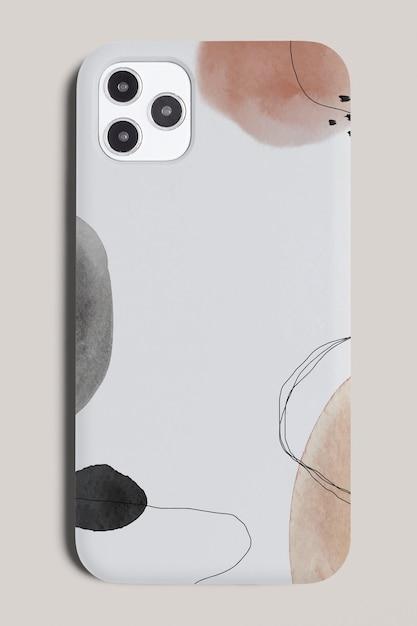
Are you tired of your plain and boring phone case? Why not give it a personal touch and make it truly unique? In this blog post, we will guide you step by step on how to make your own DIY sticker phone case. Not only will you be able to express your creativity, but you’ll also have a phone case that’s as one-of-a-kind as you are.
If you’ve been wondering how to make your phone cover beautiful, how to spice up a clear phone case, or if stickers can stick on phone cases, we’ve got you covered. We’ll provide all the answers to your burning questions and help you create a stunning phone case that reflects your style and personality.
But before we dive into the exciting world of DIY phone case customization, let’s address some common queries like how long it takes for Mod Podge to dry on a phone case, the best app for making stickers, and what materials can stick to silicone. So, grab your crafting supplies and let’s get started on this fun and rewarding project!
How to Create Your Own Stylish Phone Case with DIY Sticker Magic
So, you’ve got a plain and boring phone case, and you’re itching to give it a personal touch? Look no further! In this guide, we’ll walk you through the art of making your own DIY sticker phone case. With a little creativity and a touch of magic, you’ll transform your ordinary case into a unique fashion statement that’s bound to turn heads. Get ready to express your style and show off your personality with this fun and easy project!
Materials You’ll Need
Before we dive into the sticker madness, let’s gather our supplies. Here’s a handy checklist to ensure you’re well-equipped for this creative adventure:
1. A phone case:
Make sure you have a phone case that’s compatible with your phone model. It’s essential to choose a case with a smooth surface, allowing the stickers to adhere properly without any bumps or ridges getting in the way.
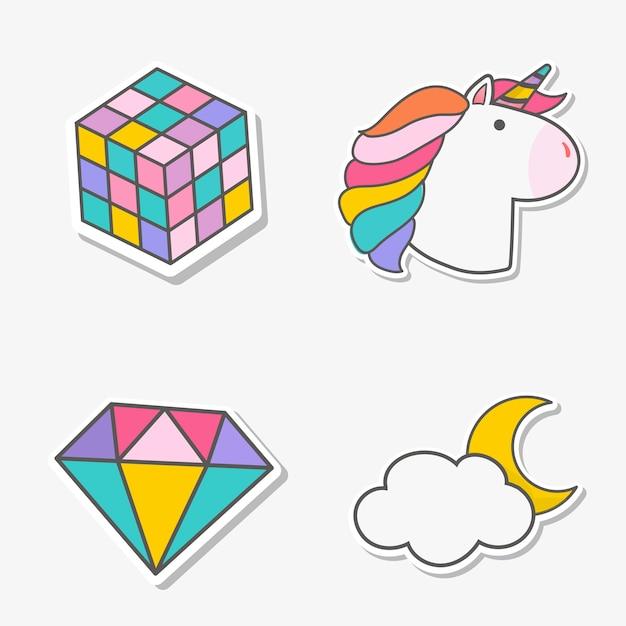
2. Stickers galore:
This is where the magic begins! Explore an assortment of stickers that reflect your personal style. From cute animals to trendy patterns and quirky quotes, let your imagination run wild. Remember, the more stickers, the merrier your creation will be!
3. Scissors:
Don’t worry; we’re not asking you to become a contortionist. Just a good pair of scissors to trim your stickers and create precision cuts, if needed.
4. Tweezers:
A handy tool to help you position and place the stickers accurately. The last thing you want is a crooked design ruining your masterpiece.
Step-by-Step Sticker Sorcery
Now that we’ve got our supplies ready, it’s time to delve into the enchanting art of creating a DIY sticker phone case.
1. Clean and prep your phone case:
Give your phone case a quick wipe-down to remove any dust, dirt, or fingerprints. We don’t want anything interfering with your sticker magic, do we?
2. Plan your masterpiece:
It’s always a good idea to plan your sticker arrangement before diving in headfirst. Lay out your stickers on the case without sticking them yet. This allows you to experiment with different designs and find the perfect arrangement that speaks to your soul.
3. Stick ’em up:
Once you’re satisfied with your design, grab your tweezers and start sticking those bad boys onto the case. Take your time and be gentle with the stickers to avoid any tears or creases. Remember, perfection takes patience!
4. Press and secure:
Now that your stickers are in place, grab a clean cloth and press firmly over the entire surface of the case. This ensures that the stickers adhere smoothly and won’t peel off easily. Give them a moment to settle in, and voila! Your phone case has transformed into a work of art.
5. Share your masterpiece:
You’ve successfully awakened your inner artist and crafted a stunning DIY sticker phone case. Now it’s time to flaunt your creation! Share it on social media platforms, add it to your #PhoneCaseGoals collection, or simply bask in the admiration of your friends’ envy.
Let Your Imagination Take the Lead
Creating your own DIY sticker phone case is not only a fun and creative way to express yourself, but it also adds a personal touch to your beloved gadget. Each time you look at your phone, you’ll smile at the sight of your unique masterpiece, knowing that you’ve added a splash of your personality into the mix. So go ahead, let your imagination run wild, and let the stickers work their magic!
DIY Sticker Phone Cases: Your Burning Questions Answered!
So, you’ve got yourself a plain and boring phone case that’s just begging for a little personality. What’s a creative soul like you to do? Fear not! We’ve compiled a list of frequently asked questions about DIY sticker phone cases to help you unleash your inner artist and transform your phone into a work of art. Let’s dive right in!
How long does Mod Podge take to dry on a phone case
Ah, Mod Podge, the holy grail of crafty individuals. When it comes to drying time, it depends on a few factors. In general, you’ll want to give your Mod Podge masterpiece about 24 hours to dry completely. Feel free to do a little dance, play some music, or binge-watch your favorite series during this waiting period. Patience is key, my friend!
How can I make my phone cover beautiful
Oh, the possibilities are endless, my friend! One simple yet effective way to make your phone cover beautiful is by using stickers. Get creative with colorful, vibrant designs, or keep it classy with elegant patterns. The choice is yours! Remember, let your imagination run wild and let your personality shine through your phone cover. That thing you’re feeling right now? That’s excitement!
Can you put stickers on phone cases
Absolutely! Stickers and phone cases go together like peanut butter and jelly. Just slap those stickers on your phone case and watch the magic happen. But hold on a second! Make sure your phone case is clean and free from any dirt or debris before applying your stickers. Trust me, you don’t want any unwanted surprises lurking beneath those adorable stickers.
What is the best app for making stickers
Ah, the age-old question! There are plenty of sticker-making apps out there, but one that has stolen the hearts of many DIY enthusiasts is “Stickerify That!” This user-friendly app allows you to create your own custom stickers with ease. Choose from a selection of fonts, graphics, and colors to make your stickers truly unique. Have some fun and let your creative juices flow!
What can stick to silicone
Silicone, oh silicone, you slippery devil! While some materials may struggle to stick to this smooth surface, fear not, there is hope. Washi tape, acrylic paint, and even Cricut permanent vinyl are great options for adding some flair to your silicone phone case. So go ahead, unleash your imagination, and show that silicone who’s boss!
Does Cricut permanent vinyl stick to silicone
Yes, indeed! Cricut permanent vinyl is your secret weapon when it comes to sticking it to silicone. Just cut out your desired shape using your Cricut machine, peel off the backing, and firmly press the vinyl onto your phone case. Voila! Your phone case just went from drab to fab in a matter of minutes. Prepare for compliments on your newfound DIY prowess!
Is a phone case business profitable
Ah, the allure of turning your crafting passion into a profitable venture! While starting a phone case business can be exciting, success depends on various factors such as market demand, quality of your products, and marketing strategies. If you have a knack for design, a solid business plan, and a sprinkle of entrepreneurial spirit, you just might be on your way to a profitable phone case empire. But remember, Rome wasn’t built in a day, so have patience and persevere!
Can you use Mod Podge on a phone case
Absolutely! Mod Podge is a versatile wonder that can work its magic on a wide range of surfaces, including phone cases. To Mod Podge your phone case, start by cleaning it thoroughly. Then, apply a thin, even layer of Mod Podge to the surface. Worried about smudges or streaks? Fear not! Mod Podge dries clear, leaving your phone case with a glossy and professional-looking finish. Get ready to impress friends and strangers alike with your crafting skills!
How do you Modge podge a phone case
Ah, the art of Mod Podging a phone case! Here’s a step-by-step guide to make this process a breeze:
- Start by cleaning your phone case to ensure a smooth surface for the Mod Podge to adhere to.
- Choose your desired design, whether it’s a collage of images or a single statement sticker.
- Apply a thin coat of Mod Podge to your phone case using a foam brush. Make sure to spread it evenly and avoid clumps.
- Carefully place your stickers or cut-outs onto the Mod Podge-coated surface, arranging them as desired.
- Once all your stickers are in place, apply another thin layer of Mod Podge on top to seal the deal. This will protect your stickers from wear and tear.
- Allow your masterpiece to dry for about 24 hours, resisting the temptation to check on it every five minutes.
- Admire your handiwork and proudly flaunt your personalized phone case to the world!
How do you spice up a clear phone case
Ah, the clear phone case, a blank canvas just waiting to be adorned! Get ready to make a statement with these creative ideas to spice up your clear phone case:
Nail polish marbling:
- Fill a container with water.
- Drop different colored nail polish onto the water’s surface.
- Swirl the colors with a toothpick or skewer to create a marbled effect.
- Dip your clear phone case into the water, making sure to cover the desired area.
- Gently lift the case out of the water and let it dry.
Pressed flowers:
- Gather some beautiful flowers or leaves.
- Place them between two sheets of parchment paper.
- Lay a heavy book on top and let the flowers dry for a week or two.
- Once dry, carefully arrange the pressed flowers on the inside of your clear phone case.
- Secure them in place by placing another clear case on top.
How do you seal phone stickers
Oh, those precious phone stickers! To keep them looking fresh and fabulous, follow these simple steps to seal them:
- Ensure your phone case is clean and free of any dust or debris.
- Apply a clear, waterproof sealant to the surface of your phone case, covering the stickers completely.
- Gently brush the sealant over the stickers, making sure to reach all the edges.
- Allow the sealant to dry according to the instructions provided by the manufacturer.
- Voila! Your stickers are now sealed and protected from the elements, ready to accompany you on all your grand adventures!
How do you make stickers on your phone
Creating stickers on your phone can be a breeze with the right app! Here’s a simple step-by-step guide to get you started:
- Download a sticker-making app like “Sticker Maker” from your phone’s app store.
- Open the app and select the option to create a new sticker pack.
- Choose an image from your phone’s gallery or use the app’s built-in tools to create your own design.
- Crop the image to your desired shape and size, add fun text or emojis if desired.
- Save your sticker and add it to your sticker pack.
- Repeat the process for each sticker you want to create.
- Once you’ve finished creating your pack, export it to your messaging apps or share it with friends.
- Get ready to bombard your chats with cute and personalized stickers created right on your phone!
What do you need to sublimate a phone case
Sublimating a phone case offers a world of creative possibilities! Here’s what you’ll need:
- A sublimation printer: This special printer uses heat to transfer dyes onto a range of surfaces, including phone cases.
- Sublimation paper: This specialized paper is coated with a layer that allows the dyes to transfer onto the phone case.
- Sublimation ink: Unlike traditional ink, sublimation ink turns into a gas when heated, allowing it to infuse the phone case’s surface.
- Heat press machine: This machine applies the necessary heat and pressure to transfer the ink onto the phone case.
- Phone case blanks: These specially coated cases provide a smooth surface for the ink to adhere to.
What can I use to seal paint on my phone case
Keep that paint intact and your designs fresh by sealing it with a clear varnish or sealant. Look for a sealant specifically designed for the type of paint you used on your phone case. Apply a thin, even coat over the painted surface, allowing it to dry completely. This protective layer will ensure that your hard work remains vibrant and unscathed, even in the face of everyday wear and tear.
How do you make a paper iPhone
Ah, the paper iPhone, perfect for playtime or quirky decorations! Here’s a quick and easy way to make your very own paper iPhone:
- Start by finding a template for a paper iPhone online or create your own by tracing the shape onto a piece of cardstock.
- Cut out the shape using scissors or a craft knife, making sure to include all the necessary details like buttons and camera holes.
- Score along the indicated fold lines, gently creasing them to make for easier folding.
- Carefully fold along the scored lines, creating the sides and back of your paper iPhone.
- Secure each fold with glue or double-sided tape to hold your creation together.
- If you’re feeling extra fancy, get creative and customize your paper iPhone with colorful markers, stickers, or even tiny googly eyes (because why not?).
- Now you have your very own paper iPhone! Use it for pretend play, display it on your desk, or give it to a friend as a unique gift that’s sure to bring a smile to their face.
Do stickers stick on silicone
Stickers and silicone have an interesting relationship, almost like a love-hate affair. While some stickers may struggle to stick to silicone due to its smooth surface, fear not! There are a few tricks you can try to get those stickers to stay put:
- Clean the silicone surface thoroughly with rubbing alcohol to remove any traces of oil or dirt.
- Use stickers with strong adhesive backing, ideally designed for challenging surfaces.
- Consider applying a layer of clear sealant or adhesive spray over the silicone surface before sticking on your stickers.
- Press the stickers firmly onto the silicone surface, ensuring good contact and reducing the chances of them peeling off.
How can I decorate my phone case
Oh, the possibilities are endless when it comes to phone case decorations! Here are some ideas to get your creative gears turning:
- Stickers: The classic choice for phone case decoration. Choose from cute, funny, or artsy designs to express your unique style.
- Rhinestones: Add a touch of bling to your phone case with some adhesive rhinestones. Sparkle on, dear friend!
- Washi tape: This magical tape comes in a variety of patterns and colors. Cut it into different shapes and stick it onto your phone case for a fun and customizable look.
- Paint markers: Unleash your artistic side with paint markers. Use them to draw intricate designs, write inspiring quotes, or create mind-boggling patterns on your phone case.
- Dried flowers: Press and dry your favorite blooms, then carefully arrange them on your phone case for a chic and natural touch.
- Fabric or felt cutouts: Get crafty with fabric or felt. Cut out shapes, letters, or even your favorite characters, then glue them onto your phone case. The cuteness level will be off the charts!
How do I design my own sticker
Oh, the joys of designing your own stickers to unleash your creativity! Here’s a quick guide to get you started:
- Start with a clear vision of what you want your sticker to look like. Sketch it out on paper or envision it in your mind.
- Choose a digital design software such as Adobe Illustrator or Canva to bring your vision to life.
- Create or import your artwork into the software, selecting colors, fonts, and graphics that align with your design.
- Use the software’s tools to refine your design, ensuring it’s clean, clear, and ready for printing.
- Once you’re satisfied with the design, export it as an image file such as PNG or JPEG.
- Print your design onto sticker paper using an inkjet or laser printer. Make sure to follow the sticker paper’s instructions for optimal printing results.
- Cut out your stickers using scissors, a craft knife, or a cutting machine like Cricut.
- Peel off the backing paper and stick your custom-designed stickers wherever your heart desires. It’s your world – sticker it up!
Boom! There you have it, all your burning questions about DIY sticker phone cases answered in one fell swoop. Now go forth, my creative friend, and turn that plain phone case into a canvas of awesomeness. The possibilities are endless, and the fun is just beginning! Happy crafting, and may your phone case be a true reflection of your unique personality in this otherwise cookie-cutter world. Keep shining!