Henna has been a popular choice for body art and hair dyeing for centuries, but what if you don’t have henna powder on hand? Don’t worry! In this guide, we’ll explore how to make DIY henna without henna powder, using natural ingredients that can be found in your kitchen pantry. Whether you’re looking to experiment with different colors or simply want to try a new approach, this blog post will provide you with all the information you need.
From drying henna leaves to creating your own henna paste, we’ll cover it all. Have you ever wondered how white Mehendi is made? Or what the side effects of henna are? We’ll tackle these questions and more. Discover the ingredients used in traditional henna and alternative mixtures with food coloring. Plus, we’ll share tips on thickening henna paste and addressing concerns about henna’s impact on your hair.
So, if you’re eager to learn how to make your own DIY henna without henna powder, keep reading. Get ready to unleash your creativity and achieve stunning results while exploring the vibrant world of natural body and hair art.
How to Create Your Own Henna Magic Without Henna Powder
Welcome to the enchanting world of DIY henna! You don’t need mystical powers to create beautiful henna designs; all you need is a pinch of creativity and a dash of resourcefulness. In this guide, we’ll show you how to make DIY henna without henna powder, so you can embark on your henna journey without any obstacles. Get ready to unleash your inner artist and dive into the whimsical realm of henna artistry!
Using Nature’s Bounty: How to Make Henna Paste Without Henna Powder
Getting Creative with Coffee Grounds
If you thought coffee was only good for perking you up in the morning, think again! Coffee grounds can bring depth and richness to your henna paste. Combine 2 tablespoons of finely ground coffee with 2 teaspoons of black tea, a squeeze of lemon juice, and a teaspoon of aromatic essential oils. Mix it all together until you achieve a smooth, velvety consistency, and voila! You’ve just brewed up a delicious henna alternative.
Cocoa Power to the Rescue!
No, we’re not talking about a superhero made of chocolate, but close enough! Cocoa powder can be your secret weapon when creating henna without henna powder. Mix equal parts of cocoa powder and cornstarch for a heavenly concoction. Then, add hot water and stir until you achieve a paste-like consistency. The rich, earthy tones of cocoa will lend your henna designs a warm and inviting allure.
Sherbet Sorcery
Who says henna has to stick to tradition? Let’s sprinkle some creativity into our DIY henna recipe with sherbet! Start by grabbing a packet of orange or raspberry sherbet from your favorite grocery store. Mix it with water until it transforms into a smooth paste. Shake things up by adding a teaspoon of sugar and a squeeze of lemon juice to the mixture. The sherbet’s vibrant colors will infuse your henna designs with a playful, summer-like vibe.
Embrace the Unexpected: Try Out Non-traditional Ingredients
Yogurt-y Goodness
When life gives you lemons, make henna paste! And when life gives you yogurt, well, you can make henna paste too! Yogurt not only adds a creamy texture but also helps improve the longevity of your henna stain. Mix equal parts of yogurt and cornstarch until smooth. Feel free to experiment with fragrant spices like cinnamon or turmeric to infuse your design with a delightful twist. Now you’re ready to yogi your way into henna mastery!
Silky Smooth Avocado
Avocados are the unicorns of the fruit kingdom, and now they’re adding their magical touch to henna recipes too! Blend half an avocado with 1 tablespoon of lemon juice until smooth, then add 1 tablespoon each of cornstarch and olive oil. Mix it well, creating a lusciously green paste that will not only soothe your skin but also give your henna designs a quirky twist. Embrace the avocado craze and become a henna Picasso!
Congratulations, you’ve just mastered the art of DIY henna without henna powder! Now, armed with these alternative henna recipes, you can let your imagination run wild and create henna designs that will leave everyone spellbound. Remember, the world of henna is your creative playground—so grab your ingredients, unleash your inner artist, and embark on a henna journey filled with endless possibilities. Get ready to dazzle the world with your own unique henna magic!
FAQ: How to Make DIY Henna without Henna Powder
How to Dry Henna Leaves
Drying henna leaves is a crucial step in making DIY henna without henna powder. Here’s a simple guide to help you with the process:
-
Harvest the leaves: Find a henna plant (also known as Lawsonia inermis) and harvest the leaves. Select healthy, green leaves for the best results.
-
Clean the leaves: Remove any dirt or impurities from the leaves by gently washing them in cool water. Be careful not to damage the leaves.
-
Dry the leaves: Spread the leaves evenly on a clean surface, such as a tray or a drying rack. Place them in a well-ventilated area away from direct sunlight. Let them air dry for about one to two weeks until they become crisp and brittle.
-
Crush the leaves: Once completely dry, crush the leaves into a fine powder using a mortar and pestle or a coffee grinder. Make sure there are no clumps remaining.
How is White Mehendi Made
White mehndi, also known as white henna, is a trendy alternative to traditional henna. Contrary to its name, white mehndi does not actually contain henna. Instead, it is made using ingredients like cosmetic-grade adhesive, stencils, and glitter. Here’s how you can make white mehndi:
-
Prepare your design: Choose a stencil pattern or create your own design. Place the stencil on the desired area of your skin.
-
Apply the adhesive: Carefully apply a thin layer of cosmetic-grade adhesive within the stencil. Make sure the adhesive covers the design area evenly.
-
Let it dry: Allow the adhesive to dry completely. This can take anywhere from 15 minutes to an hour, depending on the brand of adhesive used.
-
Remove the stencil: Gently peel off the stencil to reveal your white mehndi design. You can further enhance the design by adding glitter or other decorative elements, if desired.
What are the Side Effects of Henna
Henna is generally safe to use on the skin, but it’s essential to be aware of potential side effects:
-
Allergic reactions: Some individuals may develop an allergic reaction to henna. Symptoms can include redness, itching, swelling, or a rash. If you experience any of these symptoms, remove the henna immediately and consult a healthcare professional.
-
Chemical sensitivities: Pre-mixed henna products often contain additives or chemicals that may cause sensitivity or irritation. It’s advisable to opt for natural, pure henna to minimize the risk of adverse reactions.
-
Skin staining: Henna is renowned for dyeing the skin, but the intensity and duration of the stain can vary. The skin may retain the henna color for approximately one to three weeks.
-
Hair complications: When using henna for hair dyeing, it’s worth noting that the results may differ depending on your original hair color and type. Additionally, improper application or leaving henna on for an extended period may lead to hair dryness or brittleness.
Always patch test henna products before applying them to larger areas and consult a professional if you have any concerns or underlying health conditions.
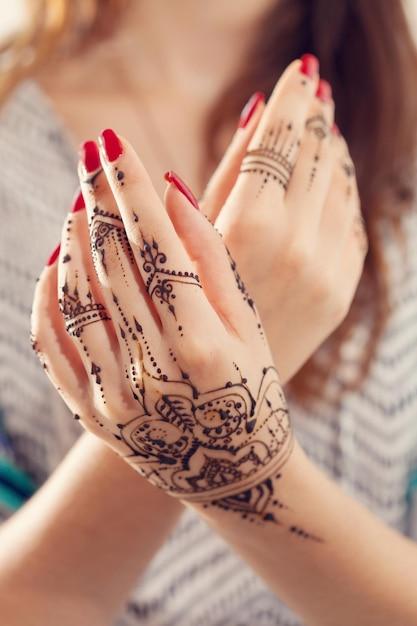
How Do You Make Your Own Henna
Making your own henna can provide a creative and personalized touch to your designs. Follow these steps to create your DIY henna paste:
-
Gather the ingredients: You will need henna powder, lemon juice, sugar, essential oils (such as lavender or tea tree), and a mixing bowl.
-
Mixing the henna: Combine henna powder and lemon juice in the mixing bowl. Gradually add lemon juice until you achieve a thick, pancake batter-like consistency.
-
Sweeten it: Add a teaspoon of sugar to the henna mixture and stir until the sugar dissolves completely. This helps the paste adhere better and improves color development.
-
Infuse with essential oils: Add a few drops of your chosen essential oil to the mixture and stir well. Essential oils not only enhance the aroma but may also help improve the color and longevity of the henna stain.
-
Let it rest: Cover the mixing bowl with plastic wrap or a lid and leave the henna paste to rest for at least 6 to 12 hours. This allows the dye to release and deepen in color.
Note: The exact ratios of ingredients may vary depending on the desired consistency and personal preferences. Experimentation is key!
How Do You Make Henna Leaf Powder
Henna leaf powder is a vital ingredient in traditional henna recipes. If you prefer to make your own henna leaf powder from scratch, here’s how to do it:
-
Harvest the henna leaves: Locate a healthy henna plant and harvest the leaves. Choose mature leaves for the most potent powder.
-
Rinse and dry the leaves: Wash the leaves under cool water to remove any dirt or contaminants. Pat them dry with a clean towel or let them air dry.
-
Dehydrate the leaves: Once dry, place the leaves in a food dehydrator or an oven set to a low temperature (around 150°F or 65°C). Leave them to dehydrate until they are completely crisp and break easily.
-
Grind the leaves: Use a mortar and pestle or a coffee grinder to grind the dried henna leaves into a fine powder. Ensure there are no lumps or coarse particles remaining.
Now you have your homemade henna leaf powder, ready to be incorporated into various henna recipes!
How Do You Make Henna without Henna Powder
While it may seem contradictory, it is indeed possible to make henna without henna powder. This recipe uses readily available household ingredients to mimic the look of traditional henna. Here’s how to do it:
-
Gather the ingredients: You will need flour, cornstarch, warm water, lemon juice, sugar, and tea bags (optional).
-
Mix the dry ingredients: In a bowl, combine equal parts flour and cornstarch. The amount will depend on the size of the design you wish to create. A basic ratio could be 1 tablespoon each.
-
Add wet ingredients: Gradually add warm water and lemon juice to the dry mixture, stirring until you achieve a paste-like consistency. Add a teaspoon of sugar to enhance the color and improve the paste’s adherence.
-
Infuse with tea bags (optional): If you desire a richer color, you can add brewed tea, obtained from tea bags, to the henna mixture. This step is entirely optional and can be skipped if you prefer a lighter result.
-
Allow the paste to rest: Cover the bowl and let the henna substitute paste rest for a few hours. This resting period allows the ingredients to meld and develop a deeper color.
Remember that this alternative paste may not provide the same longevity or richness of color as genuine henna, but it can still offer an enjoyable experience and temporary embellishment.
How Do You Make Henna with Food Coloring
If you want to experiment with vibrant and non-traditional henna colors, incorporating food coloring is an exciting option. Here’s a fun recipe to make henna with food coloring:
-
Prepare the henna paste: Follow the instructions for making henna paste using henna powder and lemon juice. Let it rest for a few hours.
-
Divide the paste: Separate the henna paste into individual bowls, depending on the number of colors you want to create. Use one bowl for each color.
-
Add food coloring: Into each bowl of henna paste, add a few drops of your desired food coloring. Start with a small amount and gradually add more until you achieve the desired hue. Mix well to distribute the color evenly.
-
Test the color: Take a small amount of each colored henna paste and apply it to your skin. Allow it to dry and assess the color. Adjust the color by adding more food coloring if needed.
-
Apply and unleash your creativity: Fill your henna cones or applicator bottles with the colored henna paste. Create intricate designs and let your artistic spirit shine!
Remember that using food coloring may affect the natural properties of henna, potentially reducing the staining power. While it might not offer the same longevity, it’s a fantastic way to enjoy temporary and vibrant henna designs.
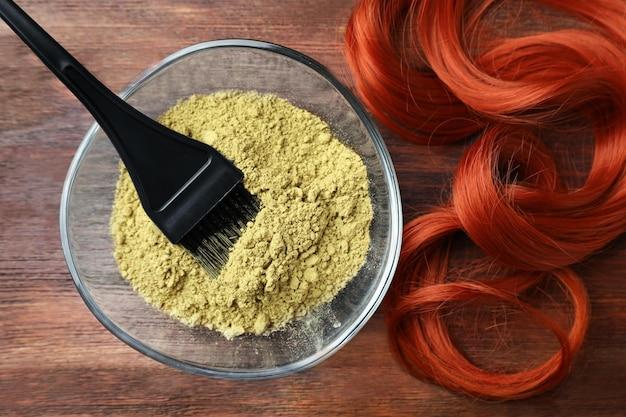
What are the Ingredients of Henna
Traditional, natural henna paste typically consists of just a few simple ingredients:
-
Henna Powder: The primary ingredient is henna powder, derived from the dried and crushed leaves of the Lawsonia inermis plant.
-
Lemon Juice: Lemon juice acts as an acidic component, necessary to release the dye molecules in henna.
-
Sugar: Adding sugar to the henna paste helps create a sticky consistency and improves color development.
-
Essential Oils: Essential oils, such as lavender or tea tree oil, are commonly added to henna paste to enhance the aroma and potentially help deepen the henna stain.
It’s important to note that pre-packaged henna products may contain additional ingredients such as preservatives, chemicals, or additives for different purposes. Always check the label for a list of ingredients if you prefer a more natural approach.
How Do You Thicken Henna Paste for Hair
For those aiming to thicken henna paste specifically for hair dyeing purposes, here’s a simple method:
-
Prepare the henna mixture: Create a basic henna paste by mixing henna powder with warm water and lemon juice. Follow the standard henna paste recipe.
-
Add thickening agents: To thicken the henna paste, you can incorporate ingredients like yogurt, egg yolks, or fenugreek powder. These substances add viscosity and ensure the paste adheres well to the hair.
-
Mix well: Blend the additional thickening agent of your choice into the henna paste until it reaches a smooth, pudding-like consistency. Make sure there are no lumps or clumps.
-
Let it sit: Cover the bowl containing the henna paste with a plastic wrap and allow it to sit for a few hours or overnight. This resting time allows the dye to release, and the paste will naturally thicken further.
Always tailor the thickness of the henna paste according to your preferences and needs. Remember to consistently test the paste’s consistency during the preparation process to achieve desired results.
Why is Henna Bad for You
Henna itself is generally safe and has been used for centuries for various purposes. However, there are a few circumstances in which henna may have negative effects:
-
Purity and additives: Pre-packaged henna products may contain additives, chemicals, or synthetic dyes, potentially triggering allergic reactions or skin irritations. Opting for pure, natural henna without additives can significantly reduce any associated risks.
-
Allergies: While rare, some individuals may develop an allergic reaction to henna. If you experience redness, itching, swelling, or a rash after applying henna, remove it immediately and seek medical advice.
-
Low-quality or expired products: Using low-quality or expired henna may result in poor color, ineffective staining, or compromised hygiene. Always choose fresh, high-quality ingredients or products to ensure a positive experience.
As with any cosmetic product, it’s essential to conduct thorough research, check ingredient lists, and perform patch tests before using henna. If you have any underlying skin conditions or concerns, consult a professional before applying henna.
What is Henna Made Of
Henna is made from the dried and crushed leaves of the Lawsonia inermis plant. The leaves undergo a process of drying, grinding, and sieving to transform them into a fine powder.
The primary pigment responsible for the iconic reddish-brown stain of henna is called lawsone. This natural dye molecule is released when henna powder is mixed with a liquid and applied to the skin or hair.
It is important to note that pure henna does not contain any artificial additives, chemicals, or dyes. The simplicity and organic nature of henna have contributed to its timeless popularity in various cultural traditions and body art practices.
Is There Red Henna
Yes, red henna exists! In fact, red henna is the most commonly used form of henna. The term “red henna” refers to henna powder sourced purely from the Lawsonia inermis plant, which produces a reddish-brown dye.
The color intensity and shade of the henna stain can vary depending on factors such as the quality of the henna powder, the length of application, individual skin chemistry, and aftercare.
Other variants of henna, such as black henna or colored henna, often involve the addition of synthetic dyes or additives to modify the traditional reddish-brown color.
Why Do Hairdressers Hate Henna
Hairdressers’ reactions to henna can differ, but some professionals may express reservations about henna for several reasons:
-
Hair coloring complications: Henna’s natural dye molecules can interact unpredictably with synthetic hair dyes and chemical treatments. Combining henna with these products can result in unwanted color variations or reactions.
-
Lack of control: Since henna stains the hair cuticle rather than penetrating it, hairdressers may find it challenging to achieve precise, consistent results, especially when trying to lighten or change hair color dramatically.
-
Difficulty in removing henna: Once henna is applied, it gradually fades as the hair grows out. However, completely removing henna from the hair can be time-consuming and may require several deep-cleansing treatments.
It’s important to communicate openly with your hairdresser about past henna usage, as it may influence the desired outcome or the techniques used during salon treatments.