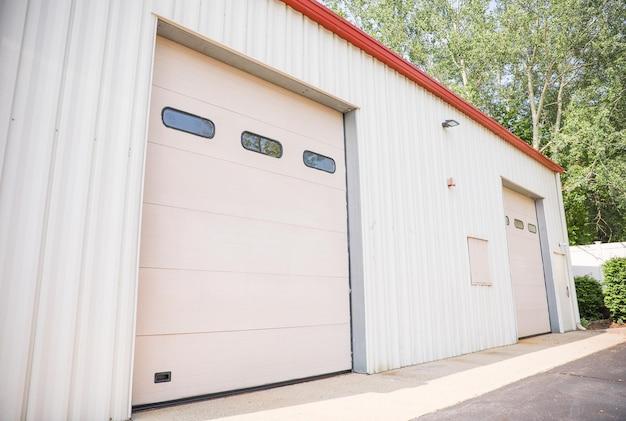
So, you’ve decided to add an extra layer of protection and aesthetic appeal to your pole barn with metal siding. Great choice! Metal siding not only enhances the durability of your structure but also gives it a sleek and modern look. But where do you even begin? How do you hang steel siding? What should go behind the metal siding? Don’t worry, as we’ve got you covered. In this comprehensive guide, we’ll walk you through the step-by-step process of installing metal siding on your pole barn. Whether you’re a seasoned DIY enthusiast or a beginner, we’ll make sure you have all the information you need to tackle this project with confidence. So, let’s get started!
How to Install Metal Siding on a Pole Barn
Prepping for the Metal Masterpiece
Before we dive into the wild world of metal siding installation, let’s get our ducks in a row. First things first, you’ll want to make sure you have all the necessary tools at your disposal. Think of yourself as a metal wizard, so grab hold of your trusty wizard wand (a.k.a. metal snips) and a good ol’ measuring tape.
Step One: Measure Twice, Chuckle Once
As the saying goes, measure twice and cut once. Except in this case, we’re not cutting anything just yet. Take precise measurements of your pole barn, and of course, don’t forget to jot them down. You don’t want to end up with a metal masterpiece that’s more Picasso than polished.
Step Two: Wrangle the Wily Weather
Installing metal siding on a pole barn can be a battle against the elements. So before you embark on this epic journey, check the weather forecast. You don’t want to find yourself racing against a storm while balancing on a ladder – talk about an adrenaline rush!
Step Three: It’s Eating Time – Screw Party!
Time to gather your screws, the unsung heroes of the metal siding universe. Make sure you choose screws that are designed specifically for metal siding. You don’t want your barn to resemble a cheesy action movie with screws popping out left and right.
Step Four: Get Your Ninja On – Safety Comes First
Safety should be your sidekick throughout this adventure. Put on your superhero cape (a.k.a. safety gear) – goggles, gloves, and sturdy boots. Stay vigilant and keep your spidey senses tingling for any potential hazards as you prance around the barn like a master metal ninja.
Step Five: Tongue Twister – Nailing the Starter Strip
Start at the bottom, we’re here! The starter strip, that is. Nail it securely at the bottom of your pole barn, ensuring it’s level and straight. If your starter strip is a little wonky, well, you’ll have a wonky metal barn. Embrace the eccentricities!
Step Six: Metal Magic – Attaching the Panels
The time has come to unleash your inner metal magician. Attach your metal siding panels to the barn, one after the other, securing them with screws. Pro tip: make sure to leave a small gap between each panel for expansion – we don’t want our metal siding suddenly feeling claustrophobic!
Step Seven: The Grand Finale – Finishing Touches
Congratulations, you’ve made it to the grand finale! It’s time to add those finishing touches that will make your pole barn shine. Trim the excess metal, cap the top, and seal the corners. Smooth it out, step back, and admire your metal masterpiece – a pole barn that would make even Michelangelo weep with envy.
The Final Word
Now that you have the tricks of the trade up your sleeve, installing metal siding on a pole barn should be a breeze. Remember to approach it with a sense of humor, embrace the quirks, and always put safety first. So go forth, my metal-savvy friend, and create a pole barn that will stand tall, even in the fiercest of storms!
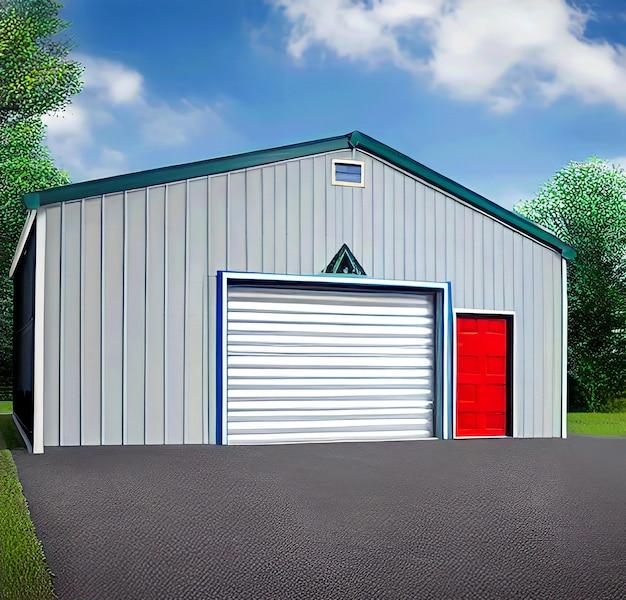
Metal Siding for Your Pole Barn: The Shiny Solution
Say Goodbye to Boring Barn Walls
So, you’ve got yourself a pole barn and you’re looking to take its style game to a whole new level? Well, my friend, there’s one surefire way to achieve that – metal siding! But hold on to your tool belt, because I’m about to give you the lowdown on all things metal siding for your beloved pole barn.
Why Metal Siding? The Time Has Come to Shine
Metal siding is like that flashy friend who turns every head in the room. It’s sleek, durable, and will make your pole barn the talk of the town (or at least the barnyard). Plus, it’s practically maintenance-free, which means more time for you to kick back and enjoy a cold glass of lemonade while admiring your barn’s newfound beauty.
Selecting the Right Metal Siding: Like Finding the Perfect Dance Partner
Just like finding the perfect dance partner, you’ll want to make sure you pick the right metal siding for your pole barn. The two most popular options are steel and aluminum. Steel is strong and long-lasting, while aluminum is lightweight and resistant to rust. Choose the one that suits your barn’s personality best, and get ready for some serious barn envy.
Measuring and Prepping: Don’t Come Up Short on Style
Hold your tape measure tight and get ready to conquer. Measure the length and height of each wall, and don’t forget to consider any windows, doors, or other openings. Once you’ve got your measurements, it’s time to prep the area. Remove any old siding or paint, and give your barn a good cleaning. After all, you want your new metal siding to shine like a polished coin.
Installation: It’s Hammer Time!
Now comes the fun part – installation! But don’t worry, you don’t need to be an acrobat to tackle this. Start with a sturdy base, like plywood or oriented strand board (OSB), to give your metal siding something to hold on to. Then, attach the siding panels using screws made specifically for metal siding. Remember to leave a little room for expansion on those hot summer days, unless you want your barn to sound like a cowboy’s creaky rocking chair.
Finishing Touches: The Devil is in the Details
Almost there, partner! Time to add those finishing touches that will make your pole barn the envy of all barns. Seal the edges of your metal siding panels with a high-quality caulk, and ensure all joints are properly secured. And if you’re feeling extra fancy, consider adding a trim to hide any rough edges and give your barn a polished look. Now stand back and admire your handiwork – you’ve just transformed your pole barn into a shining star!
In conclusion, installing metal siding on your pole barn is a surefire way to jazz up its style and give it the wow factor it deserves. So don’t let your barn be the wallflower of the neighborhood – embrace the shine and let your pole barn steal the spotlight!
How do you hang steel siding
Preparing to Hang Steel Siding
Before diving into the exciting world of steel siding hanging, there are a few things you need to do prepare yourself mentally and physically. Trust me, you don’t want to attempt this while nursing a hangover or wearing your fanciest outfit. So here’s what you need to get started:
Gather your supplies
Forget a magic wand – you’ll need some real tools for this job. Grab a measuring tape, a level, a power drill, snips, and some screws. And don’t forget your trusty hard hat! Safety first, my friend!
Measure twice, cut once
If you’ve ever tried to put together IKEA furniture, you know the importance of measuring twice before making a single cut. The same principle applies here. Measure your walls and calculate how much steel siding you need. Trust me, you don’t want to be stuck halfway through the project with a shortage of steel.

Hanging Steel Siding Like a Pro
Are you ready to become a steel siding hanging aficionado? Follow these steps to hang your steel siding like you were born for it:
Start from the bottom
It might sound counterintuitive, but when it comes to hanging steel siding, it’s best to start from the bottom. That way, any water that sneaks behind the siding will have a clear escape route. Think of it as giving your siding the ultimate waterproofing defense mechanism.
Level up
I mean it both metaphorically and literally. Use your level to ensure your first piece of steel siding is straight and true. No crooked behemoths allowed here! Once you’ve achieved level greatness, secure that bad boy to your pole barn using screws.
Overlap like a boss
This step is all about creating a seamless look. As you hang each subsequent piece of steel siding, make sure to overlap it with the previous one. This will not only create an impressive visual effect but also keep any pesky water out of your precious pole barn.
Wrapping It Up
By now, you should be well on your way to becoming a steel siding hanging expert. Just remember to take your time, follow the steps, and maybe grab a buddy to cheer you on. With a little patience and determination, you’ll have your pole barn looking fly in no time. So go forth, my friend, and hang that steel siding with wild abandon!
What’s Behind the Shiny Metal: The Hidden World of Metal Siding
So, you’re all set to install that beautiful metal siding on your pole barn. But have you ever wondered what goes on behind that shiny exterior? Let’s take a peek behind the scenes and uncover the hidden world of metal siding.
The Secret Weapon: Insulation
Believe it or not, metal siding isn’t just about looking good; it’s got some serious brains too. And that’s where insulation comes into play. Think of it as the unsung hero of your pole barn, keeping it cozy and energy-efficient. Whether it’s hot as blazes or colder than a polar bear’s toenails outside, insulation helps to maintain the perfect temperature inside your barn. Plus, it muffles unwanted noise from rain, hail, or your neighbor’s questionable karaoke skills.
The Never-Ending Battle: Moisture Barrier
Just like a hero needs a shield, metal siding requires a moisture barrier. This layer is like an invisible force field, protecting your barn from the potentially damaging effects of moisture. It’s like an umbrella during a rainstorm or a waterproof onesie for your pole barn. Trust us, your barn will thank you for this extra layer of defense against Mother Nature’s sneaky attempts to infiltrate your space.
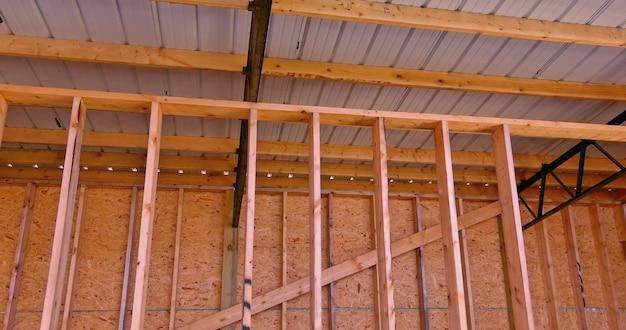
The Skeleton Crew: Framing and Sheathing
Every superhero needs a solid foundation, and your pole barn is no exception. Behind that sleek metal siding lies a framework of studs and rafters. They provide the structural support necessary for your barn to stand tall against winds, storms, and any other forces that may come its way. And let’s not forget about the sheathing! Acting as the muscles of your barn, sheathing adds strength and stability to the whole structure. It’s the backbone that holds everything together.
It’s All in the Details: Flashing and Trim
Just like the perfect accessory can make or break an outfit, flashing and trim put the finishing touches on your metal siding masterpiece. Flashing, those shiny strips of metal, are the unsung heroes that keep water from seeping into those vulnerable spots (like the corners or where the roof meets the siding). And trim, oh trim! It adds that final touch of pizzazz, making your pole barn look like the coolest kid on the block.
So, next time you gaze at your shiny metal siding, take a moment to appreciate the hidden warriors behind the scenes. From insulation to framing, moisture barriers to trim, they all play a vital role in protecting and beautifying your pole barn. And now, armed with this knowledge, you’re ready to conquer the world of metal siding like a true superhero!
Vertical Metal Siding Installation Guide
Choosing the Right Tools and Materials
Before you embark on your mission to transform your pole barn into a dazzling metal masterpiece, it’s important to gather your trusty sidekicks – er, tools. Dust off your tape measure, grab some tin snips, and make sure you have enough screws to conquer the high seas of siding installation.
Measure Twice, Sip Coffee Once
There’s an old saying, “Measure twice, cut once,” but here in the barnyard, we like to tweak things a bit. Make sure to measure twice, sip coffee once, and then measure thrice just to be safe. Accuracy is key when cutting those sleek metal panels, or your barn might end up looking like Picasso tried his hand at siding.
Prep Like It’s a Party
Preparing your barn for its metal makeover is like prepping for a party – minus the confetti and party hats. Clean the surface, remove any loose nails or splintered wood, and give your barn a final pep talk. After all, it’s about to become the most stylish landmark in the entire county!
Panels: The Dance Partners You Never Knew You Needed
As you start attaching the metal panels, imagine them as your dance partners gliding across the barn’s walls. Secure them at the top with screws, leaving room for expansion, and let gravity do its thing. Remember, it’s all about the vertical dance, so make sure each panel overlaps its neighbor, creating a seamless and oh-so-chic look.
Edges: Friends with Benefits
The edges of your metal siding panels are like those reliable friends who always have your back. Snap them into place, one after the other, ensuring they lock together like puzzle pieces. Don’t worry, they’re not as complicated as those 1000-piece jigsaw puzzles your Aunt Mildred loves. With a little finesse and a lot of determination, your siding will be as snug as a bug.
Finishing Touches: Cap It Off with Confidence
Now that your barn is dressed to the nines in shiny metal, it’s time to give it some final pizzazz. Install the top trim to keep everything secure and add a touch of elegance. It’s like putting a crown on your barn and declaring it the king or queen of all pole structures. Confidence is key, my friends!
Admire Your Mastery
Step back and take a moment to bask in the glory of your vertical metal siding installation. You’ve turned a simple pole barn into a work of art. From the precise measurements to the perfect panel placement, you’ve conquered the wild world of siding installation. Give yourself a pat on the back and take a well-deserved victory lap around your barn. Bravo, maestro!
How to Put Metal Siding on a Block Building
So, you’ve got a block building that’s just begging to be clad in shiny metal siding, eh? Well, my friend, you’ve come to the right place. Putting metal siding on a block building can be a daunting task, but fear not! I’m here to guide you through the process with a little bit of humor and a whole lot of know-how.
Prepping for the Metal Madness
Before you jump headfirst into the metal mayhem, you’ll need to get your block building ready for its stylish new makeover. Start by giving the walls a good cleaning – metal siding doesn’t appreciate dirt or grime. Then, take some time to examine the surface for any cracks or crevices that might need to be patched up. Trust me, you don’t want to trap any critters or moisture between that metal and your block.
Measure Twice, Cut Once
Now, I know what you’re thinking – “But I’m not a measuring genius!” Fear not, my friend. All you need is a trusty tape measure and a bit of patience. Measure the height and length of each wall, making sure to account for any windows or doors. Add a few extra inches for good measure (pun completely intended) – it’s always better to have too much than too little.
Putting the Pieces Together
Once you’ve got your metal siding all cut to the right sizes, it’s time to start slapping those bad boys onto your block building. The best way to do this is by starting at the bottom and working your way up. Use some self-tapping screws to attach the siding to the wall, making sure to leave a little room for expansion and contraction. Oh, and a tip: make sure you’re wearing gloves – those metal edges can be a bit sharp.
Finishing Touches for an Extra “Wow” Factor
You’re almost there! But before you call it a day, take a moment to admire your handiwork and add some finishing touches. Caulk any gaps or seams to keep out moisture and pesky critters. And if you’re feeling extra fancy, why not add a pop of color with some trim? It’s like the cherry on top of your metal siding sundae.
And there you have it – a step-by-step guide to putting metal siding on a block building. I hope this has been as entertaining as it has been informative. Now go forth, my friend, and transform that boring old block building into a shining metal masterpiece!