Are you experiencing issues with the cooling performance of your Daikin mini split? It might be time to recharge it! In this blog post, we will guide you through the process of charging your Daikin mini split, answering all your burning questions along the way. From using a mini split recharge kit to charging by pressure, we’ll cover it all. So, if you’re wondering how to recharge your mini split or how often it needs to be done, keep reading for the complete guide. We’ll also dive into common problems like a blinking green light and whether you can charge your mini split while it’s running. Let’s get started!
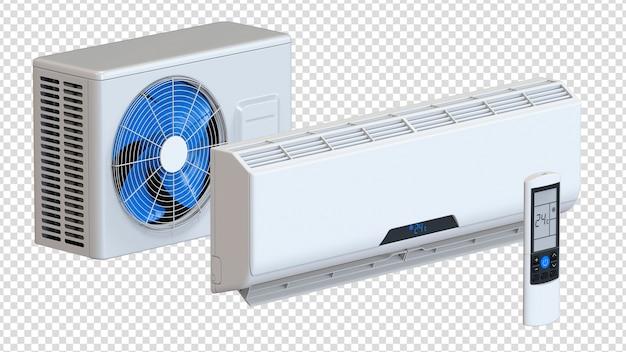
Charging a Daikin Mini Split
Understanding the Importance of Proper Charging
When it comes to maintaining the efficiency and performance of your Daikin mini split system, proper charging is crucial. The term “charging” refers to the process of adding or removing refrigerant in your system to ensure it operates optimally. This ensures the system can effectively cool or heat your space without any issues. However, charging a Daikin mini split is not something to be taken lightly. It requires careful attention to detail and a solid understanding of the specific requirements for your system.
The Consequences of Improper Charging
Improperly charging your Daikin mini split system can lead to several issues. If your system is overcharged, it can put unnecessary strain on the compressor and other components. This can lead to reduced efficiency, increased energy consumption, and even damage to the system over time. On the other hand, if your system is undercharged, it may struggle to reach the desired temperature, resulting in poor performance and discomfort. Therefore, it’s important to ensure your Daikin mini split is charged correctly for optimal operation.
Signs of Improper Charging
If you suspect that your Daikin mini split system may not be properly charged, there are a few telltale signs to look out for. Uneven cooling or heating, unusual noises coming from the system, and increased energy bills are all potential indicators of charging issues. Additionally, if you notice your system frequently cycling on and off or if it takes longer than usual to achieve the desired temperature, it may be time to inspect the refrigerant levels.
Hiring a Professional vs. DIY Charging
While it’s tempting to take matters into your own hands, charging a Daikin mini split system is generally best left to the professionals. Daikin systems require specific refrigerant types and precise charging procedures. Professionals have the knowledge, tools, and experience to accurately charge your system, ensuring optimal performance and efficiency. Plus, attempting to charge your system yourself may void the warranty or potentially damage the components if done improperly.
Regular Maintenance and Inspection
To avoid charging issues and maintain the efficiency of your Daikin mini split, regular maintenance and inspection by a licensed technician are essential. They can check the refrigerant levels, inspect for leaks, and address any potential issues before they become major problems. By investing in routine maintenance, you’ll not only ensure your system is properly charged but also extend its lifespan and maximize its performance.
Remember, charging a Daikin mini split system is a task that requires expertise and precision. By entrusting the job to a professional, you’ll have peace of mind knowing your system is in capable hands, resulting in efficient cooling and heating for years to come.
Mini Split Recharge Kit
Understanding the Mini Split Recharge Kit
So, you have a Daikin mini split and you’re looking for a way to recharge it? Well, you’re in luck because there’s a handy-dandy solution called the Mini Split Recharge Kit! This nifty little kit is designed specifically for folks like you who want to take matters into their own hands and give their mini split a fresh charge.
What’s Inside the Kit
Inside the Mini Split Recharge Kit, you’ll find everything you need to bring your mini split back to life. It typically includes a can of refrigerant, a pressure gauge, and a hose. Think of it as your very own mini split doctor’s bag for when your unit is feeling under the weather.
How to Use the Mini Split Recharge Kit
Now, let’s talk about how to use this kit. But before we dive into the process, here’s a friendly reminder: always consult the manufacturer’s instructions and guidelines for your specific mini split model. Safety first, my friends!
-
Preparation: First things first, make sure your mini split is turned off and completely powered down before you begin. Safety is crucial, so let’s not take any shortcuts.
-
Locating the Ports: Your mini split should have two ports – one for the high-pressure line and one for the low-pressure line. You’ll need to locate these ports to connect your recharge kit properly.
-
Connecting the Kit: Attach the hose from the recharge kit to the low-pressure port. Ensure a snug fit, but be gentle. We don’t want any leaks!
-
Checking the Pressure: Now, connect the pressure gauge to the other end of the hose. This will help you monitor the pressure as you recharge your mini split.
-
Adding the Refrigerant: Carefully follow the instructions on the refrigerant can to add the appropriate amount to your mini split. Remember, more isn’t always better, so don’t overdo it!
-
Monitoring the Pressure: Keep an eagle eye on the pressure gauge as you add the refrigerant to make sure it stays within the recommended range. This will help you avoid any mishaps or potential damage.
-
Disconnecting the Kit: Once you’re done adding the refrigerant, disconnect the kit from the ports. Make sure everything is secure and snugly fitted before moving on.
-
Turning It On: Finally, it’s showtime! Turn your mini split back on and revel in the cool, refreshing air that it’s now capable of delivering. Ahhh, pure bliss!
Wrapping Up
While the Mini Split Recharge Kit can be a handy tool to have in your DIY arsenal, remember that it’s always a good idea to consult a professional if you’re unsure or uncomfortable with the process. Safety should never be compromised when it comes to dealing with refrigerant and electrical components.
So, go forth and recharge your mini split with confidence! With the Mini Split Recharge Kit, you’ll be able to keep your unit running smoothly and efficiently, all while saving time and money. Take charge of your comfort!
Recharging your Daikin Mini Split: A Quick and Easy Guide
Understanding the Importance of Recharging
As a proud owner of a Daikin mini split system, you know how effective and efficient it is in keeping your home comfortable. However, over time, your mini split may require recharging to maintain its optimal performance. Recharging your system is a crucial step in ensuring that it continues to cool or heat your space effectively, especially during the peak summer or winter months.
Signs that your Daikin Mini Split Needs Recharging
While you may not be an HVAC expert, there are a few telltale signs that indicate your Daikin mini split needs a recharge. If you notice that your system is taking longer than usual to cool or heat your room, or if it is not reaching the desired temperature, it’s likely time for a recharge. Additionally, if you feel weak airflow, hear unusual noises, or notice ice formation on the unit, these are all signs that your mini split needs attention.
The Quick Recharging Process
Recharging your Daikin mini split can be done quickly and easily, even if you’re not a professional technician. Here’s a simple step-by-step guide to help you through the process:
Step 1: Turn Off the System
Begin by turning off your Daikin mini split system. This will ensure your safety and prevent any mishaps during the recharging process.
Step 2: Locate the Service Valves
Next, locate the service valves on the outdoor unit of your mini split. These valves are typically found on the refrigerant lines. You may need to remove a cap to access them.
Step 3: Connect the Charging Hose
Connect your charging hose to the low-pressure valve. This valve is usually marked with an “L” or “S” for suction. Make sure the hose is securely attached.
Step 4: Recharge the System
Once the hose is connected, slowly open the refrigerant canister, allowing the refrigerant to flow into your Daikin mini split. Be sure to monitor the pressure gauges to ensure they are within the recommended range.
Step 5: Check for Leaks
After recharging, it’s essential to check for any leaks. Apply a soapy solution to the connection points and valves while the system is running. If you see bubbles forming, it means there is a leak that needs to be addressed.
Recharging your Daikin mini split doesn’t have to be a daunting task. By following these simple steps, you can ensure that your system continues to provide optimal comfort all year long. Remember to pay attention to the warning signs and address any issues promptly. And as always, if you’re unsure or uncomfortable performing the recharge yourself, it’s best to consult a professional HVAC technician to ensure the job is done right. Your Daikin mini split will thank you for it with cool, crisp air or cozy warmth when you need it most.
Charging a Mini Split by Pressure
Charging a Daikin mini split can be a bit tricky, but by understanding the process and following a few steps, you can get your unit up and running at optimum efficiency. One of the methods for charging a mini split is by pressure, and in this section, we will dive into the details of how it can be done.
The Basics: What is Charging by Pressure
Charging a mini split by pressure is a method used to determine the refrigerant charge level in the system. It involves measuring the high-side and low-side pressures to ensure they fall within the manufacturer’s recommended range. By doing so, you can ensure that your mini split is operating at the right capacity, providing optimum cooling performance.
Step 1: Gather the Required Tools
Before you start charging your mini split by pressure, make sure you have all the necessary tools handy. You’ll need a set of pressure gauges, a refrigerant charging hose with a valve, and a refrigerant scale. These tools will help you accurately measure the pressures and charge your unit accordingly.
Step 2: Prepare the System
Before attaching the pressure gauges, ensure that your mini split is operating correctly. Check for any leaks in the refrigerant lines, and make sure the system is clean and free from debris. It’s also essential to ensure that the service valve is open and that the unit’s electrical power is turned off.
Step 3: Attach the Pressure Gauges
Once you’ve prepared the system, it’s time to attach the pressure gauges. Connect the high-side gauge to the liquid line service valve and the low-side gauge to the suction line service valve. Make sure the valves are closed before connecting the gauges to avoid any sudden pressure changes.
Step 4: Measure the Pressures
With the gauges securely attached, open the valves and start the mini split. Allow the system to run for a few minutes to stabilize the pressures. Take note of the high-side and low-side pressure readings on the gauges. These readings will help determine if the refrigerant charge level is correct or if adjustments need to be made.
Step 5: Adjust the Charge
Compare the pressure readings to the manufacturer’s recommended specifications. If the pressures are too low, it indicates an undercharged system, while high pressures suggest an overcharged system. To adjust the charge, slowly add or remove refrigerant using the charging hose and valve while monitoring the pressure changes on the gauges. Repeat this step until the pressures fall within the recommended range.
By following these steps, you can charge your Daikin mini split using the pressure method. Remember to always consult the manufacturer’s guidelines and seek professional assistance if you are unsure or uncomfortable performing the task yourself. Properly charged refrigerant levels will help ensure your mini split operates efficiently, providing cool comfort when you need it most.
Charging a Mini Split with 410a
Understanding the Process
So, you’ve got yourself a shiny new Daikin mini split and now you’re ready to charge it up with the right refrigerant. But how exactly do you go about charging a mini split with 410a? Fear not, dear reader, for I am here to guide you through this puzzling process.
Step 1: Gather Your Tools
Before you dive into the charging process, you’ll need to gather a few key tools. Grab your trusty refrigerant manifold gauge set, a scale to measure the amount of refrigerant, and of course, your bottle of 410a refrigerant. Oh, and don’t forget some gloves and safety goggles – safety first, my friend!
Step 2: Check the Manufacturer’s Recommendations
No two mini splits are exactly the same, so it’s essential to consult the manufacturer’s guidelines before charging your system. Look for their specific instructions on the proper amount of refrigerant for your model. This is crucial for maintaining optimal performance and efficiency.
Step 3: Connect the Manifold Gauge Set
Now it’s time to hook up your manifold gauge set to the suction and liquid refrigerant lines. Make sure you follow the correct connections as indicated by the gauges. Safety reminder: always double-check that valves are closed before making any connections.
Step 4: Begin the Charging Process
With everything set up, it’s time to start charging your mini split. Slowly open the refrigerant cylinder’s valve and the low-pressure valve on the manifold gauge set. Keep a close eye on the pressure readings to ensure they match the manufacturer’s recommendations.
Step 5: Achieve the Right Refrigerant Charge
As you monitor the pressure readings, slowly add refrigerant to the system. Remember, patience is key here. Add refrigerant gradually to avoid overcharging the system. Keep checking the manufacturer’s recommended pressure and stop adding refrigerant once you’ve reached the desired level.
Step 6: Close the Valves
Once you’ve achieved the correct refrigerant charge, it’s time to close the valves on both the refrigerant cylinder and the manifold gauge set. This will prevent any unwanted leaks or accidental release of refrigerant. Safety should always be your top priority!
Remember, charging a mini split with 410a requires precision and care. If you’re not confident in your abilities, it’s best to call in a professional to handle the task. But if you follow these steps diligently, you’ll be well on your way to enjoying the cool comfort of your perfectly charged mini split. Stay cool, my friends!
R410A Refrigerant for Mini Splits
Understanding R410A Refrigerant and its Role in Mini Split Systems
One vital component of a mini split system is the refrigerant it uses. In the case of Daikin mini split systems, the most commonly used refrigerant is R410A. But what exactly is R410A and why is it important for your mini split?
What is R410A Refrigerant
R410A is a hydrofluorocarbon (HFC) blend that is commonly used as a refrigerant in air conditioning and heat pump systems. Compared to older refrigerants like R22, R410A is more eco-friendly and does not contribute to ozone depletion. It became the industry standard for residential HVAC systems in 2010, after the phase-out of R22 due to its harmful effects on the environment.
Benefits of R410A for Mini Split Systems
-
Higher Energy Efficiency: One of the significant advantages of R410A is its superior energy efficiency. It allows mini split systems to cool or heat a space more effectively, resulting in lower energy consumption and reduced utility bills.
-
Better Performance: R410A can operate at higher pressures than the older refrigerants, allowing mini splits to provide a more consistent and reliable performance. This means your mini split will cool your room faster and maintain the desired temperature more efficiently.
-
Environmentally Friendly: As mentioned earlier, R410A is ozone-friendly and has a lower impact on global warming compared to older refrigerants. By choosing a mini split system that uses R410A, you’re contributing to the preservation of our planet.
Charging R410A in Mini Split Systems
While mini splits come pre-charged with the appropriate amount of refrigerant, it’s essential to understand how charging works in case a service technician needs to add or adjust the refrigerant levels. However, charging should only be performed by a qualified professional as it requires specialized equipment and knowledge to avoid any damage to the system.
R410A refrigerant plays a crucial role in the performance and environmental friendliness of mini split systems. Its energy efficiency, superior performance, and eco-friendly nature make it an ideal choice for cooling and heating applications. Remember, if you ever need to charge or service your mini split system, always rely on the expertise of professionals to ensure the proper functioning and longevity of your unit.
How do you recharge a mini split
So, your Daikin mini split isn’t cooling like it used to, and you suspect it might need a recharge. Don’t worry, it’s not as complicated as it sounds! Here’s a step-by-step guide to help you recharge your mini split and get it back to its cooling superpowers.
Assessing the refrigerant level
The first thing you need to do is check if your mini split actually needs a recharge. Sometimes, the issue might be something else entirely. Start by inspecting the unit for any visible leaks or damages. If you notice any, it’s essential to fix those before proceeding with the recharge. However, if everything looks fine on the outside, it’s time for a quick check of the refrigerant level.
Gathering the tools
Before you begin recharging your mini split, make sure you have all the necessary tools ready. You’ll need a set of manifold gauges, which allow you to measure the pressure of the refrigerant. Additionally, you’ll require a screwdriver, a charging hose, and, of course, the appropriate refrigerant for your specific model. Safety glasses and gloves are also recommended to ensure your protection during the process.
Connecting the gauges
Once you have your tools prepared, it’s time to connect the manifold gauges to the high and low-pressure valves of your mini split. These valves are usually labeled on the unit itself. Make sure to match the colors on the hoses with the valves – red for high-pressure and blue for low-pressure. Tighten the connections to ensure a proper seal.
Checking the pressures
With the gauges connected, it’s time to check the pressures. Turn on your mini split and let it run for a while to stabilize the system. Then, take note of the readings on the gauges. The ideal pressure range for most mini splits is usually specified in the manufacturer’s manual. If your readings are below the recommended range, it’s a sign that your unit needs a recharge.
Recharging the system
To recharge your mini split, you’ll need to attach the charging hose to a bottle of refrigerant. Slowly open the valve on the bottle, allowing the refrigerant to flow into the system. Keep an eye on the pressure gauges and check the manual for the appropriate amount of refrigerant to add. Remember to go slow and steady, as adding too much refrigerant can be just as problematic as too little.
Wrapping it up
Once you’ve added the required amount of refrigerant, close the valve on the charging hose and disconnect it from the system. Double-check that all the connections are secure before you switch your mini split back on. Let it run for a while, monitoring the temperature and ensuring that the cooling performance has improved.
Recharging your Daikin mini split might seem a bit daunting at first, but with a little bit of patience and the right tools, you can do it! Just remember to stay safe, follow the manufacturer’s guidelines, and don’t hesitate to seek professional help if needed. Happy cooling!
How to Charge a Multi Zone Mini Split
Understanding the Basics
Before we delve into the nitty-gritty of charging your multi-zone mini-split, let’s make sure we’re on the same page about what it means to charge a system. Essentially, charging refers to the process of adding or removing refrigerant to achieve optimum performance. Got it? Great!
Gather Your Tools
To get started, you’ll need a few tools to make the charging process smooth sailing. Grab yourself a manifold gauge set, a refrigerant scale, a thermometer, and a charging hose. Oh, and don’t forget your safety goggles – protecting those peepers is a must!
Checking Pressures and Temperatures
Now it’s time to put on your detective hat and investigate the state of your mini-split. Attach the manifold gauge to the low-pressure and high-pressure ports, and check the pressure readings. While you’re at it, use the thermometer to measure the temperature of the air coming out of the indoor unit. These readings will give you a good idea of how your system is performing.
Calculating the Charge
Next up, we need to determine the ideal refrigerant charge for your system. This will depend on various factors, like the model of your mini-split and the length of refrigerant line set. For this step, you might want to consult the manufacturer’s specifications or reach out to a professional for guidance. Accuracy is key here!
Adding or Removing Refrigerant
Once you have determined the optimal refrigerant charge, it’s time to take action. If you need to add refrigerant, carefully connect the charging hose to the low-pressure port and slowly introduce the refrigerant into the system. Keep an eye on the pressure readings and the temperature of the air coming out of the indoor unit – you want those numbers to be just right! On the other hand, if you need to remove refrigerant, I’m afraid you’ll have to call in the experts, as this should only be handled by certified HVAC technicians.
Testing, Testing, 1, 2, 3
Congratulations! You’ve successfully charged your multi-zone mini-split. But before you celebrate with a dance party, let’s make sure everything is in tip-top shape. Give your system a thorough test run to ensure it’s cooling (or heating) like a champ in all the different zones. Oh, and don’t forget to keep an eye (or an ear) out for any unusual sounds or smells – we don’t want any surprises!
Wrapping It Up
Charging a multi-zone mini-split may sound like a daunting task, but with the right tools and a little know-how, you can tackle it like a pro. Remember to prioritize safety, follow the manufacturer’s guidelines, and don’t be afraid to seek professional help if needed. Now go forth and conquer that temperature control in style – you’ve got this!
Blinking Green Light on Daikin Mini Split
Understanding the Mysterious Blinking Green Light
If you’ve noticed a blinking green light on your Daikin mini split system, don’t worry, it’s not trying to communicate with extraterrestrial life. In fact, this blinking light is a part of the unit’s notification system, and it’s indicating that something might be amiss. But fear not, we’re here to demystify the blinking green light and shed some light on what it could mean.
Understanding the Codes
The blinking green light on your Daikin mini split is actually an error code in disguise. It’s the unit’s way of letting you know that it’s detected an issue. Each blink pattern represents a specific error code, like a secret language that only the unit understands. By deciphering the code, you can better diagnose the problem and take the necessary steps to address it.
Decoding the Blink Pattern
To decode the blinking green light, you’ll need to count the number of blinks and the pauses in between. Each blink and pause combination corresponds to a specific error code. For example, two blinks followed by a pause might indicate a refrigerant leak, while four blinks followed by a pause might indicate a faulty sensor. Consult your Daikin unit’s manual or contact a professional technician to identify the exact error code based on the blink pattern.
Troubleshooting Tips
While it’s always best to consult a professional when dealing with complex HVAC systems, there are a few troubleshooting steps you can take to address the blinking green light issue. Start by turning off the unit and checking for any obvious issues, like loose connections or dirty filters. Next, reset the unit by flipping the circuit breaker or unplugging it for a few minutes before plugging it back in. If the blinking green light persists after these steps, it’s time to call in the experts.
So, the next time you spot a blinking green light on your Daikin mini split, don’t panic. Take a moment to decode the mysterious blink pattern and consult the manual or a professional technician for further guidance. Remember, the blinking green light is your unit’s way of communicating with you, so it’s important to listen and take action. With a little detective work, you’ll have your mini split up and running smoothly in no time.
Do you charge a mini split with it running
With the rise in popularity of mini split systems, many homeowners are wondering if it’s possible to charge their units while they’re still running. While it may seem counterintuitive, let’s delve into the details and find out if you can indeed charge a mini split while it’s operating.
The basics of charging a mini split
Before we answer the burning question, let’s quickly brush up on the basics of charging a mini split. When we talk about charging, we’re referring to the refrigerant levels in the system. Over time, refrigerant levels can deplete due to leaks or other issues, causing the unit to run inefficiently.
Shutting it down for a successful charge
To properly charge a mini split, it’s generally recommended to shut down the system. This allows for a more accurate assessment of the refrigerant levels and ensures a successful charge. Think of it as a mini split time-out – a break for both you and your unit.
Why shutting down is necessary
Now, you might be wondering why shutting down the system is necessary. Well, think of it this way: you wouldn’t try to refuel your car while it’s still zooming down the highway, right? The same concept applies here. Charging a mini split with the unit running can lead to inaccurate readings and potential safety hazards.
The importance of accuracy
Accuracy is key when it comes to charging a mini split. By shutting it down, you allow the system to stabilize and reach an equilibrium, ensuring that the refrigerant levels are measured accurately. This helps avoid under or overcharging, both of which can negatively impact the unit’s performance and efficiency.
Keep it in top shape
Regular maintenance and proper charging are essential to keep your mini split system running smoothly. By scheduling regular inspections and addressing any refrigerant issues promptly, you can ensure optimal cooling and energy efficiency while extending the lifespan of your unit. So, remember to give your mini split a well-deserved break when it’s time for a recharge.
Although it might be tempting to charge your mini split while it’s running, it’s best to shut down the system for an accurate and successful charge. By prioritizing accuracy and safety, you can keep your unit in top shape, leading to efficient cooling and maximum longevity. So, the next time you need to charge your mini split, remember to give it a break – it’ll thank you in the long run!
How Often Do Mini Splits Need to be Recharged
The Truth about Recharging Mini Splits
So, you’ve just installed a shiny new Daikin mini split in your home, and you’re thrilled with the cool comfort it provides. But wait… how long will this coolness last? How often do mini splits need to be recharged with refrigerant? Let’s dive into this puzzling question and uncover the truth!
Understanding the Refrigerant Cycle
To grasp the concept of recharging mini splits, it’s essential to understand how the refrigerant cycle works. Without getting too technical, the refrigerant is the magical substance that absorbs heat from your indoor air and releases it outside. This process allows your mini split to cool your space effectively. However, unlike fuel in a car, the refrigerant in your mini split doesn’t get consumed over time. It’s a continuous loop. So, in theory, your mini split shouldn’t need to be recharged at all.
Factors That Can Cause a Refrigerant Leak
But, hold on, there’s a catch! While the refrigerant should ideally last the lifetime of your mini split, certain factors can cause leaks. These can include poor installation, manufacturing defects, physical damage to the copper lines, or corrosion over time. If you suspect your mini split isn’t performing as well as it used to, a refrigerant leak might be the culprit.
Signs Your Mini Split Needs a Recharge
Now, you’re probably wondering how to tell if your mini split requires a top-up. Well, here are a few telltale signs: insufficient cooling, decreased airflow, ice formation on the copper lines, or an increase in your energy bills. If you notice any of these red flags, it’s time to call in a professional HVAC technician to assess the situation.
Leave It to the Pros
While you might be tempted to try a DIY recharge, we strongly advise against it. Handling refrigerant can be dangerous and requires specialized knowledge and equipment. Leave this task to the professionals, who can not only recharge your mini split but also fix any underlying issues causing the leak.
Prevention Is Key
Now, recharging your mini split should be a last resort. To minimize the chances of a refrigerant leak, ensure your mini split is installed properly by a qualified technician. Regular maintenance, such as cleaning or replacing air filters, can also help prevent issues. Remember, prevention is always better than cure!
Although mini splits don’t generally need to be recharged, it’s crucial to be aware of the signs of a refrigerant leak. By staying attentive and addressing any issues promptly, you can keep your mini split running smoothly and enjoy the cool comfort it provides for years to come. So, sit back, relax, and let your mini split work its magic – no recharge needed!