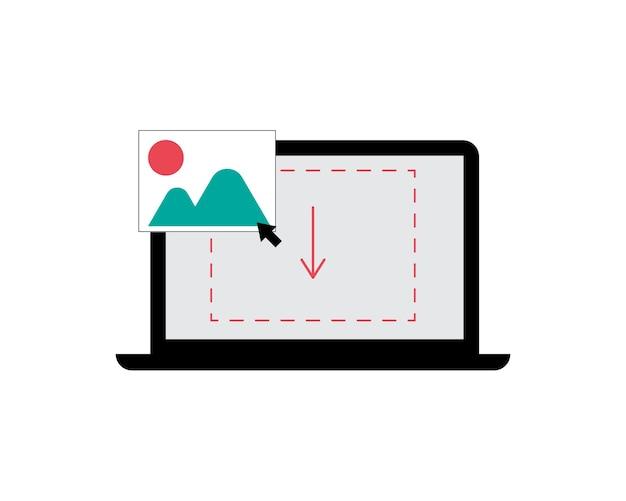
Can You Drag And Drop Into Canvas? The short answer is yes! Canvas is a popular learning management system used by students and educators alike. It offers various features to enhance the online learning experience, including the ability to drag and drop files and questions.
In this blog post, we will explore how to utilize drag and drop activities within Canvas. We’ll dive into the process of adding files to Canvas, dropping files in Canvas, and even creating drag and drop quizzes. Additionally, we’ll cover some useful tips and tricks for navigating Canvas effectively.
So if you’ve ever wondered how to incorporate drag and drop functionality into your Canvas experience, this blog post is for you! Let’s get started and make the most out of Canvas in 2023.

Can You Drag And Drop Into Canvas
In the ever-evolving world of technology, dragging and dropping has become a common action for many of our daily tasks. From moving files on your desktop to rearranging items in an email, this intuitive method has made our lives easier. But what about dragging and dropping into canvas? Can you perform this magic trick and create art with just a flick of your wrist? Let’s dive into the world of canvas and find out!
Understanding Canvas
Before we embark on this dragging and dropping adventure, let’s first understand what canvas is. In simple terms, canvas is a web technology that allows you to draw and create graphics using JavaScript. It provides a blank space, like an artist’s canvas, where you can unleash your creativity and bring your ideas to life. Whether you’re creating a simple shape or a complex masterpiece, canvas is your artistic playground.
The Magic of Dragging and Dropping
Now that we’ve acquainted ourselves with canvas, let’s explore the possibility of dragging and dropping into it. Unfortunately, canvas alone does not possess the magical powers to handle dragging and dropping. It’s like asking a painter to magically move their brush strokes around the canvas. However, fear not! There’s a workaround to achieve this desired effect.
The Assistants: HTML5 and JavaScript
To unleash the power of dragging and dropping into canvas, we need the assistance of two trusty allies: HTML5 and JavaScript. HTML5, the newest version of the Hypertext Markup Language, introduces a host of new features and capabilities, including the ability to handle drag and drop events. JavaScript, on the other hand, is the scripting language that brings interactivity to web pages.
Combining Forces
Once HTML5 and JavaScript join forces, they can transform canvas into a drag-and-drop wonderland. By leveraging HTML5’s drag and drop API and JavaScript’s event handling capabilities, you can add dragging and dropping functionality to your canvas projects. Just like a magician pulling a rabbit out of a hat, you’ll be able to bring objects into canvas with a flair that would make Houdini proud.
Bring in the Props
To achieve this magical feat, you’ll need a few props. First, you’ll need to create the objects or elements you want to drag and drop. These could be images, shapes, or even text. Then, you’ll need to implement the drag and drop event listeners in your JavaScript code. These listeners will listen for drag start, drag over, and drop events, allowing you to control the behavior of the objects as they interact with the canvas.
Performing the Trick
Now comes the fun part: performing the drag-and-drop trick. With your objects in place and the event listeners primed, you can start dragging elements from outside the canvas and dropping them onto it. Whether it’s an image of a flower or a text box containing your favorite quote, you can arrange and rearrange these elements within the canvas, creating a visually stunning composition that tells your story.
Unleash Your Creativity
So, while you can’t directly drag and drop into canvas itself, you now have the knowledge and tools to perform this magical act. Remember, with HTML5 and JavaScript as your assistants, you hold the power to create art that captivates and engages your audience. So go forth, my fellow magician, and unleash your creativity onto the canvas, one dragged and dropped element at a time!
Now that you’re armed with the knowledge of dragging and dropping into canvas, it’s time to let your imagination run wild and create masterpieces that will leave everyone in awe. Happy dragging and dropping, and may your canvas be filled with wonders only limited by your creativity!
FAQ: Can You Drag and Drop into Canvas
Canvas is a popular learning management system used by educators and students to enhance the online learning experience. One of the features that many users find convenient and efficient is the ability to drag and drop elements within Canvas. Whether you’re adding files, rearranging questions, or creating interactive quizzes, the drag and drop functionality in Canvas can save you time and effort. In this FAQ-style guide, we’ll answer commonly asked questions about dragging and dropping in Canvas.
How Can We Drag and Drop
One of the benefits of using Canvas is the ease with which you can drag and drop elements. Whether it’s uploading files to your course or rearranging questions in a quiz, the process is straightforward:
-
Click and Hold: To drag an item, simply click and hold your mouse button on it.
-
Move: While holding the item, move your mouse to the desired location where you want to drop it.
-
Release: Once you’ve reached the desired location, release the mouse button to drop the item.
How Do I Add a File to Canvas
Adding files to Canvas is a breeze with the drag and drop feature. Here’s how you can quickly add a file to your Canvas course:
-
Locate the File: Find the file you want to add to your course on your computer.
-
Drag and Drop: Simply click and drag the file from your computer’s file browser or desktop and drop it into the desired location in your Canvas course.
-
Wait for Upload: Canvas will upload the file, and once it’s completed, you’ll see the file added to your course.
How Do I Drop a File in Canvas
Dropping a file into Canvas involves using the same drag and drop technique. Here’s how you can drop a file into Canvas:
-
Drag the File: Click and drag the file you want to drop from its location in your computer’s file browser or desktop.
-
Drop in Canvas: Move your mouse to the desired location in Canvas where you want to drop the file.
-
Release the Mouse: Release the mouse button to drop the file into Canvas. Wait for the upload to finish, and voilà, your file is now in Canvas!
What Are Drag and Drop Activities
Drag and drop activities in Canvas refer to interactive exercises where learners can manipulate objects by dragging and dropping them into correct positions. These activities are widely used to enhance engagement and assess understanding. In Canvas, instructors can create drag and drop activities by following these steps:
-
Create the Activity: Navigate to the desired Canvas course and open the quiz, assignment, or discussion where you want to create the drag and drop activity.
-
Add a Question: Click on the “Add Question” button and select the drag and drop question type.
-
Customize the Activity: Set up the question, add the objects to be dragged, and define the correct drop zones.
-
Save and Publish: Once you’re satisfied with the activity, save and publish the quiz, assignment, or discussion to make it available to your students.
How Do You Unsubmit an Assignment on Canvas as a Student
Accidentally submitting an assignment on Canvas can be a heart-stopping moment for students. But fear not, you can easily unsubmit an assignment by following these steps:
-
Access the Assignments Page: Go to your Canvas course and navigate to the “Assignments” page.
-
Find the Assignment: Locate the assignment you want to unsubmit.
-
Click “Submit Assignment”: Click on the “Submit Assignment” button to access your submission.
-
Unsubmit the Assignment: Look for the “Unsubmit Assignment” button and click on it. Confirm the action when prompted.
-
Review and Resubmit: Take this opportunity to review your work, make any necessary changes, and resubmit the assignment before the deadline.
How Do I Get My Canvas to Regrade a Quiz
Sometimes, you might realize that a quiz question was poorly worded or had an incorrect answer. In such cases, you’ll be glad to know that Canvas allows instructors to regrade quizzes effortlessly:
-
Open the Quiz Statistics: As an instructor, navigate to your Canvas course and open the quiz you want to regrade.
-
Click on “Quiz Statistics”: Within the quiz, click on the “Quiz Statistics” button to view the statistics and details.
-
Find the Question: Locate the question that needs regrading.
-
Edit the Question: Click on the “Edit” button next to the question and make the necessary changes.
-
Regrade the Quiz: After editing the question, select the option to regrade the quiz. Canvas will automatically update the grades based on the revised question.
What Is a Stimulus in Canvas Quiz
In Canvas quizzes, a stimulus refers to the information provided to students before or with a question. It can take various forms, such as images, videos, text passages, or even audio files. The purpose of a stimulus is to provide context or additional information that aids in answering the question. To add a stimulus to a Canvas quiz:
-
Create or Edit a Quiz: Open the desired Canvas course and create a new quiz or edit an existing one.
-
Add or Edit a Question: Click on the “Add Question” button or select a question to edit.
-
Include a Stimulus: Look for the option to insert a stimulus and choose the appropriate format (text, image, etc.).
-
Provide the Stimulus: Upload the stimulus or enter the text content, ensuring it supports the question and enhances student understanding.
-
Save and Publish: Once you’re satisfied, save and publish the quiz to make it available to your students.
How Do You Drag and Drop Text
While dragging and dropping objects is common, dragging and dropping text in Canvas can also be useful. Here’s how you can drag and drop text:
-
Highlight the Text: Select the text you want to move by clicking and dragging your mouse over it.
-
Initiate the Drag: Once the text is selected, click and hold your mouse button to start the drag action.
-
Move the Text: While holding the mouse button, move your mouse to the desired location where you want to drop the text.
-
Release and Drop: When you’ve reached the desired location, release the mouse button to drop the text.
How Do I Drop a Question in Canvas
In Canvas quizzes, you may need to arrange the order of questions or move questions between different sections. Here’s how you drop a question in Canvas:
-
Access the Quiz: Go to your Canvas course and open the quiz where you want to drop the question.
-
Move the Question: Find the question you want to move and click and hold the move icon (usually represented by three horizontal lines).
-
Drag the Question: While holding the move icon, drag the question to the desired location within the quiz.
-
Drop the Question: Release the move icon to drop the question into the new position. The quiz will automatically update to reflect the change.
How Do I Move a Question in Canvas
When creating quizzes in Canvas, you may want to reorganize questions within the same section. Here’s how you can easily move a question in Canvas:
-
Edit the Quiz: Open the desired Canvas course and edit the quiz that contains the question you want to move.
-
Identify the Question: Find the question you want to move within the quiz.
-
Click and Hold: Click and hold the move icon (usually three horizontal lines) next to the question.
-
Drag the Question: While still holding the move icon, drag the question to the new desired location within the same section.
-
Release the Question: Release the move icon to drop the question into the new position. The quiz will update accordingly.
How Do You Create a Drag and Drop Quiz
Creating a drag and drop quiz in Canvas can be a fun and interactive way to test student knowledge. Here’s how you can create your own drag and drop quiz:
-
Access Quizzes: Log in to your Canvas course and navigate to the “Quizzes” section.
-
Create a New Quiz: Click on the “+Quiz” button to create a new quiz or select an existing quiz to edit.
-
Add a Drag and Drop Question: Click on the “Add Question” button and select the drag and drop question type.
-
Set Up the Question: Define the question prompt, add draggable objects, and create drop zones.
-
Publish the Quiz: Once you’re satisfied with the quiz, save and publish it to make it available to your students.
How Do You Drag an Object in JavaScript
JavaScript provides the flexibility to create draggable elements on webpages. To drag an object using JavaScript, you can follow these steps:
-
Define the Object: In your HTML, assign a unique ID to the object you want to make draggable.
-
Add Event Listeners: Use JavaScript to add event listeners to the object for the
mousedown,mousemove, andmouseupevents. -
Capture Initial Position: On
mousedown, capture the initial position of the object and store it in variables. -
Update Object Position: On
mousemove, calculate the distance the mouse has moved and update the object’s position accordingly. -
Release the Object: On
mouseup, remove the event listeners to stop dragging the object.
How Do I Drag and Drop in HTML5 Canvas
If you’re working with the HTML5 element, dragging and dropping objects can add interactivity to your visual creations. Here’s how you can implement drag and drop functionality in HTML5 Canvas:
-
Capture Mouse Events: Add event listeners for
mousedown,mousemove, andmouseupevents to the canvas element. -
Track Object Position: When a draggable object is clicked (
mousedown), capture its initial position relative to the canvas. -
Move the Object: On
mousemove, continuously update the object’s position based on the distance between the current mouse position and the initial position. -
Release the Object: When the mouse button is released (
mouseup), stop updating the object’s position.
How Do You Use Interactive Canvas on Stile
Stile is an online platform that provides interactive learning experiences for students and teachers. To use interactive canvas on Stile, follow these steps:
-
Navigate to Stile: Open your web browser and go to the Stile website.
-
Log in: If you’re a registered user, log in to your Stile account. Otherwise, create a new account.
-
Access Interactive Canvas: Once you’re logged in, navigate to the desired lesson or activity that features the interactive canvas component.
-
Interact with the Canvas: Follow the instructions provided by the lesson to drag and drop elements, draw, or interact with the canvas.
What Is the Difference Between Quizzes and New Quizzes in Canvas
In Canvas, there are two types of quiz formats available: traditional quizzes and new quizzes. Here’s a breakdown of the main differences:
-
Traditional Quizzes: These are the original quiz format in Canvas, provided by the classic quiz engine. Traditional quizzes offer a wide range of question types but lack some of the advanced features found in new quizzes.
-
New Quizzes: New quizzes in Canvas represent an updated, more feature-rich quiz format. They offer enhanced question types, improved options for setting up quiz rules and settings, and improved accessibility features.
What Is New Quizzes in Canvas
As mentioned earlier, new quizzes in Canvas represent an updated and improved quiz format. Unlike traditional quizzes, new quizzes come with several advantages:
-
Enhanced Question Types: New quizzes offer a wider range of question types, including hotspot, ordering, and categorization questions.
-
Improved Quiz Settings: New quizzes provide more advanced settings for setting up rules, time limits, availability dates, and accommodations.
-
Question Banks: With new quizzes, you can create question banks to organize and categorize your questions for easier quiz creation.
-
Rich Content Editor: The rich content editor in new quizzes allows for formatted text, images, videos, and math equations within questions.
How Do I Regrade a Whole Quiz in Canvas
If you need to regrade an entire quiz in Canvas, follow these steps:
-
Access Quiz Statistics: Navigate to your Canvas course and open the quiz you want to regrade.
-
Click on “Quiz Statistics”: Inside the quiz, click on the “Quiz Statistics” button to access the statistics and details.
-
Select “Moderate This Quiz”: Look for the “Moderate This Quiz” button and click on it to access the moderation options.
-
Choose “Regrade Entire Quiz”: In the moderation panel, select the option to “Regrade Entire Quiz” and confirm your choice.
-
Update and Recalculate: Once the quiz is regraded, Canvas will update the grades for all students based on the recalculated scores.
How Do I Clear Storage on Canvas
Clearing storage on Canvas can help resolve browser-related issues and ensure smooth performance. To clear storage on Canvas, follow these steps:
-
Access Browser Settings: Open your preferred browser and go to the settings or preferences menu.
-
Find “Clear Browsing Data”: Look for the option to clear browsing data, usually found in the privacy or security section of your browser settings.
-
Choose Time Range: Select the appropriate time range for which you want to clear the data (e.g., “Last hour,” “Last day,” “All time”).
-
Select “Cookies and Other Site Data”: Make sure to check the box next to “Cookies and Other Site Data” or a similar option.
-
Clear Data: Click on the “Clear Data” (or similar) button to remove the stored data from Canvas and other websites.
Can You Group Questions in New Quizzes in Canvas
Yes, you can group questions in new quizzes in Canvas to create a more organized assessment experience. Here’s how you can group questions:
-
Create a Quiz: Access the desired Canvas course, create a new quiz, or open an existing one for editing.
-
Add Question Group: Click on the “Add Question Group” button to create a group for related questions.
3.