If you’ve ever wondered about the feasibility of insulating the space between floors, you’ve come to the right place. In this blog post, we’ll explore whether blowing insulation between floors is a viable option, along with the pros and cons of doing so. We’ll also address common questions like whether you can put a floor over blown insulation or insulate between the first and second floors. Additionally, we’ll discuss how to blow in insulation into existing ceilings and explore soundproofing between floors without removing the ceiling. Join us as we delve into the world of floor insulation and discover if it’s worth putting sound insulation between floors.
Can You Blow Insulation Between Floors
So you’re wondering if you can blow insulation between floors? Well, let me enlighten you with some knowledge, my curious friend.
Understanding the Ins and Outs of Blow-in Insulation
Blow-in insulation is a method that involves blowing loose insulation material into cavities to create a thermal barrier. It’s like giving your home a warm and cozy jacket to keep the chilly drafts away. But can you use this technique for insulating the space between your floors? Let’s find out.
The Mysterious Space Between Floors
Picture this: you’re on the first floor feeling toasty, but as soon as you step onto the second floor, it’s as if you’ve entered the Arctic. What gives? Well, blame it on the lackluster insulation between your floors. This space, also known as the interstitial space, is often neglected and becomes a breeding ground for all things chilly.
The Ins and Outs of Blowing Insulation Between Floors
Now, the burning question: can you blow insulation into this no man’s land? The answer is… drumroll, please… yes, you can! Blowing insulation between floors is a viable option to improve the comfort and energy efficiency of your home. It helps to reduce heat loss, minimize noise transmission, and prevent those pesky drafts from making their way up to the upper floors.
“But How Do You Blow It In?” You Ask
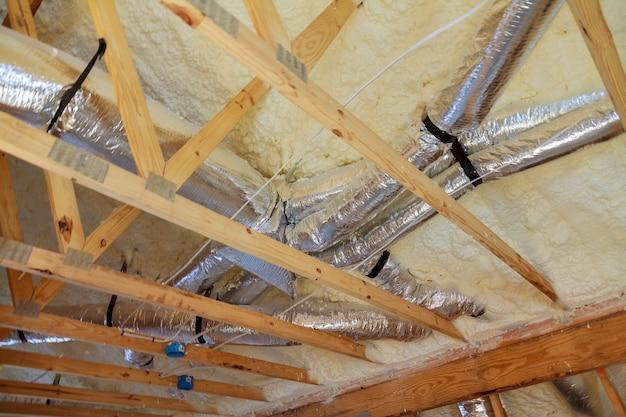
Ah, my curious reader, the process is simpler than you might think. A professional insulation contractor will come armed with a magical instrument called a blowing machine. This contraption blows the insulation material through small holes or openings in your ceiling, making its way into the gap between the floors. It’s like a superhero swooping in to save the day!
The Perfect Insulation Material for the Job
Now that you know how it’s done, let’s talk about the what. The most commonly used insulation material for blowing between floors is cellulose. Made from recycled paper products, it’s an eco-friendly option that also provides excellent thermal performance. Plus, it’s a great way to give those old newspapers a second life (no more withering away in the attic!).
DIY or Not DIY, That Is the Question
While blowing in insulation between floors may seem like a fun DIY project, it’s best left to the professionals. They have the expertise and knowledge to ensure everything is done safely and effectively. So sit back, relax, and let them work their magic while you sip your tea and enjoy a good book.
A Toasty Conclusion
In conclusion, yes, you can blow insulation between floors to improve your home’s comfort and energy efficiency. Just remember to leave it to the experts and enjoy the warmth and coziness that awaits you on the upper floors. Say goodbye to icy toes and hello to a toasty abode!
How to Insulate the Space Between Floors: A Humorous Guide
Have you ever wondered how to keep the temperature just right in your home? Well, worry no more, because today we’re diving into the exciting world of insulating the space between floors! While it may not be the most glamorous topic, it’s definitely one worth exploring. So, grab your hard hat and tool belt, because we’re about to get cozy!
Why Insulate Between Floors
Before we jump into the nitty-gritty of insulating, let’s take a moment to appreciate the importance of a well-insulated home. Not only does it keep you warm in the winter and cool in the summer, but it also helps save energy and reduces those dreaded utility bills. Plus, who doesn’t want to be the envy of their neighbors with a home that’s the perfect temperature year-round?
Materials Needed: Feathered Boas and Bubble Wrap
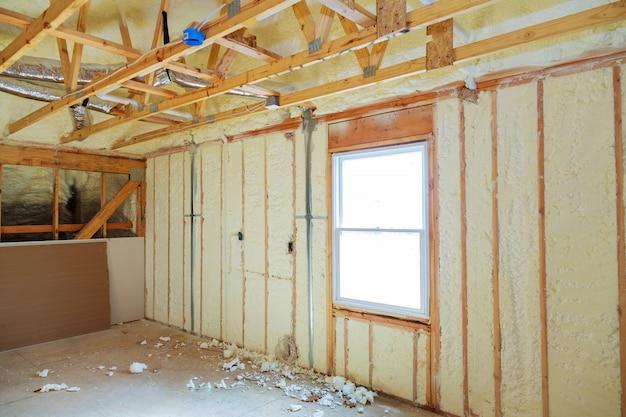
Okay, maybe not feathered boas (we’ll save those for a different project), but when it comes to insulating between floors, there are a few key materials you’ll want to have on hand. First up, we have good old-fashioned fiberglass batt insulation. Just roll it out, cut it to size, and voila! You’ve got yourself a cozy barrier between floors. If you’re feeling adventurous, you could also opt for spray foam insulation or even recycled denim. Hey, who knew insulation could be so fashion-forward?
Step 1: Measure Twice, Insulate Once
Before you go on a wild insulation spree, it’s important to measure the space between your floors accurately. After all, you don’t want to end up with insulation sticking out like a sore thumb (or toe) in your beautifully finished home. Grab your trusty tape measure and get those dimensions down pat. Remember, accuracy is key here!
Step 2: Safety First, Friends
As with any DIY project, safety should be your number one priority. Make sure to wear proper protective gear, such as gloves, goggles, and a dust mask. No one wants to end up coughing up fiberglass particles like a hairball later on. Trust us, it’s not a good look.
Step 3: Cut, Roll, and Tuck!
Now comes the fun part—insulation installation! Take your measurements and cut the insulation rolls accordingly. Gently roll out the insulation between your floor joists, making sure to leave no gaps behind. Remember, we’re not playing a game of hide-and-seek here; we want every inch of that space covered!
Step 4: Seal the Deal
Once your insulation is snugly in place, it’s time to seal the deal. Use a trusty caulk gun to seal any gaps or cracks you may see around your newly insulated area. This will help keep those pesky drafts out and ensure your insulation is doing its job to the fullest.
Step 5: Sit Back and Enjoy
Congratulations! You’ve successfully mastered the art of insulating between floors. Now, sit back, relax, and revel in the fact that your home is super cozy and energy-efficient. You can now proudly brag to your friends about your insulation prowess at your next dinner party. Trust us, it’s a real crowd-pleaser!
So, there you have it – a humorous guide to insulating the space between floors. With a little bit of know-how and a sprinkle of humor, you’ll be able to tackle this DIY project with ease. Remember, a well-insulated home is a happy home. Now go forth and get insulating!
Can You Put a Floor Over Blown Insulation
So, you’ve decided to blow insulation between your floors. Your home will now be soundproof, energy-efficient, and cozy. But wait, what about putting a floor over all that blown insulation? Can it be done? Let’s find out!
The Floor Dilemma
Putting a floor over blown insulation can be a bit tricky. While it may sound like an easy task, there are a few things you need to consider. Don’t worry though, we’re here to demystify the process and sprinkle in some humor along the way!
Step 1: Check the Depth
Before you start laying down any floors, you need to make sure there’s enough space for the insulation. Get your trusty tape measure and find out if your blown insulation is within the recommended depth. If it is, congratulations! You’re one step closer to enjoying a seamless and cozy floor.
Step 2: Smooth Out the Bumps
Nobody likes a wobbly floor, right? If your blown insulation is a bit uneven, no worries! Grab your trusty broom and gently level out the bumps. Just make sure you don’t go overboard and create a ski slope instead of a floor. We wouldn’t want that!
Step 3: Lay Down the Subfloor
Now that your insulation is all nice and level, it’s time to lay down the subfloor. This will provide a sturdy foundation for your beautiful floor. But let’s not forget to give a shout-out to the insulation for keeping you warm in those chilly months. It’s a team effort!
Step 4: Choose Your Flooring Wisely
When it comes to choosing the right flooring, make sure it can handle the weight of the insulation underneath. You don’t want your luxurious marble tiles cracking under the pressure. So, opt for materials that are durable and can withstand the added support from the blown insulation.
Step 5: Enjoy Your Comfy, Cozy Floor
Congratulations, you did it! You have successfully put a floor over blown insulation. Now you can enjoy your cozy, soundproof, and energy-efficient living space. Invite your friends over for a dance party—they won’t even hear you stomping around!
Putting a floor over blown insulation may require a bit of extra effort, but it’s definitely worth it. Just remember to check the depth, smooth out the bumps, lay down the subfloor, choose the right flooring, and voila! You’ve created a comfortable space that not only looks great but also keeps you warm and cozy. So, go ahead and enjoy your newly insulated floors!
Pros and Cons of Insulating Between Floors
Insulating between floors can have several benefits, but like any home improvement project, there are also some drawbacks to consider. Here, we’ll take a lighthearted look at the pros and cons of blowing insulation between floors.
The Pros
1. Improved Energy Efficiency
Insulation between floors can help maintain a comfortable temperature throughout your home. With better insulation, you’ll spend less on heating and cooling bills. Plus, you won’t need to rely on those old wool socks and blanket forts to stay warm.
2. Enhanced Soundproofing
Do you have a noisy family or neighbors who love to crank up their favorite tunes? Insulation between floors can help dampen sound transmission, making your home a quieter sanctuary. No more feeling like you’re living above a mini-concert or a herd of elephants!
3. Increased Comfort
Say goodbye to cold floors and drafts creeping into your living spaces. Insulation between floors helps eliminate chilly feet and keeps the overall temperature more consistent. You’ll no longer have to tiptoe around your home like you’re dancing on a glacier.
4. Potential for Higher Home Value
Investing in insulation between floors can boost your home’s overall value. Potential buyers will appreciate the added energy efficiency and comfort. Who knows? Maybe the insulation will even make your home the hottest property on the block!
The Cons
1. Cost Considerations
Blowing insulation between floors might not be the most budget-friendly option. It requires hiring professionals to complete the job, which can add up quickly. But hey, they say money can’t buy happiness…except when it comes to warm feet and lower energy bills!
2. Limited Accessibility
If you’re thinking of insulating between floors in an existing home, accessibility could prove challenging. Retrofitting insulation requires accessing hidden spaces, which may mean cutting into walls or removing ceiling panels. Goodbye, movie theater-style secret passages!
3. Potential for Unforeseen Issues
Once you start delving into your home’s inner workings, you may discover unforeseen issues. Hidden pipes, electrical wires, or structural elements could complicate the insulation process. So, be prepared for some surprises that might make you question whether exploring the Arctic would have been easier.
4. Storage Limitations
Adding insulation between floors can reduce the available space for storage in your home. Those once empty attic or crawl spaces may need to be sacrificed in the name of insulation. On the bright side, you’ll never have to wonder where to store your collection of “World’s Greatest Tinfoil Ball” memorabilia!
In conclusion, insulating between floors has its advantages and disadvantages. Consider your budget, accessibility requirements, and potential complications before embarking on this project. Whether you choose to insulate or not, just remember that a warm and cozy home is priceless – even if it means sacrificing a bit of storage space or your secret agent dreams.
Should I Insulate Between 1st and 2nd Floors
So, you’re wondering if it’s a good idea to insulate between the first and second floors of your home? Well, let’s dive in and find out!
Understanding the Need for Insulation
Before we get into the nitty-gritty, let’s take a moment to understand why insulation is important. Insulation acts as a barrier, preventing heat transfer between different areas of your home. It helps keep your home warm in the winter and cool in the summer. Plus, it can even save you some moolah on your energy bills. Who doesn’t like the idea of lower bills?
The Battle Against Noise
If you’ve ever lived in an apartment or a house with multiple floors, you know that noise can be a real issue. From your upstairs neighbor’s energetic Zumba sessions to your teenager’s latest favorite band, unwanted sound can drive you mad. Insulating between floors can help reduce noise transmission, creating a more peaceful and harmonious living environment. So, if peace and quiet are high on your priority list, insulation might just be the solution you need.
Keeping It Toasty and Cool
Now, let’s talk about temperature control. Without proper insulation, heat can escape through the cracks, leaving you shivering in the winter months. Conversely, in the summer, cool air can slip through those same gaps, leaving you sweating like a sumo wrestler in a sauna. Insulation helps create a barrier that keeps the temperature just right, like Goldilocks’ preferred porridge. So, if your goal is to keep your home cozy and comfortable year-round, insulating between floors might be worth considering.
Saving the Environment and Your Wallet
We’ve touched on this briefly before, but let’s delve deeper into it: insulation can save you some serious dough. By reducing heat loss or gain, your heating and cooling systems won’t have to work as hard to maintain the desired temperature in your home. This not only lowers your energy bills but also reduces your carbon footprint. So, by insulating between floors, you’ll not only be saving money but also doing your part to save the planet. Mother Nature would be proud!
Conclusion: Wrap It Up, Literally
In conclusion, insulating between your first and second floors can offer several benefits, including noise reduction, temperature control, energy efficiency, and cost savings. It’s a smart investment that can make your home more comfortable, quieter, and environmentally friendly. So, go ahead and wrap your floors in some insulation, and let the good vibes flow between your floors!
Now that you have a clearer picture of whether you should insulate between your first and second floors, it’s time to get cozy and start planning your insulation project. Your comfort, sanity, and wallet will thank you for it!
Can You Blow Insulation Between Floor Joists
Understanding the Big Question
So, you’re wondering if you can blow insulation between those sneaky floor joists of yours? Well, my friend, you’ve come to the right place! We’re about to take a deep dive into the wonderful world of floor insulation and find out if blowing insulation between those wooden beams is a viable option. Get ready for some joist-tastic knowledge!
A Sneak Peek into Floor Joists
Before we jump into the insulation jazz, let’s do a quick recap on what floor joists actually are. They’re like the hidden heroes of your flooring, providing support and ensuring everything stays nice and steady. These trusty timber beams run parallel to each other, creating a strong foundation for your floors. Now that we’ve got that cleared up, let’s get down to the nitty-gritty!
The Ins and Outs of Blowing Insulation
Now, blowing insulation between floor joists might sound like a wild idea straight out of a cartoon, but believe it or not, it’s totally doable! This method, known as “blown-in insulation,” involves using a special machine to blow insulation material between the joists, filling up all those empty spaces and creating a cozy barrier against unwanted temperature changes.
The Benefits are a No-Brainer
Why would anyone want to blow insulation between their floor joists, you might ask? Well, my curious friend, the benefits are as sweet as candy (minus the cavities). First and foremost, it helps prevent the escape of precious heat during those chilly winter months. Say goodbye to icy toes and hello to toasty floors! Additionally, it acts as a noise barrier, muffling any pesky sounds that may try to sneak through the cracks. It’s like an invisible superhero cape for your floors!
The Right Insulation for the Job
Now that you’re gung-ho about blowing insulation between your floor joists, let’s talk about the right insulation materials to get the job done. Fiberglass and cellulose are the superheroes of the insulation world, commonly used for this type of installation. Both materials offer excellent thermal performance and are all-around champs at keeping unwanted air at bay. Make sure you do your research and choose the one that suits your needs best!
DIY or Call in the Pros
Deciding whether to take on this insulation gig yourself or call in the pros is a big decision. If you’re comfortable with a little DIY action and have the necessary tools, go ahead and give it a whirl. However, if climbing up and down ladders with insulation machines isn’t your cup of tea, don’t hesitate to reach out to the professionals. They’ll have your floors insulated in no time, leaving you with more time to kick back and relax.
Who would’ve thought you could have so much fun talking about blowing insulation between floor joists? But hey, now you know it’s a possibility, and a darn good one at that! So, whether you decide to DIY or leave it to the experts, make your floors the envy of all your neighbors. A cozy home and a happy you await, my friend. Keep those floor joists snug as a bug!
How to Blow in Insulation into Existing Ceilings
If you’ve ever wondered how to keep your home cozy and energy-efficient, you may have come across the idea of blowing insulation into existing ceilings. It’s a smart move that can help regulate temperatures and reduce heating and cooling costs. Plus, it’s a DIY project that can be a blast! (Pun intended!) So, if you’re ready to tackle this insulating adventure, here’s a handy guide to get you started.
1. Prepare for Blast Off!
Before you begin blowing insulation into your existing ceilings, make sure you gather all the necessary materials. You’ll need an insulation blower, insulation material (loose-fill or blown-in), a respirator mask (to protect yourself from those pesky fibers), safety goggles, gloves, and a ladder. Oh, and don’t forget a sense of adventure and a good playlist to keep you entertained during the process!
2. Choose the Right Insulation Material
When it comes to insulation, you have a couple of options to choose from. Loose-fill insulation is usually made of cellulose or fiberglass and is perfect for blowing into small gaps and hard-to-reach areas. If you prefer a more eco-friendly alternative, there are even insulation materials made from recycled denim or newspaper! The choice is yours, so go with what suits your needs and values.
3. Locate the Gaps and Start Blowing
To ensure a seamless insulation experience, locate any gaps or openings in your existing ceilings where warmth might escape. Common trouble spots include recessed lights, electrical fixtures, and attic access points. Once you’ve marked these areas, position the insulation blower strategically to blow the material evenly throughout your ceiling. It’s like giving your home a cozy, warm hug!
4. Safety First, Fun Second
Remember, while blowing insulation can be a barrel of laughs, it’s important to prioritize safety. Wear your safety goggles and respirator mask to keep those pesky fibers out of your eyes and lungs. And don’t forget to take breaks when needed. Insulating your ceilings is a marathon, not a sprint!
5. The Cleanup Dance
Once you’ve finished blowing insulation into your existing ceilings (hooray!), it’s time for the cleanup dance. Sweep up any excess insulation material and dispose of it properly. Pro tip: It’s a great opportunity to practice some sweet dance moves while you’re at it!
Blowing insulation into existing ceilings is a fun and effective way to improve your home’s comfort and energy efficiency. Now that you’re armed with the knowledge and know-how, you can embark on this DIY adventure with confidence. So, put on that safety gear, crank up the tunes, and start blowing your way to a snugger, cozier home. Get ready to enjoy those energy bill savings and the satisfaction of a job well done!
Soundproof Between Floors Without Removing Ceiling
Do you need some peace and quiet in your busy household? Tired of hearing your upstairs neighbors practicing the drums at midnight? Don’t worry, we’ve got you covered! In this subsection, we’ll explore how to soundproof between floors without having to remove your ceiling. So roll up your sleeves and let’s dive in!
Insulation is Your Secret Weapon
One of the most effective ways to soundproof between floors is by using insulation. Now, I know what you’re thinking – insulation is for keeping your home warm, not for blocking out noise. But trust me on this one; insulation is your secret weapon in the battle against unwanted noise.
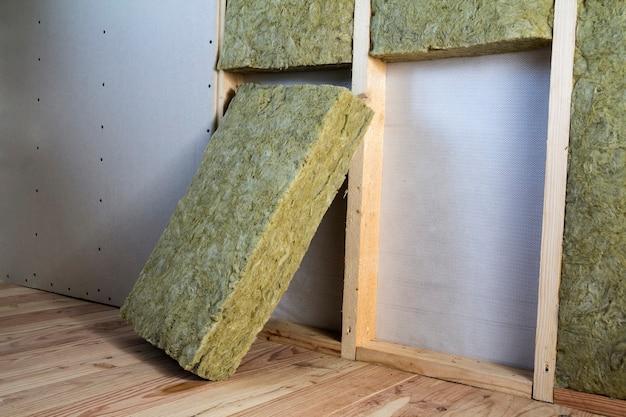
Choose Your Insulation Wisely
When it comes to soundproofing, not all insulation is created equal. Look for insulation with good sound absorption properties. Mineral wool or fiberglass batt insulation is a popular choice for soundproofing between floors. These materials help absorb and dampen sound waves, reducing the transfer of noise between rooms.
Fill in the Gaps
To effectively soundproof between floors, you need to make sure there are no gaps or holes for sound to sneak through. Insulate the gaps between floor joists using expanding spray foam insulation. This will create a solid barrier that prevents sound from traveling between floors. So say goodbye to hearing your neighbor’s cat meowing or their TV blaring through the ceiling!
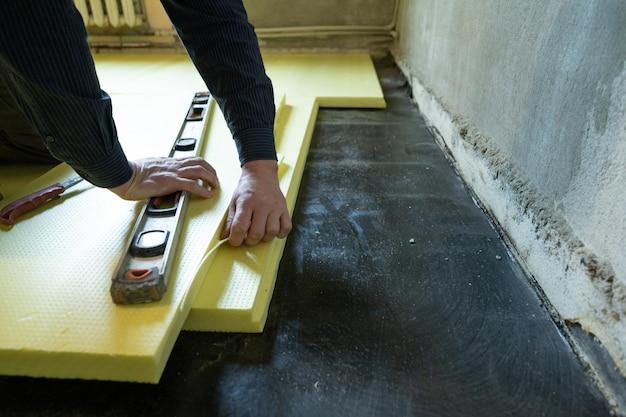
Keep Your Ears Safe with Acoustic Underlay
If you want to take your soundproofing game to the next level, consider installing acoustic underlay. This extra layer of cushioning material goes between your floor and the subfloor, providing additional sound insulation. It’s like giving your ears a cozy blanket to snuggle up with, to block out unwanted noise.
Don’t Forget the Rugs!
Here’s a fun and stylish way to further dampen sound between floors: rugs! Adding rugs to your upstairs rooms can help absorb and muffle sound, reducing noise transmission to the floor below. Plus, they add a touch of warmth and style to your space. It’s a win-win situation!
Conclusion
So next time you find yourself desperately craving some peace and quiet, don’t reach for those noise-canceling headphones just yet. Instead, consider soundproofing between floors without removing your ceiling. With a little insulation, some spray foam, and a few cozy rugs, you’ll be able to enjoy the blissful sound of silence in no time. Happy soundproofing!
Is it Worth Putting Sound Insulation Between Floors
When it comes to sound insulation between floors, you might find yourself questioning whether it’s worth the hassle. Well, my dear reader, let me enlighten you with a touch of humor and a dash of casual banter. It’s time to dig deeper and uncover the truth!
Noise, Noise, Everywhere
If you live in an apartment or have ever had the misfortune of neighbors who think they’re auditioning for a heavy metal band at 3 am, you know the struggle. The constant thumping, stomping, and even the occasional “who left their screaming banshee out of its cage?” can drive you up the wall.
The Quest for Quiet
Now, picture this: you’re trying to relax, read a book, or maybe binge-watch your favorite show. Suddenly, an unexpected noise interrupts your blissful peace. It could be an overly enthusiastic child upstairs playing indoor soccer or the delightful sound of heavy furniture being rearranged at odd hours. Oh, the joys of apartment living!
The Sound of Silence
But fear not, my weary friend! There is a solution: sound insulation between floors. Picture a sanctuary where the only sounds you hear are your own thoughts and the soothing whispers of tranquility. It’s like living in your own private paradise, shielded from the cacophony of the outside world.
Peace in Layers
So, how does sound insulation between floors work? Is it some magical potion made from unicorn tears? Well, not quite. It’s actually a layer of material, often made from cellulose or mineral wool, strategically placed between the floors to absorb and dampen sound vibrations.
Benefits Galore
Now, let’s talk about the perks of installing sound insulation between floors. Firstly, it reduces the airborne sound transmission, ensuring that even the loudest footsteps or impromptu dance parties won’t disturb your zen. Secondly, it also minimizes impact noise, making those annoying thuds much less noticeable. And finally, sound insulation also improves thermal efficiency, so you’re hitting three birds with one stone!
To Muffle or Not to Muffle
Ah, the million-dollar question: is it worth the investment? Well, my wise reader, that depends on your personal preferences. If peace and quiet are high on your priority list, sound insulation between floors is a no-brainer. You’ll have the ultimate sanctuary to decompress and enjoy your own little bubble of bliss.
In conclusion, my dear reader, whether you’re living harmoniously in an apartment or just want to drown out the noise from the floor above, sound insulation between floors is a game-changer. It’s like giving your home a cozy hug of tranquility – no earplugs required. So go forth, embrace the silence, and enjoy a life free from unwanted noise disturbances!
Remember, the choice is yours, but let’s be honest – who wouldn’t want a little extra peace and quiet?