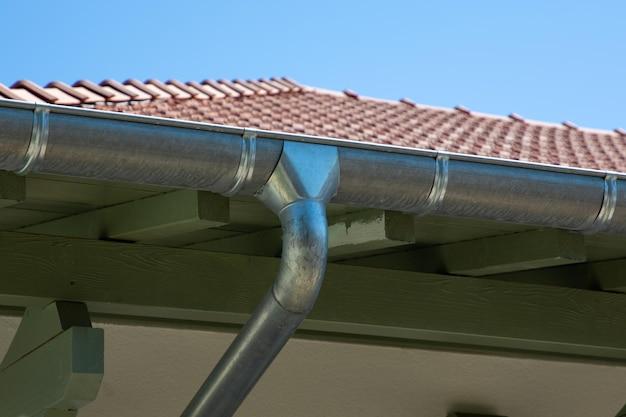
If you’ve noticed that your downspout pipe is broken or damaged, it’s important to address the issue as soon as possible. A broken downspout pipe can lead to water pooling around your foundation, causing potential damage to your property. In this blog post, we’ll explore various methods to repair and replace a broken downspout pipe, including how to fix it underground and the cost of gutter drain pipe replacement. We’ll also discuss burying a downspout drain pipe and the depth at which it should be buried. So, let’s dive in and find out how to fix a broken downspout pipe effectively.
Broken Downspout Pipe: Causes and Solutions
Introduction
A broken downspout pipe can be a real pain. Not only does it disrupt the functionality of your gutter system, but it can also cause costly water damage to your home. In this article, we’ll explore the common causes of broken downspout pipes and provide you with some handy solutions to get your gutter system back on track. Let’s dive in!
Causes of a Broken Downspout Pipe
-
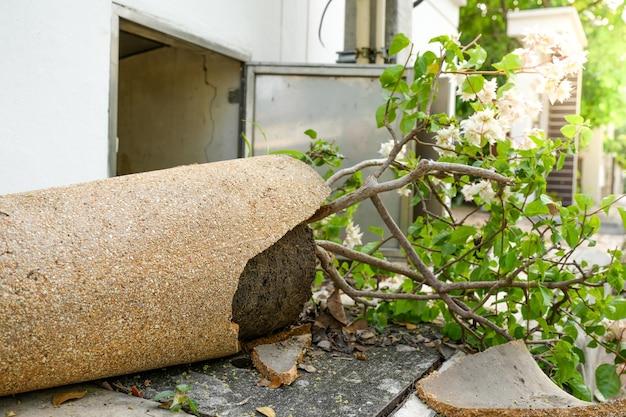
Ageing pipes: Just like us, pipes don’t last forever. Over time, exposure to the elements can cause downspout pipes to deteriorate, leading to cracks and leaks.
-
Freezing temperatures: If you live in a region with freezing winters, your downspout pipes are at risk. When water freezes inside the pipes, it expands, putting pressure on the pipe walls and potentially causing them to crack or burst.
-
Clogs and debris: Twigs, leaves, and other debris can accumulate in your gutters and downspout pipes, leading to blockages. As water tries to flow through, the increased pressure can cause the pipes to weaken or break.
Solutions for a Broken Downspout Pipe
-
Inspect and replace damaged sections: Start by examining your broken downspout pipe for any visible cracks or leaks. If you spot any, it’s time for a replacement. Measure the damaged section and purchase a replacement pipe of the same size and material. Remove the broken section with a hacksaw, attach the new pipe using connectors, and secure it with screws or rivets.
-
Prevent freezing: To safeguard your downspout pipes from freezing, consider installing heat tape or gutter heating cables. These devices are designed to provide warmth and prevent ice formation. Don’t forget to regularly check and maintain them to ensure they’re functioning effectively.
-
Regular maintenance: Prevention is key! Make it a habit to clean your gutters and downspout pipes at least twice a year, especially during the fall when leaves are aplenty. Use a gutter scoop or trowel to remove debris, then rinse the gutters and pipes with a hose. This will help prevent clogs and prolong the life of your downspout pipes.
Wrapping Up
Dealing with a broken downspout pipe doesn’t have to be a headache. By understanding the causes and implementing the solutions mentioned above, you can effectively address the issue and keep your gutter system in tip-top shape. Remember to stay proactive with maintenance to prevent future problems. Happy downspout pipe fixing!
Downspout Drain Pipe Repair
Signs of a Broken Downspout Drain Pipe
If you’ve noticed water pooling around the foundation of your home or a sudden increase in the moisture levels in your basement, chances are you might be dealing with a broken downspout drain pipe. It’s important to identify the signs of a damaged downspout drain pipe as early as possible to prevent more serious issues down the line.
One of the most obvious signs of a broken downspout drain pipe is water dripping or gushing from the pipe itself. You might also notice water stains or discoloration on the exterior walls of your house near the downspout, indicating that water is not properly draining away from your home. Additionally, if you’ve been hearing strange gurgling sounds when it rains, it could be a sign that water is not flowing freely through the downspout drain pipe.
DIY or Call a Professional
When it comes to repairing a broken downspout drain pipe, you might be tempted to grab your tool belt and tackle the job yourself. While some repairs can be done without professional assistance, it’s important to consider the complexity of the issue. If the damage is minimal and you have the necessary skills and tools, a DIY approach might be feasible. However, if the damage is extensive or you’re unsure of how to proceed, it’s best to call a professional to avoid further complications.
DIY Downspout Drain Pipe Repair
If you’ve decided to take matters into your own hands, here are some steps to follow for a DIY downspout drain pipe repair:
1. Assess the Damage
Begin by identifying the exact location and extent of the damage. This will help determine the appropriate repair method and materials needed.
2. Gather the Tools and Materials
You’ll need a few tools and materials for the repair, including a saw, PVC pipe cutter, pipe connector, PVC glue, and a waterproof sealant.
3. Cut out the Damaged Section
Carefully cut out the damaged portion of the downspout drain pipe using a saw or PVC pipe cutter. Make sure to create smooth and clean cuts.
4. Connect the New Section
Attach a pipe connector to each end of the cut pipe, following the manufacturer’s instructions. Insert the new section of pipe and secure it tightly.
5. Seal the Joints
Apply PVC glue to the pipe connector joints to create a strong and secure bond. Additionally, seal any potential leakage points with a waterproof sealant to prevent future issues.
Professional Downspout Drain Pipe Repair
For complex or extensive damage to your downspout drain pipe, it’s recommended to hire a professional plumber who specializes in drainage systems. A professional will have the necessary expertise and equipment to assess the issue accurately and provide a long-lasting repair solution.
By promptly addressing a broken downspout drain pipe, you can prevent potential damage to your foundation and basement. Whether you choose to tackle the repair yourself or hire a professional, it’s important to take action as soon as possible. Remember, a properly functioning downspout drain pipe is crucial for maintaining the structural integrity of your home and preventing costly repairs in the future.
How to Fix a Broken Downspout Extension
Assess the Damage
Before diving into the repair process, it’s crucial to evaluate the extent of the damage to your downspout extension. Look for any cracks or breaks in the pipe that might be causing the issue. Additionally, check if the problem is limited to just a certain section or if the entire extension needs fixing. Understanding the scope of the damage will help you determine the best approach to take for the repair.
Gather the Necessary Tools and Materials
To fix your broken downspout extension, you’ll need a few supplies. Gather a hacksaw, PVC cement, PVC primer, a coupling or replacement pipe, a measuring tape, and a marker. Don’t worry if you’re not familiar with these tools – the process is easier than it sounds!
Measure and Mark
Now it’s time to get your hands dirty (not too dirty, though!). Measure the length of the broken section on your downspout extension and mark it with a marker. This will serve as a guide when cutting and replacing the damaged part.
Cut and Remove the Broken Piece
Using a hacksaw, carefully cut through the marked section of the downspout extension. Once you’ve made the cut, gently remove the broken piece from the surrounding pipe. Be cautious not to damage any other parts during this process.
Prepare the Replacement Pipe
Take your replacement pipe or coupling and prepare it for installation. Clean the ends of the new pipe with PVC primer to remove any dirt or debris. Next, apply PVC cement to the primed ends. Make sure you’re working in a well-ventilated area and follow the manufacturer’s instructions while using the cement.
Attach the Replacement Pipe
Align the replacement pipe with the existing downspout extension and firmly press the two sections together, applying slight pressure to ensure a secure fit. Wipe off any excess cement using a damp cloth, and give it ample time to dry and set according to the manufacturer’s instructions.
Test and Observe
Once the PVC cement has fully dried, it’s time to test your handy work. Turn on your water supply or wait for rain and observe the flow of water through the downspout and extension. Ensure there are no leaks or issues, and voila – your downspout extension is fixed!
Repairing a broken downspout extension may seem like a daunting task, but with the right tools, materials, and guidance, it can be a straightforward process. By taking the time to evaluate the damage, gather the necessary supplies, and follow the steps outlined above, you’ll have your downspout extension back in working order in no time. Remember to take safety precautions, and don’t hesitate to consult a professional if needed. Happy fixing!
How to Fix a Broken Downspout Pipe
So, you’ve found yourself with a broken downspout pipe. Don’t panic! It might seem like a daunting task, but fear not, my friend. With a little bit of know-how and some elbow grease, you’ll have that downspout pipe fixed in no time. Here’s a handy guide to help you through the process.
Tools You’ll Need
Before we dive into the nitty-gritty of fixing that downspout pipe, let’s make sure you have all the necessary tools on hand. You’ll need:
- Safety gear – Don’t forget to protect yourself by wearing gloves and safety glasses.
- Pipe cutter – This handy tool will be your best friend during the repair process.
- Hacksaw – In case you need to make any additional cuts on the downspout pipe.
- Screws and screwdriver – You’ll need these to secure the pipe joints.
- Waterproof sealant – To ensure your repairs are watertight and sturdy.
- Measuring tape – Make accurate measurements to ensure a proper fit.
Step-by-Step Guide
1. Assess the Damage
Take a good look at the broken downspout pipe and assess the extent of the damage. Is it a minor crack or a complete break? This will help you determine the appropriate repair method.
2. Remove the Broken Section
Using your trusty pipe cutter or hacksaw, carefully remove the damaged portion of the downspout pipe. Be sure to make clean, straight cuts for an easier repair.
3. Measure and Cut the Replacement Pipe
Next, measure the length of the removed section and cut a replacement pipe to match. Remember the old saying, “measure twice, cut once.” It’s better to be safe than sorry!
4. Fit and Secure the Replacement Pipe
Slide the replacement pipe onto the existing downspout, ensuring a snug fit. Secure the joints with screws, making sure they are tightly fastened. This will prevent any leaks or further damage.
5. Apply Waterproof Sealant
To ensure a watertight seal, apply a generous amount of waterproof sealant around the joints. This will provide added protection against leaks and will keep your downspout functioning properly.
6. Test Your Handy Work
Before you put away your tools, make sure to give your downspout pipe a thorough test. Run some water through it and check for any leaks or weak spots. If everything looks good, pat yourself on the back – you’ve successfully fixed your downspout!
Remember, tackling a broken downspout pipe can be a DIY adventure, but if you’re not comfortable or the damage is significant, it’s always best to call in a professional. With the right tools, a bit of patience, and a sprinkle of confidence, you’ll conquer that broken downspout pipe like a pro!
The Problem with Broken Downspout Pipes Underground
Introduction
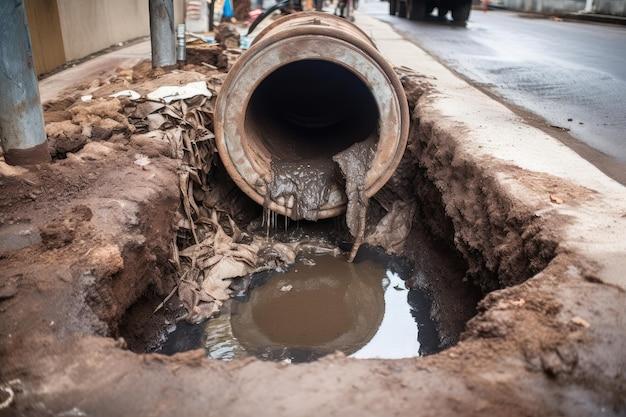
So we’ve covered the headache of dealing with a broken downspout pipe, but what if that pipe happens to be underground? Well, my friend, you’ve got a whole new set of problems on your hands. Let’s dive right in and explore the not-so-fun world of broken downspout pipes underground.
Digging Deeper: The Underground Downspout Pipe Disaster
Ah, the mysterious realm of underground downspout pipes. These hidden conduits of rainwater are great when they’re doing their job correctly, but when they break, things can quickly go from bad to worse. Here are some of the perils you may encounter:
1. Invisible Woes of a Broken Downspout Pipe
Unlike their above-ground counterparts, broken underground downspout pipes are like ninjas of destruction. You won’t notice the problem until it starts wreaking havoc on your property. So be vigilant and keep an eye out for signs such as pooling water or damp patches in unexpected places.
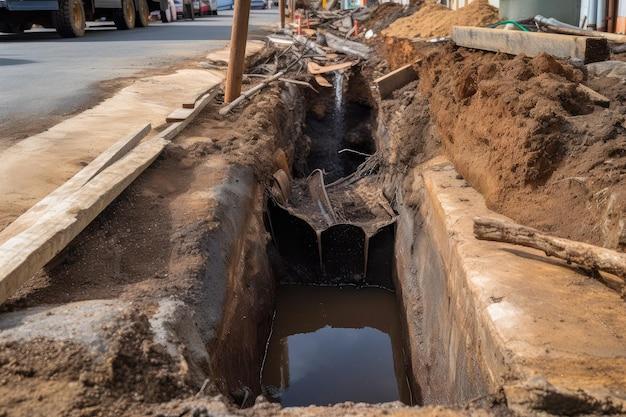
2. Digging Up Trouble (Literally)
Fixing an underground downspout pipe requires some serious earth-moving skills. You’ll need to excavate the area to access the damaged pipe, and this can be a labor-intensive and time-consuming task. So put on your imaginary construction hat and get ready to dig deep!
3. Pipe Predicaments: More than Meets the Eye
When an above-ground downspout pipe breaks, identifying the problem is relatively straightforward. However, underground pipes are a whole different ballgame. Locating the exact point of failure can be like searching for a needle in a haystack. So get ready to play detective and follow the clues (and the water).
Conclusion: Tread Cautiously with Underground Downspout Pipes
Dealing with broken downspout pipes underground is no picnic, my friend. It’s a challenging and time-consuming affair that requires careful excavation and a good dose of patience. So, the next time you’re enjoying a rainy day, keep one eye on the above-ground pipes and the other on the hidden ones beneath the surface. After all, prevention is always better than dealing with an underground downspout disaster!
Gutter Drain Pipe Replacement Cost
Why the Cost Can Dampen Your Spirits
Replacing a broken downspout pipe can put a serious dent in your wallet. Let’s dive into the nitty-gritty details of gutter drain pipe replacement costs and see why it’s no laughing matter. But hey, I promise to sprinkle in some humor along the way!
Understanding the Price Tag
When it comes to gutter drain pipe replacement, several factors come into play that affect the cost. First off, the material you choose will impact your expenses. PVC, aluminum, and galvanized steel are among the popular options out there. Each material brings its own price range to the table, so be sure to consider durability and aesthetic preferences too.
Hiring a Professional vs. Becoming a DIY Diva
Now, you might be tempted to unleash your inner DIY diva and tackle the task yourself, probably armed with a trusty toolbox and a “how hard can it be?” attitude. While it could save you some bucks, keep in mind that improper installation can lead to even costlier issues down the line. So, unless you’re confident in your plumbing prowess, it’s usually best to call in the pros.
Let’s Talk Numbers, Shall We
Alright, let’s address the elephant in the room – the actual costs. The price to replace a gutter drain pipe can range anywhere from $200 to $800. Yep, that’s no chump change! Factors like pipe length, accessibility, and any necessary additional repairs will all contribute to the final bill. Oh, and don’t forget to factor in labor costs if you’re hiring a professional.
Saving Tips to the Rescue
Now, don’t despair just yet! I’ve got a couple of tips up my sleeve to help you save some hard-earned cash. If you’re feeling adventurous, you can opt for a DIY approach. However, be sure to research and educate yourself thoroughly before plunging into the project. Another money-saving option is to consider vinyl or aluminum pipes instead of pricier materials like stainless steel.
Wrap-Up Time
There you have it – the scoop on gutter drain pipe replacement costs. Remember, it’s essential to weigh the pros and cons of material options and decide whether to tackle the project yourself or hire a professional. By staying informed and considering your budget, you’ll be able to make an informed decision when the time comes. Good luck in avoiding those unexpected plumbing “adventures”!
How to Bury a Downspout Drain Pipe
So, you’ve got a pesky downspout drain pipe that’s poking out of your yard and ruining your lawn’s aesthetics. No need to fret! With a little elbow grease and some know-how, you can bury that unsightly pipe and restore the beauty of your outdoor space. Here’s a step-by-step guide on how to bury a downspout drain pipe and bid farewell to that eyesore.
Determine the Path
First things first, you need to figure out where exactly you want to redirect your downspout drain pipe. Consider the natural slope of your yard and choose a location that allows water to flow away from your home’s foundation. It’s essential to prevent water from pooling near your house – we want to keep it nice and dry!
Dig a Trench
Now that you have chosen the ideal location, it’s time to dig a trench. Grab your trusty shovel and start excavating a trench along the path where you want to bury the downspout drain pipe. Make sure the trench is wide enough to accommodate the pipe and deep enough to allow for proper drainage. We don’t want any water backups, do we?
Install the Pipe
With the trench ready and waiting, it’s time to install the downspout drain pipe. Ensure that the pipe runs smoothly along the pre-determined path, using gentle slopes to facilitate water flow. Connect the downspout to the pipe and secure it tightly. You wouldn’t want any loose ends causing trouble later on!
Test the Water Flow
Once the pipe is in place, it’s time for the moment of truth – testing the water flow. Turn on your garden hose or wait for the next rainfall, and observe the water drainage. Make any necessary adjustments to the pipe’s slope or positioning if the water flow isn’t as smooth as a summer breeze.
Backfill the Trench
Now that everything is in order and water is flowing seamlessly, it’s time to backfill the trench. Grab your shovel once again and carefully fill the trench, packing the soil firmly around the buried pipe. Take care not to damage the pipe while backfilling, as we want it to stay put for a long time.
Restore Your Yard’s Beauty
With the trench filled and the pipe safely buried, it’s time to put the finishing touches on your yard. Smooth out the soil, reseed any bare spots, and maybe even add a touch of mulch or decorative rocks to give your newly buried pipe a polished look. Voila! Your yard’s beauty is restored, and the downspout drain pipe is nowhere in sight.
Burying a downspout drain pipe may seem like a daunting task, but with the right instructions and a bit of effort, it’s well within reach. Now you can enjoy your outdoor oasis without a protruding eyesore, all while ensuring proper drainage and keeping your home safe and dry. Happy burying!
How Deep are Downspout Drains Buried
Introduction
When it comes to the functionality of your downspout drains, it’s important to consider not only the condition of the pipes but also their depth underground. The depth at which downspout drains are buried plays a crucial role in effective water drainage and preventing costly damages to your home’s foundation. In this article, we will explore the optimal depth for downspout drains and why it matters.
The Ideal Depth: Digging Deeper
To ensure proper water flow and avoid any potential issues, downspout drains are typically buried at a depth of around 10 to 12 inches. This depth allows for adequate drainage while preventing the pipes from being exposed and potentially damaged by external factors. However, it’s important to note that the ideal depth can vary depending on several factors, such as the climate, soil conditions, and local building codes.
Considerations for Depth: The Underground Adventure
Before burying your downspout drains, it’s essential to take into consideration various factors that can affect the depth. One crucial aspect is the climate in your area. In regions prone to heavy rainfall or snow, it’s recommended to bury the drains deeper to accommodate a higher volume of water flow. Additionally, soil conditions can impact drainage, so it’s important to ensure the depth allows for proper absorption and dispersal of water.
Obstacles on the Journey: The Importance of Clear Pathways
When digging for downspout drains, it’s vital to ensure there are no obstacles blocking the path of water flow. Tree roots, rocks, or other debris can cause blockages and interfere with the draining process. By digging deep enough, you create a clear pathway for water to follow, reducing the chance of clogs and potential damages to your drainage system.
Building Codes and Regulations: Navigating the Legality
As with any construction project, it’s crucial to adhere to local building codes and regulations. Some areas may have specific requirements on the depth at which downspout drains should be buried. Consulting with a professional or local authorities can help ensure you comply with any regulations in your area, keeping your drainage system safe and legally sound.
When it comes to downspout drain installation, the depth at which the pipes are buried is a critical factor. By digging deep enough, you ensure efficient water drainage, prevent potential damages, and maintain the structural integrity of your home. Remember to consider your local climate and soil conditions, avoid obstacles, and adhere to any relevant building codes. Now you’re ready to embark on your downspout drain installation adventure with confidence!
Underground Gutter Drainage Repair Near Me
What to Do When Your Underground Gutter Drainage System Breaks Down
We all know that sinking feeling when something goes awry with our home’s gutter drainage system. It’s like a pipe decided to play hide-and-seek, disappearing underground and leaving you stranded. But fear not! Here are a few steps you can take when you find yourself in need of underground gutter drainage repair near you.
Step 1: Don’t Panic, Call the Professionals!
When faced with a broken underground gutter drainage system, it’s essential not to go into full-blown DIY mode. Sure, you might fancy yourself a handyman or woman, but trust me, this is a job for the experts. Search for reputable repair services near you that specialize in underground gutter drainage systems.
Step 2: Assess the Damage and Explain It to the Pros
Before the repair specialists arrive, take a moment to assess the damage. Is it a cracked pipe, a detached downspout, or something else entirely? Having a clear understanding of the problem will help the professionals diagnose and fix the issue promptly. When they arrive, explain the situation in detail. Be ready to provide any information that could assist them, such as when you first noticed the problem or any recent weather events.
Step 3: Let the Magic of Modern Technology Solve It
Gone are the days when underground gutter drainage repair involved digging up your entire yard. Nowadays, professionals use advanced technology like video inspection and trenchless repair methods. The repair team will likely perform a thorough examination of your underground system using specialized cameras to pinpoint the exact location and cause of the issue. From there, they can determine the most efficient and cost-effective solution.
Step 4: Sit Back, Relax, and Let the Experts Work Their Magic
Once the repair plan is in place, it’s time to sit back, breathe a sigh of relief, and let the professionals work their magic. Rest assured that their expertise and experience will ensure the job is done right. You won’t have to worry about getting your hands dirty or making the problem worse. So go ahead and make yourself a cup of tea while they take care of business.
Step 5: Prevention is Key – Keep Up with Regular Maintenance
Now that your underground gutter drainage system is back to its former glory, it’s essential to keep it that way. Regular maintenance can help prevent future issues and save you from the hassle of further repairs. Make sure you clean your gutters regularly, removing debris that could clog the system. Additionally, consider scheduling annual inspections to catch any potential problems before they become major headaches.
Congratulations! You’ve now survived the treacherous world of underground gutter drainage repair. Remember, in times of trouble, always reach out to the professionals who know best. And with proper care and maintenance, your gutter drainage system will stay happy and dry for years to come.