Are you tired of stumbling around in the dark? Do you find yourself fumbling for the light switch every time you enter a room? Well, fret no more! In this comprehensive guide, we will teach you everything you need to know about adding a light switch to an existing circuit. So get ready to shed some light on your life!
Why Add a Light Switch to an Existing Circuit
Adding a light switch to an existing circuit can bring a whole new level of convenience and functionality to your home. Whether you want to brighten up your outdoor space by adding an outdoor light to an existing circuit or simply want to know how to add a second light switch without rewiring, this guide has got you covered. No more stumbling in the dark or wasting time and energy searching for that elusive switch!
How Do You Add a Light Switch to an Existing Circuit
You might be wondering how it’s even possible to add a light switch to an existing circuit without tearing down walls and rewiring your whole house. Well, worry not! We’re here to walk you through the process step by step. With our easy-to-follow instructions, you’ll be able to add that much-needed light switch in no time, without the hassle of a major renovation.
The Benefits of DIY Light Switch Installation
Not only will adding a light switch to an existing circuit save you from the frustration of stumbling around in the dark, but it can also save you some serious money. By tackling this project yourself, you can avoid the hefty costs of hiring professional electricians. Plus, the sense of accomplishment you’ll feel when you successfully install your own light switch is truly priceless.
So, grab your tool belt, put on your DIY hat, and let’s dive into the exciting world of adding a light switch to an existing circuit. Get ready to take control of your lighting and illuminate your life like never before!
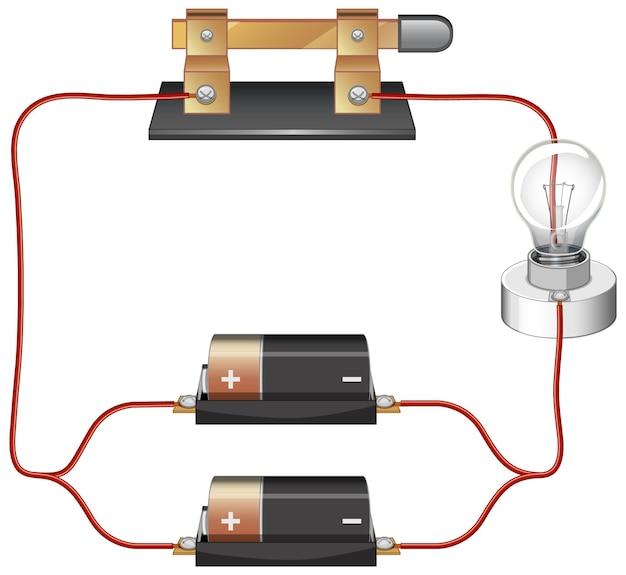
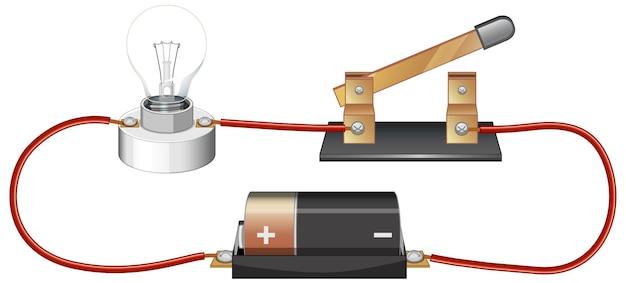
Adding a Light Switch to an Existing Circuit
So you want to add a light switch to an already existing circuit? No worries, my friend! I’ve got you covered. Adding a light switch to an existing circuit can seem like a daunting task, but with a little know-how and some electrical finesse, you’ll have that switch up and running in no time.
Assessing the Circuit
Before diving headfirst into the world of switches and circuits, it’s essential to assess the current state of your electrical setup. Start by identifying the power source and locating the circuit that controls the light you want to add a switch to. This might involve a trip to your electrical panel or fuse box to identify the appropriate breaker or fuse. Safety first, right?
Gathering the Right Tools
Now that you know which circuit you’re working with, it’s time to gather the necessary tools. You’ll need a screwdriver, wire strippers, wire nuts, electrical tape, and, of course, a light switch. It’s always a good idea to have a voltage tester on hand as well, just to double-check that there’s no power flowing to your circuit. Safety should never be compromised!
Cutting the Power
Now it’s time to get down to business. Before working on any electrical circuit, always turn off the power. This can be done by flipping the breaker switch or removing the appropriate fuse. Just to be extra cautious, double-check the circuit with your trusty voltage tester to ensure there’s no electricity running through those wires.
Wiring the Switch
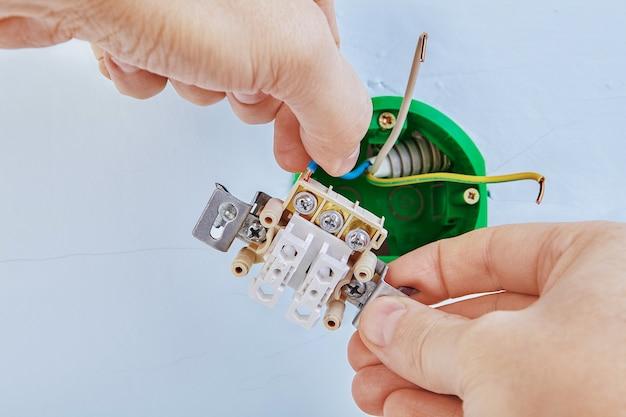
With the power off, you can now start wiring the switch. Begin by removing the cover plate of the existing light fixture. You’ll often find three wires – a black (hot) wire, a white (neutral) wire, and a bare copper (ground) wire. Carefully disconnect these wires from the existing fixture, making note of which wire was connected to which terminal.
Splicing and Connecting
Now comes the fun part – splicing and connecting the wires to the light switch. Using your wire strippers, remove a small portion of insulation from the ends of the wires. Then, connect the black wire to the hot terminal of the switch, the white wire to the neutral terminal, and the bare copper wire to the ground terminal. Secure each connection with a wire nut and a twist of electrical tape for added safety.
Testing and Wrap-Up
Once you’ve finished wiring the switch, it’s time to test your handiwork. Turn the power back on and give your new switch a flick. If the light turns on and off as expected, congratulations – you did it!
Remember, if you’re ever unsure about any step, it’s important to consult a professional electrician. Safety should always be your number one priority when working with electricity.
And there you have it – a step-by-step guide on how to add a light switch to an existing circuit. Now go forth and become the master of your own lighting destiny!
Adding an Outdoor Light to an Existing Circuit
Why Add an Outdoor Light
Adding an outdoor light to your existing circuit is a great way to enhance the functionality and ambiance of your outdoor space. Whether you want to illuminate your backyard for evening gatherings or create a welcoming entrance with a porch light, adding an outdoor light can make a big difference.
Locate a Suitable Power Source
The first step in adding an outdoor light is to locate a suitable power source. Before you begin, make sure to turn off the power to the circuit you will be working on. You can do this by flipping the corresponding breaker in your electrical panel.
Choose the Right Light Fixture
Once you have determined the power source, it’s time to choose the right light fixture for your outdoor space. Consider factors such as the size and style of your home, the amount of light you need, and any specific features you desire, such as motion sensors or dimming capabilities.
Install the Light Fixture
With the power turned off, carefully remove the existing electrical box cover and attach the light fixture mounting plate to the box using the provided screws. Connect the wires from the light fixture to the corresponding wires in the electrical box, ensuring a secure connection.
Test and Confirm Operation
Before fully securing the light fixture, it’s essential to test and confirm its operation. Turn the power back on and check to see if the light fixture functions as expected. Make any necessary adjustments or repairs before proceeding.
Finalize the Installation
Once you are satisfied with the operation of the light fixture, securely fasten it to the mounting plate and replace the electrical box cover. Take a moment to admire your new outdoor light, and don’t forget to clean up any debris or tools used during the installation process.
By adding an outdoor light to your existing circuit, you can transform your outdoor space into a well-lit and inviting environment. Remember to follow all safety precautions and consult a professional if you are unsure about any aspect of the installation process. Now, go ahead and enjoy your outdoor area illuminated with the enchanting glow of your newly installed light fixture!
Adding a Second Light Switch Without Wiring
So, you’ve decided to add a second light switch to your existing circuit but don’t want to deal with the hassle of wiring? Well, you’re in luck! There are actually a few clever ways you can achieve this without tearing up your walls and getting tangled up in a mess of wires. Let’s explore some options:
Option 1: Smart Wi-Fi Light Switches
Thanks to modern technology, you can now add a second light switch without any wiring by using smart Wi-Fi light switches. These nifty devices connect to your home’s Wi-Fi network and allow you to control your lights from anywhere using your smartphone or a voice-controlled device like Amazon Echo or Google Home.
To install a smart Wi-Fi light switch, you simply replace your existing switch with the smart switch. Then, follow the manufacturer’s instructions to connect it to your Wi-Fi network and set up the accompanying app. Voila! You now have the ability to control your lights with ease, without the need for any new wiring.
Option 2: Wireless Light Switch Kits
If you prefer a more DIY approach, wireless light switch kits are another great option. These kits typically consist of a wireless switch and a receiver that plugs into any standard electrical outlet. The switch and receiver communicate wirelessly, allowing you to control your lights without the need for new wiring.
To set up a wireless light switch kit, simply plug the receiver into an outlet near your existing light switch, and then mount the wireless switch wherever you desire. The switch sends a signal to the receiver, which in turn controls the lights. It’s a simple and effective solution for adding a second light switch.
Option 3: Remote Control Light Switches
For those who prefer a more traditional approach, remote control light switches offer a convenient alternative. These switches come with a handheld remote, allowing you to control your lights from anywhere within range.
To add a second light switch using a remote control, you’ll need to install a receiver module behind your existing switch. This receiver communicates with the remote control, enabling you to turn your lights on or off with a simple press of a button. It’s a handy solution that doesn’t require any complicated wiring.
Adding a second light switch without wiring may seem like a daunting task, but with the help of smart Wi-Fi light switches, wireless light switch kits, or remote control light switches, you can achieve your goal easily and without breaking a sweat. Choose the option that suits your needs and enjoy the convenience and flexibility of having an additional light switch in your home. Happy switching!”
How to Add a Light Switch to an Existing Circuit
So, you’re looking to add a light switch to an existing circuit, huh? Well, you’re in luck! Adding a light switch to an existing circuit is a relatively simple task that can instantly upgrade the convenience and functionality of your lighting system. In this guide, I’ll walk you through the steps and provide some helpful tips to guide you along the way.
Identify the Circuit
The first step is to identify the circuit you want to add the light switch to. This means locating the breaker that controls the circuit and turning it off to ensure your safety during the installation process. Trust me, nobody wants to risk getting shocked while installing a light switch!
Choose the Switch Type
Next, you’ll need to decide on the type of light switch you want to install. There are a few different options to choose from, including traditional toggle switches, dimmer switches, and even smart switches that can be controlled remotely through your smartphone. Consider the functionality and aesthetics you want, and choose the switch that best fits your needs.
Gather the Tools and Materials
Before you dive into the installation, make sure you have all the necessary tools and materials. You’ll typically need a screwdriver, wire strippers, electrical tape, a voltage tester, and of course, the light switch itself. Double-check your toolbox to ensure you have everything you need before you get started.
Turn off the Power
Once you’ve gathered your tools, it’s time to turn off the power to the circuit you’re working on. This is a crucial step to prevent any accidents or damage during the installation. Use your voltage tester to confirm that the power is indeed off before proceeding.
Connect the Wires
Now comes the fun part: connecting the wires! This is where your wire strippers and electrical tape come in handy. Follow the manufacturer’s instructions for your specific light switch, but in general, you’ll need to connect the hot wire (usually black), the neutral wire (usually white), and the ground wire (usually green or bare copper) to their respective terminals on the switch.
Test and Reassemble
Once you’ve connected the wires, it’s time to test your handiwork. Turn the power back on and check if the light switch is functioning properly. If everything is working as it should, you can now reassemble any covers or plates that you removed during the installation process.
Adding a light switch to an existing circuit is an excellent DIY project for beginners and can make a significant difference in the usability of your lighting system. Remember to always prioritize safety by turning off the power and using a voltage tester before working on any electrical connections. With the right tools, materials, and guidance, you’ll have that new light switch up and running in no time!
So, why wait? Get ready to step up your lighting game and enjoy the convenience of controlling your lights with a simple flip of a switch.