Writing your blog like an expert: How to Clean Cabinets Before Painting
Are you considering transforming the look of your kitchen cabinets with a fresh coat of paint? You’ve come to the right place! Before you grab your paintbrush, it’s crucial to understand the importance of properly cleaning and prepping your cabinets. By taking the time to prepare them, you’ll ensure a smooth and long-lasting finish.
In this comprehensive guide, we’ll answer all your burning questions about cleaning cabinets before painting. From removing grease and grime to choosing the right sandpaper grit, we’ll cover it all. Plus, we’ll share expert tips on achieving a flawless paint job without brush marks or any unnecessary hassle. So, let’s dive in and learn the secrets of prepping cabinets like a pro!
Note: The following sections in your blog can delve into each of the mentioned keywords, answering specific questions and providing step-by-step instructions. Make sure to include attractive headings, subheadings, and relevant images throughout the blog. Remember to optimize your content for SEO by incorporating the keywords naturally.
How to Get Your Cabinets Sparkling Clean Before You Start Painting
If you’re planning to give your cabinets a fresh coat of paint, it’s crucial to clean them properly beforehand to ensure a smooth and long-lasting finish. Nobody wants a beautifully painted cabinet with remnants of last night’s spaghetti sauce still clinging to it. So, let’s dive into the nitty-gritty of cleaning cabinets before painting and get your surfaces sparkling clean.
Gather Your Arsenal of Cleaning Supplies
Before you embark on your cabinet cleaning mission, gather your cleaning supplies. Be prepared to battle the grime and gather an assortment of cleaning tools. Here’s what you’ll need:
1. Soap and Warm Water: A Dynamic Duo
Soap and warm water are like Batman and Robin, except they fight the evil grime on your cabinets instead of criminals in Gotham City. Mix a small amount of mild dish soap with warm water in a bucket or sink.
2. Microfiber Cloths: The Ultimate Dirt Erasers
Microfiber cloths are like little magical fairies that effortlessly whisk away dirt and grime from your cabinets. They’re soft, durable, and won’t scratch the surfaces. Make sure to have a few on hand to tackle those stubborn spots.
3. Toothbrush: Your Secret Weapon
Yes, you read that right: a toothbrush! Don’t worry; we’re not suggesting you scrub your cabinets with toothpaste. An old toothbrush is perfect for those hard-to-reach nooks and crannies that tend to accumulate dirt.
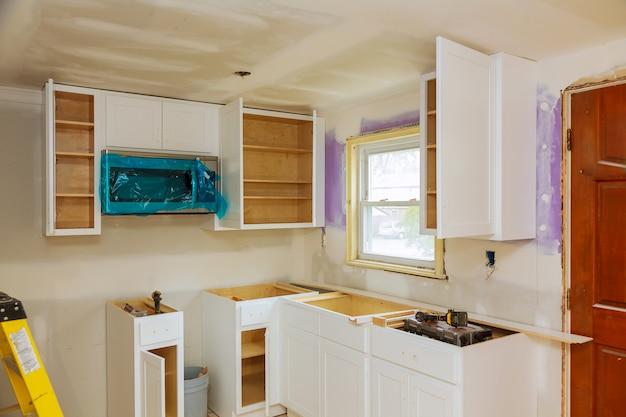
Step 1: Empty Your Cabinets and Remove Hardware
Before you tackle the cleaning process, empty your cabinets and remove all the items inside. It’s easier to clean without obstacles in the way. Plus, you don’t want to accidentally paint your great-grandmother’s antique teacup collection.
Unscrew and remove any hardware, such as knobs and handles, from your cabinets. This will make the cleaning process smoother and allow you to paint all the surfaces evenly.
Step 2: Dusting Off Like a Pro
Now it’s time for some dusting action. Grab a microfiber cloth and gently wipe away the dust and loose debris from the cabinet surfaces. The last thing you want is for that pesky dust to ruin your smooth paint finish.
Pro tip: Play some upbeat music while dusting to make it a more enjoyable experience. Show those dust particles who’s boss!
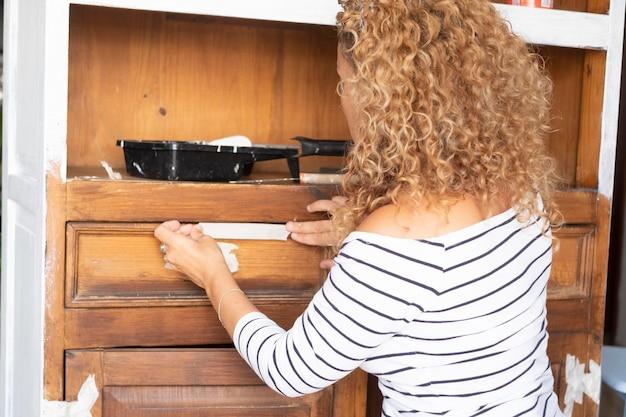
Step 3: Bathe Your Cabinets in Sudsy Warmth
Remember our trusty duo, soap, and warm water? Now’s the time to put them to work. Dip a microfiber cloth into the soapy mixture and wring out any excess water. Gently scrub the cabinet surfaces, working your way from top to bottom.
Don’t forget to clean the insides of the cabinets too! Use your toothbrush to tackle any dirt lurking in the corners or crevices. Feel free to make funny sound effects while scrubbing. It adds an extra level of entertainment—trust us!
Step 4: Rinse Away the Soap Opera
After you’ve given your cabinets a good scrubbing, it’s time to rinse away the soapy residue. Dampen a clean cloth with plain water and wipe down the surfaces, ensuring all soap remnants are gone. You don’t want any soap surprises peeking through your fresh paint job.
Step 5: Dry Like There’s No Tomorrow
Lastly, grab a dry microfiber cloth and give your cabinets a good drying-off. Make sure they’re completely dry before moving on to the painting phase. Moisture trapped within the wood could lead to paint problems, and we definitely want to avoid that.
You’re Ready to Paint!
Congratulations! Your cabinets are now squeaky clean and primed for a fabulous paint makeover. Follow the manufacturer’s instructions for the type of primer and paint you’ll be using. With your pristine cabinets and a little paint magic, you’ll have a kitchen that looks like it jumped straight out of a magazine.
Remember, cleanliness is next to godliness, and now you’re on your way to kitchen cabinet divinity. So go forth, armed with your microfiber cloths and trusty toothbrush, and conquer those dirty cabinets like the cleaning superhero you are!
FAQ: How To Clean Cabinets Before Painting
How can I paint my kitchen cabinets without brush marks
When it comes to painting kitchen cabinets, brush marks can be a real buzzkill. But fear not! To achieve a smooth and flawless finish, you can follow these steps:
- Start by using a high-quality brush with fine bristles to minimize brush marks.
- Apply thin coats of paint, allowing each coat to dry completely before applying the next.
- For an even smoother finish, lightly sand the cabinets between coats. This helps to smooth out any imperfections and creates a polished look.
Can you clean cabinets with mineral spirits before painting
Absolutely! Mineral spirits are a great choice for cleaning cabinets before painting. Follow these steps to get rid of dirt, grime, and grease:
- Dilute the mineral spirits according to the instructions on the container.
- Dip a clean cloth or sponge into the solution and gently scrub the cabinets.
- Wipe away any residue with a clean, damp cloth.
- Allow the cabinets to dry completely before applying any paint.
What removes grease before painting
Grease can be quite stubborn, but with the right approach, you can send it packing! Here’s a simple method to remove grease from cabinets before painting:
- Mix equal parts vinegar and water in a spray bottle.
- Spray the solution onto the greasy areas of the cabinets.
- Let it sit for a few minutes to loosen the grease.
- Wipe away the grease with a clean cloth or sponge.
- Rinse with water and allow the cabinets to dry before painting.
How long after mineral spirits can I paint
After using mineral spirits to clean your cabinets, it’s essential to allow them enough time to dry thoroughly. Follow these guidelines:
- Generally, it’s recommended to wait at least 24 hours before painting after using mineral spirits.
- However, the drying time may vary depending on factors such as humidity and ventilation.
- To be safe, check the label on the mineral spirits container for specific instructions and drying times.
What grit sandpaper should I use before painting cabinets
Sanding cabinets is an essential step to ensure proper adhesion of the paint. Here’s what you need to know about sandpaper grit:
- Start with a medium grit sandpaper, such as 120 or 150, to remove any rough areas or imperfections on the cabinet surface.
- Afterward, switch to a finer grit sandpaper, like 220, for a smoother finish and to ensure adhesion of the paint.
- Remember to sand in the direction of the wood grain to avoid scratch marks.
What do you wipe wood with before painting
Before painting wood cabinets, it’s crucial to give them a good wipe-down. Here’s a simple cleaning solution that works wonders:
- Mix equal parts water and vinegar in a spray bottle.
- Spray the solution onto a clean cloth or sponge.
- Wipe down the cabinets, removing any dust, dirt, or grime.
- For stubborn stains, use a gentle detergent mixed with water.
- Rinse with a damp cloth to remove any residue, and let the cabinets dry completely before painting.
How many coats of paint do I need for cabinets
The number of coats needed for painting cabinets depends on a variety of factors, such as the original color and the desired final result. However, as a general guideline:
- Start with a primer coat to ensure better adhesion and coverage of the paint.
- Follow with at least two coats of paint, allowing each coat to dry completely before applying the next.
- Remember, high-quality paint with good coverage can often require fewer coats than cheaper alternatives.
Do you have to prep cabinets before painting
Prepping your cabinets before painting is essential for a successful and long-lasting finish. Follow these prep steps:
- Remove all cabinet doors, drawers, and hardware.
- Clean the cabinets thoroughly with a suitable cleaner or degreaser.
- Repair any dents, scratches, or imperfections with wood filler and sand them smooth.
- Lightly sand the cabinet surfaces to promote paint adhesion.
- Wipe away any sanding dust with a clean cloth or tack cloth.
- Apply a primer to ensure better paint adhesion and coverage.
How do you clean cabinets with vinegar before painting
Vinegar is a natural cleaning powerhouse that can effectively clean cabinets before painting. Follow these steps:
- Mix equal parts vinegar and water in a spray bottle.
- Spray the solution directly onto the cabinet surfaces.
- Using a clean cloth or sponge, scrub away any dirt, grease, or grime.
- Rinse with a clean cloth dampened with water.
- Let the cabinets dry completely before moving on to the painting process.
How do you degrease cabinets
If grease has taken over your cabinets, fear not! Here’s how you can effectively degrease them before painting:
- Create a cleaning solution by mixing warm water with 1-2 tablespoons of mild dish soap.
- Using a sponge or cloth, dip it into the soapy solution and wring out any excess liquid.
- Gently scrub the cabinet surfaces, paying extra attention to greasy areas.
- Rinse the cabinets with a clean cloth dampened with water.
- Allow the cabinets to dry completely before proceeding with the painting process.
What is a good degreaser before painting
When it comes to finding a good degreaser for painting cabinets, there are several options available. Here are a few effective choices:
- White vinegar diluted with water.
- Ammonia mixed with warm water.
- Trisodium phosphate (TSP) mixed with water. Be sure to follow the manufacturer’s instructions for proper dilution and safety precautions.
What is a good degreaser to use on kitchen cabinets
Keep that kitchen cabinet grease in check using these tried-and-true degreasers:
- Dish soap and warm water: Mix a few drops of dish soap into warm water and use a sponge or cloth to scrub away grease.
- Baking soda paste: Create a paste using baking soda and water, apply it to the greasy areas, let it sit for a few minutes, and then wipe clean.
- Vinegar and water: Mix equal parts vinegar and water in a spray bottle, spray onto the greasy surfaces, and wipe away.
What is the best way to clean kitchen cabinets
Cleaning your kitchen cabinets before painting can be a breeze with the right approach. Here’s the best way to get those cabinets sparkling clean:
- Remove all contents from the cabinets and set them aside.
- Using a vacuum with a brush attachment or a soft cloth, remove any loose dust or debris from the surfaces and corners.
- Mix warm water with a gentle dish soap to create a cleaning solution.
- Dip a sponge or cloth into the soapy water and scrub away any dirt, grease, or grime, paying extra attention to high-traffic areas.
- Rinse with a clean cloth dampened with water.
- Dry the cabinets thoroughly before continuing with the painting process.
Can you use dawn dish soap on kitchen cabinets
Yes, Dawn dish soap can be a great ally in cleaning kitchen cabinets before painting. Follow these steps:
- Mix a small amount of Dawn dish soap with warm water to create a soapy solution.
- Dampen a sponge or cloth in the solution, wringing out any excess liquid.
- Gently scrub the cabinet surfaces, removing any dirt, grease, or grime.
- Rinse with a clean cloth dampened with water and dry the cabinets thoroughly.
- Now your cabinets are ready for their fabulous transformation!
Can you use magic eraser on painted cabinets
While magic erasers can be handy for many cleaning tasks, it’s best to exercise caution when using them on painted cabinets. Here’s what you should keep in mind:
- Magic erasers can be abrasive, and they may remove or dull the paint finish on your cabinets.
- Before using a magic eraser, test it on a small and inconspicuous area of the cabinet to ensure it doesn’t cause any damage.
- Instead of using a magic eraser, it’s often safer to stick to gentle cleaning methods using mild detergents or vinegar solutions.
How do you clean sticky wood cabinets before painting
Sticky wood cabinets can be frustrating, but with a bit of elbow grease and the right approach, you’ll have them squeaky clean in no time:
- Mix warm water with a few drops of dish soap or vinegar.
- Dampen a cloth or sponge in the soapy solution, wringing out any excess liquid.
- Gently scrub the sticky areas, applying a bit of pressure if needed.
- Rinse with a clean cloth dampened with water.
- Dry the cabinets thoroughly to prevent any moisture damage.
- Now they’re ready for a fresh coat of paint and no longer sticky!
Is it better to brush or spray cabinets
When it comes to painting cabinets, both brushing and spraying have their pros and cons. Let’s weigh the options:
Brushing:
– Pros: Brushes allow for more control and precision, especially when it comes to corners and intricate details. They also result in a thicker and more even coat of paint.
– Cons: Brush marks and visible strokes can be a challenge to avoid, and it may take more time compared to spraying.
Spraying:
– Pros: Spraying cabinets can result in a smooth, flawless, and professional finish. It’s also faster compared to brushing.
– Cons: Spraying requires more equipment, setup time, and precautions to protect surrounding areas from overspray. It may also be more challenging to achieve an even finish without proper technique.
Ultimately, the choice between brushing and spraying depends on your comfort level, preference, and available resources.
What happens if you don’t sand cabinets before painting
Skipping the sanding step before painting cabinets can lead to a less-than-desirable outcome. Here’s what you might encounter:
- Poor adhesion: Sanding helps to roughen the surface, allowing the primer and paint to adhere better. Without it, the paint may struggle to stick, leading to peeling and chipping.
- Rough finish: Sanding smooths out imperfections, providing a more even and polished surface. Without sanding, you may end up with a bumpy or rough texture.
- Uneven color: If the cabinets have a glossy or varnished finish, the paint may not adhere well or look uneven without proper sanding.
- Reduced durability: Properly sanded cabinets provide a solid foundation for the paint, enhancing its durability and longevity. Without sanding, the paint may wear off more quickly.
So, don’t skip the sanding step if you want your cabinets to look fabulous and stand the test of time!