Are you tired of clogged drains and funky odors in your kitchen? Look no further! In this comprehensive guide, we will dive into the world of P-Traps with garbage disposals, unraveling the mysteries and answering all your burning questions. Whether you’re a DIY enthusiast or just a curious homeowner, we’ve got you covered.
Understanding the Magic Behind the P-Trap
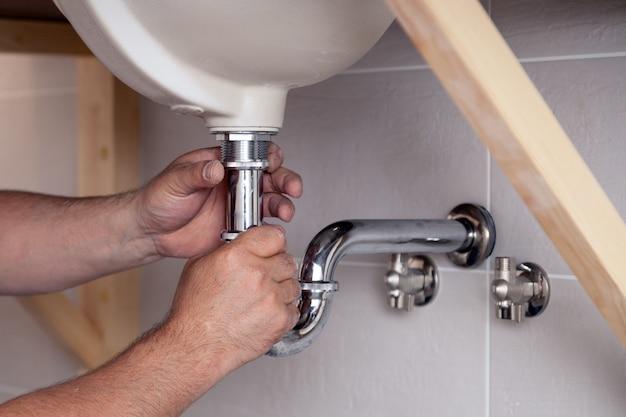
Before we jump into installing a P-trap with a garbage disposal, let’s start by understanding what this magical contraption actually is. The P-trap is a unique plumbing component that provides an essential function: preventing the escape of noxious sewer gases into your home. It forms a water seal that acts as a barrier, keeping odors at bay and maintaining the overall hygiene of your kitchen.
Connecting a P-Trap to a Garbage Disposal: A Step-by-Step Guide
Now that we know the importance of the P-trap, let’s move on to the installation process. Connecting a P-trap to a garbage disposal might sound daunting, but fear not! We will break it down into simple steps, ensuring you have a hassle-free experience. From choosing the right kit to making secure connections, we’ve got all the tips and tricks to help you get the job done right.
DIY Maintenance: Emptying and Cleaning the Garbage Disposal Trap
Maintenance is key when it comes to keeping your garbage disposal and P-trap functioning efficiently. In this section, we’ll delve into the art of emptying and cleaning the garbage disposal trap without the need for removal. Say goodbye to unpleasant odors and hello to a fresh and clean kitchen.
Do’s and Don’ts: Common Questions Answered
To wrap up our guide, we’ll address some common questions that may be swirling in your mind. Do you need a separate P-trap for your garbage disposal? Is there a specific trap to clean in a garbage disposal? We’ll provide you with clear and concise answers, debunking any myths along the way.
Get ready to upgrade your plumbing knowledge and conquer your garbage disposal woes. With our comprehensive guide by your side, you’ll never have to worry about smelly kitchens or clogged drains again. So, grab that cup of coffee, put on your DIY hat, and let’s dive into the wonderful world of P-Traps with garbage disposals!
p trap with garbage disposal
Introduction
Garbage disposals are a handy addition to any kitchen, helping to simplify the task of food waste disposal. However, when it comes to installing a garbage disposal, it’s essential to understand the role of the P trap. In this section, we will delve into the world of P traps with garbage disposals and explore their importance, functioning, and potential issues.
The Purpose of a P Trap
You might be wondering, what exactly is a P trap? Well, let’s break it down. A P trap is a pipe that looks like, you guessed it, the letter P! It’s called a trap because it traps water, creating a barrier between your home and the sewer system. This simple yet effective mechanism prevents sewer odors and harmful gases from entering your kitchen.
P Trap Compatibility with Garbage Disposals
Now, you might be asking, how does a garbage disposal fit into the P trap equation? Well, it’s quite straightforward. When a garbage disposal is installed, it connects to the drainpipe under your kitchen sink. The P trap, in turn, is connected to the drainpipe as well. So, the garbage disposal effectively becomes part of the drainage system, with the P trap acting as a buffer between the disposal and the sewer.
Maintaining Your P Trap with a Garbage Disposal
Keeping your P trap in good working condition is crucial for the proper functioning of your garbage disposal and the overall health of your kitchen plumbing. One common issue to watch out for is clogging. Food debris or grease can build up in the P trap, causing blockages. Regularly flushing hot water down the drain can help prevent this. Additionally, avoid disposing of large quantities of fibrous or starchy food waste as they can cause clogs.
Warning Signs of P Trap Problems
Like any component of your plumbing system, the P trap can develop problems over time. If you notice foul odors emanating from your sink, slow drainage, or gurgling sounds when using your garbage disposal, it could be a sign of P trap issues. In such cases, it’s best to call a professional plumber to assess the situation and provide the necessary repairs.
The P trap plays a vital role in maintaining the hygiene and functionality of your kitchen’s plumbing system, especially when you have a garbage disposal. By understanding its purpose and taking proper care of it, you can ensure a smooth and odor-free experience in the heart of your home. So, next time you’re enjoying the convenience of your garbage disposal, remember to give a nod to the unsung hero, the humble P trap!
Glue P-Trap Direction
If you’re in the process of installing a garbage disposal and have come across the term “glue p-trap direction,” fret not because I’ve got you covered on this peculiar subject! Let’s dive into what it means and how it relates to your garbage disposal installation.
Understanding the P-Trap
Before we get into the “glue p-trap direction,” let’s quickly refresh our minds on what a p-trap is. In simple terms, a p-trap is a curved pipe that is shaped like a “P” – hence the name. It’s installed under your sink and is an essential component for trapping water in order to prevent sewer gases from entering your home. It plays a vital role in maintaining a clean and odor-free environment.
The Purpose of Gluing
Now that we’ve got the basics down, let’s talk about the “glue” part of the equation. When installing a p-trap, it’s crucial to ensure that all connections are secure and leak-free. One way to achieve this is by using PVC glue, which creates a tight bond between the pipes.
The Importance of Direction
When it comes to the “glue p-trap direction,” it refers to the correct way to assemble the p-trap components using PVC glue. Whether you’re directly connecting the p-trap to the garbage disposal or incorporating it into your existing plumbing system, following the proper direction is crucial for optimal functionality.
To ensure you’re on the right track, here are a few key steps to keep in mind:
1. Measure and Cut
Start by measuring and cutting the appropriate length of PVC pipe to connect the p-trap to your garbage disposal or existing plumbing system. Remember to take accurate measurements to avoid any unnecessary adjustments later on.
2. Apply Glue
Once you have the correct pipe length, apply PVC glue to the inside of one end of the pipe and the corresponding outside of the connection point. Be mindful not to apply excessive glue, as it can get messy!
3. Connect and Hold
Next, connect the glued end of the pipe to the desired connection point and hold it firmly in place for a few seconds to allow the glue to set.
4. Repeat the Process
Continue the process, applying glue and connecting pipes until you’ve completed the entire p-trap assembly. Take your time and double-check each connection to ensure they are secure and leak-free.
A Glue P-Trap Journey
Now that you’re familiar with the glue p-trap direction, installing your garbage disposal will be a breeze! Remember, while the process may seem a bit intimidating at first, all it takes is a little patience and attention to detail. Before you know it, you’ll have a fully functional and odor-free kitchen sink with your new garbage disposal in place!
Happy plumbing adventures!
Garbage Disposal P-Trap Kit
If you’re planning to install a garbage disposal in your kitchen, it’s important to understand the importance of a P-trap kit specifically designed for garbage disposals. This essential component ensures proper drainage and prevents unpleasant odors from seeping back into your kitchen. In this section, we’ll delve into the ins and outs of a garbage disposal P-trap kit, offering you all the information you need to make an informed decision.
What is a P-Trap Kit
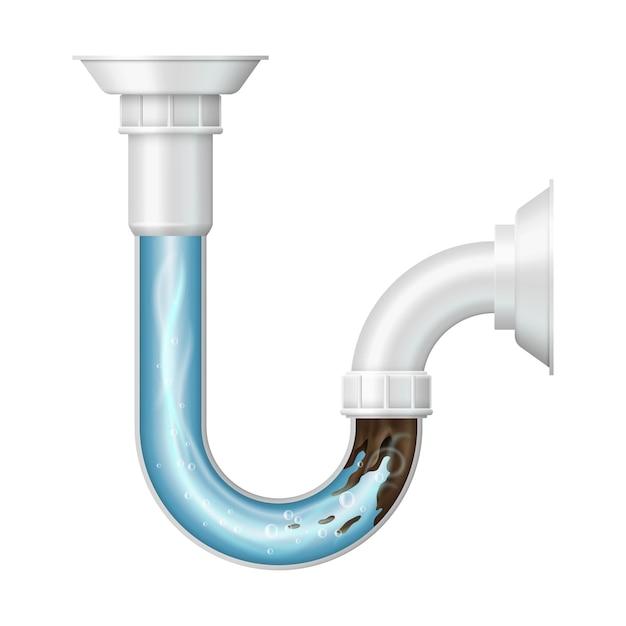
Let’s start with the basics: a P-trap kit is a U-shaped pipe that creates a water seal to prevent sewer gases from entering your home. In the case of a garbage disposal P-trap kit, this component is specifically designed to accommodate the space requirements and installation needs of a garbage disposal unit.
Why You Need a Garbage Disposal P-Trap Kit
Without a proper P-trap kit, you run the risk of foul odors permeating your kitchen, which can be nothing short of unbearable. Additionally, a P-trap kit ensures that debris from the garbage disposal does not clog the pipe and cause drainage issues. By investing in a quality garbage disposal P-trap kit, you can enjoy a pleasant-smelling kitchen and avoid potential plumbing disasters.
How Does a Garbage Disposal P-Trap Kit Work
The working principle of a garbage disposal P-trap kit is quite simple. When water flows down the sink drain, it fills the U-shaped P-trap, creating a barrier between your home and the sewer line. This water barrier acts as a seal, preventing odors from escaping into your living space. As long as the P-trap remains intact and properly installed, you can enjoy a fresh-smelling kitchen.
Installing a Garbage Disposal P-Trap Kit
Installing a garbage disposal P-trap kit may seem intimidating, but fear not – with a little guidance, you can do it yourself! Here’s a step-by-step guide to make the process a breeze:
Step 1: Gather your tools and materials.
Before you jump into the installation, make sure you have all the necessary tools and materials on hand. These typically include a P-trap kit, pliers, a wrench, Teflon tape, and a bucket.
Step 2: Disconnect the plumbing.
Start by disconnecting the existing plumbing, removing any old pipes or traps. Take this opportunity to clean the area thoroughly to ensure a smooth installation.
Step 3: Assemble the P-trap kit.
Follow the manufacturer’s instructions to assemble the garbage disposal P-trap kit. Ensure all the parts fit snugly together and use Teflon tape on any threaded connections to prevent leaks.
Step 4: Connect the P-trap kit to the garbage disposal.
Attach the P-trap kit to the garbage disposal unit, making sure all the connections are secure. Use a wrench or pliers to tighten any necessary fittings.
Step 5: Test for leaks.
Once everything is securely connected, run water through the sink and check for any leaks. If you spot any, make the necessary adjustments to ensure a watertight seal.
By following these simple steps, you’ll have your garbage disposal P-trap kit installed in no time, leaving you with a fresh-smelling kitchen and peace of mind.
A garbage disposal P-trap kit is a crucial component when installing a garbage disposal unit in your kitchen. It ensures proper drainage, prevents odors from entering your home, and helps maintain a smoothly functioning plumbing system. With the information provided in this section, you now have the knowledge and guidance to successfully install a garbage disposal P-trap kit yourself, saving both time and money. So, go ahead and embrace the convenience of a garbage disposal, knowing that a properly installed P-trap kit has got your back!
How to Empty Your Garbage Disposal Trap
Clearing Away the Gunk: A Step-by-Step Guide
We all know the feeling: the sink is clogged, the garbage disposal is making strange noises, and that unmistakable odor is starting to waft up. Yup, it’s time to empty your trusty garbage disposal trap! Lucky for you, we’ve got the ultimate guide to help you tackle this task like a pro.
Step 1: Safety First, Folks!
Before you dive headfirst into the world of garbage disposal traps, make sure to turn off the power to your disposal unit. You don’t want any unexpected surprises while you’re elbow-deep in gunk, right? Simply locate the switch on the wall, or if you can’t find it, turn off the breaker in your electrical panel.
Step 2: Bust Out the Tools
Grab a sturdy bucket or a large bowl that will fit under the sink. Now, don’t let your creative genius get ahead of you – unfortunately, this isn’t a time for using your favorite cereal bowl. You’re going to need something that can handle the mess and is easy to clean afterward.
Step 3: Get Your Hands Dirty (Well, Sort of)
If you’re squeamish about diving into the deep end of the gunk pool, fear not – we have a sneaky trick up our sleeves. Take a long-handled spoon or a pair of pliers and gently scoop or pull out the debris from the trap. Remember, the goal here is to remove anything that’s causing the clog and giving off those less-than-pleasant odors.
Step 4: Rinse and Repeat
Once you’ve successfully cleared out the trap, it’s time to give it a good rinse. Use warm water and gently flush out any remaining bits and pieces. You want your trap to be sparkling clean, just like your finest china.
Step 5: Put It All Back Together
Congratulations! You’ve made it to the finish line. Carefully reattach the trap back to the pipes under the sink. Ensure everything is tight and in place to prevent future leaks or mishaps. Once you’re satisfied with your handiwork, turn the power back on and give your disposal unit a test run. We’re confident you’ll be singing the praises of a fresh-smelling and functioning garbage disposal trap in no time!
So there you have it, folks – a comprehensive guide on how to empty your garbage disposal trap. Remember, it’s not as daunting as it may seem. With a little know-how and a dash of determination, you can conquer the gunk and have your sink running smoothly again. Happy trapping, and may your disposal never be neglected again!
How to Connect a P-Trap to a Garbage Disposal
Connecting a P-trap to a garbage disposal may seem like a daunting task, but fear not! With a little know-how and the right tools, you’ll have it connected in no time. In this section, we’ll walk you through the step-by-step process of connecting a P-trap to a garbage disposal with ease.
Gather your tools and materials
Before diving in, it’s important to gather all the necessary tools and materials. You’ll need a P-trap kit, which typically includes the P-trap itself, slip nuts, washers, and a trap bend. You’ll also need a screwdriver, an adjustable wrench, and plumber’s tape.
Step 1: Prepare your workspace
First things first, make sure to turn off the power to your garbage disposal. Safety first! It’s also a good idea to lay down some towels or a bucket underneath to catch any potential leaks or drips.
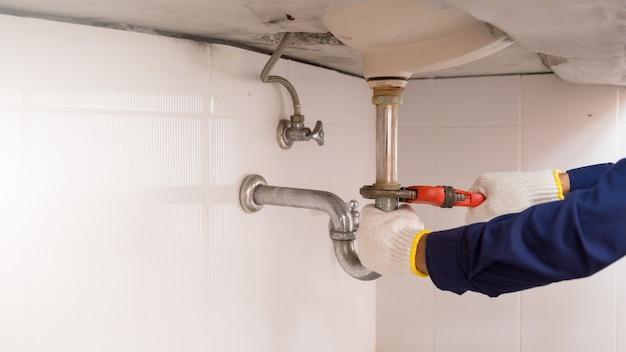
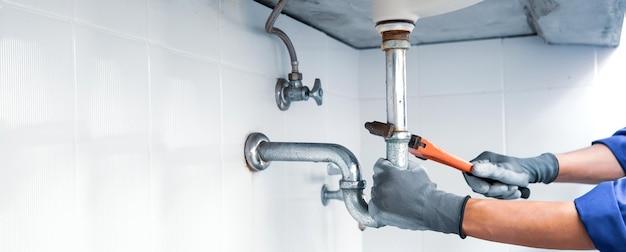
Step 2: Disconnect the old plumbing
Grab your trusty adjustable wrench and carefully disconnect the existing plumbing. This may include removing the old P-trap, as well as any other connections leading to the garbage disposal. Be cautious of any remaining water in the pipes – you don’t want to make a mess!
Step 3: Install the new P-trap
Take your new P-trap kit and attach it to the drain of the garbage disposal. Ensure that all the components fit snugly together. Use plumber’s tape on the threads to prevent any leaks.
Step 4: Connect to the main drain pipe
Now it’s time to connect the other end of the P-trap to the main drain pipe. Slide the slip nut and washer onto the end of the P-trap and attach it securely to the main drain pipe. Tighten the slip nut with your adjustable wrench until it’s nice and snug.
Step 5: Check for leaks and test it out
Once everything is connected, it’s time to check for any leaks. Slowly turn the water on and keep an eye out for any drips or water escaping where it shouldn’t. If all looks good, go ahead and give your disposal a test run to ensure everything is working as it should.
And that’s it! Connecting a P-trap to a garbage disposal may seem like a complex task, but with the right guidance, it can be a breeze. Remember, if you’re ever unsure or uncomfortable with any step of the process, it’s always best to consult a professional plumber. Happy plumbing!
Does a Garbage Disposal Need Its Own P-Trap
When it comes to installing a garbage disposal, one common question that arises is whether or not it needs its own P-trap. The answer to this question might surprise you—it actually depends on the plumbing setup in your home. Let’s dive deeper into this topic to find out more.
Understanding P-Traps
To start with, let’s quickly define what a P-trap is. A P-trap is a curved section of pipe that is designed to prevent sewer gases from entering your home. It gets its name from its shape, which resembles the letter “P.” This section of the plumbing system forms a water seal that acts as a barrier against odors and keeps your home smelling fresh.
The Purpose of a P-Trap
In a typical plumbing setup, each fixture, such as a sink or a toilet, has its own P-trap. This ensures that there is a dedicated barrier between the fixture and the main sewer line. However, when it comes to garbage disposals, it’s a different story.
Garbage Disposals and P-Traps
Contrary to popular belief, garbage disposals don’t necessarily require their own separate P-trap. In most cases, the P-trap that is already in place for your kitchen sink will suffice. This means that the wastewater from your sink and garbage disposal will flow through the same P-trap before entering the main sewer line.
The Value of Shared P-Traps
Having a shared P-trap for your sink and garbage disposal has its advantages. It simplifies the plumbing setup and saves space, making it a more convenient option. Additionally, a shared P-trap ensures that water flows smoothly through the pipes, reducing the risk of clogs and backups.
Professional Guidance is Key
While a shared P-trap may be suitable for most homes, it’s important to consult with a professional plumber to assess your specific situation. Depending on the layout of your plumbing system, local building codes, and other factors, they may recommend installing a separate P-trap for your garbage disposal.
In conclusion, whether or not a garbage disposal needs its own P-trap depends on your plumbing setup. While a shared P-trap is generally sufficient, it’s always a good idea to seek professional guidance. By consulting with a plumber, you can ensure that your garbage disposal functions effectively and remains odor-free, providing you with a hassle-free experience in the heart of your kitchen.
Do You Really Need a P-Trap for a Garbage Disposal
Understanding the Importance of P-Traps
When it comes to a garbage disposal, you might be wondering if having a P-trap is really necessary. Well, the short answer is yes, and here’s why.
What is a P-Trap?
First things first, let’s understand what a P-trap is. A P-trap is a curved pipe that is shaped like the letter “P” (hence the name) and is an essential component of any plumbing fixture. Its main purpose is to prevent unpleasant odors and harmful gases from entering your home.
The Role of a P-Trap with a Garbage Disposal
Now, you might be thinking, “But I have a garbage disposal. Can’t that take care of any waste or debris?” While a garbage disposal is great for grinding up food waste, it’s not designed to handle everything.
When you use your garbage disposal, small food particles and grease can still find their way into your plumbing system. Over time, these particles can accumulate and cause blockages. This is where the P-trap comes in.
Trapping Debris and Preventing Clogs
The P-trap acts as a barrier, collecting debris and preventing it from clogging your pipes. Its curved shape allows water to flow freely, while still trapping any solid waste and preventing it from traveling further into your plumbing system.
Protection Against Unpleasant Odors
Another important function of the P-trap is to create a water seal that prevents sewer gases from entering your home. The water in the trap forms a barrier, blocking out any foul-smelling odors that might otherwise waft into your kitchen or bathroom.
Now, just imagine a scenario where you don’t have a P-trap. Without that protective barrier, you could be dealing with some seriously unpleasant odors in your living space. Trust us, it’s not a situation you want to find yourself in!
Other Benefits of Having a P-Trap
Besides trapping debris and keeping your home smelling fresh, a P-trap also makes it easier to unclog your pipes. Since the trap is easily accessible, you can remove it if necessary to clear any blockages.
In addition, having a P-trap in place can also help with pest control. Without a trap, pests like cockroaches and rodents can easily crawl up your pipes and into your home. The P-trap acts as a physical barrier, keeping these unwanted visitors out.
So, as you can see, having a P-trap for your garbage disposal is not just important but necessary. It ensures the smooth functioning of your plumbing system, prevents blockages, keeps foul odors at bay, aids in unclogging, and provides an extra layer of defense against pests. Trust us, you’ll be grateful for that little “P” in the long run!
Is There a Trap to Clean in a Garbage Disposal
Understanding the Inner Workings of Your Garbage Disposal
So, you’ve got a garbage disposal in your kitchen. It’s a handy appliance that helps to ease your clean-up process and avoid unpleasant odors. But have you ever wondered if there is a trap in your garbage disposal that needs cleaning? Let’s delve into the inner workings of this kitchen superhero and find out.
Traps and Their Importance
Traps are an essential component of plumbing systems, and you might be familiar with the “P-trap” under your sink. It’s designed to prevent foul odors from seeping back up into your kitchen by trapping a small amount of water. However, when it comes to garbage disposals, the situation is a bit different.
No Traps to Clean
Believe it or not, a garbage disposal doesn’t have a trap to clean. Unlike your regular sink drain, a garbage disposal unit operates differently. It’s all about chopping up food waste into smaller pieces and sending them down the drain. So, while your sink drain may have a trap that requires occasional cleaning, the same does not apply to your trusty garbage disposal.
Maintenance and Cleaning Tips
Although there is no trap to clean in a garbage disposal, that doesn’t mean it’s maintenance-free. To keep your disposal working in top condition, here are a few tips:
1. Regular Flushes
Run cold water through your disposal before, during, and after using it to ensure that any remaining waste is flushed away. This helps in preventing clogs and keeps your disposal clean.
2. Citrus Freshness
Tossing a few lemon or orange peels into the disposal and grinding them up can help combat any lingering odors. Plus, it gives your kitchen a delightful citrusy scent!
3. Ice, Ice Baby
Got some ice cubes in the freezer? Use them to give your disposal a refreshing cleanse. Simply drop a few ice cubes into the disposal and run it to help dislodge any buildup or debris.
The Final Verdict
So, there you have it! While the P-trap under your sink might need some attention now and then, your hardworking garbage disposal doesn’t have a trap that requires cleaning. Remember to properly maintain your disposal to keep it working efficiently and smoothly. With a little care and attention, your garbage disposal will continue to be your kitchen’s best friend. Happy disposaling!