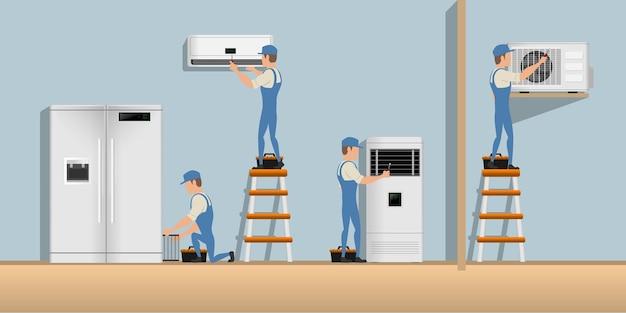
Are you considering installing a brand new HVAC system in your home or want to upgrade your existing heating and cooling system, but unsure where to start? Worry not! We’ve got you covered with this comprehensive guide that covers everything you need to know before and during the installation process.
Installing an HVAC system is a significant investment that requires careful planning, research, and decision-making. With our guide on the essential steps to install HVAC systems, best practices, and cost breakdowns, you’ll get a comprehensive overview of what the installation process entails, the equipment needed, and how long the installation takes.
Whether you’re installing the HVAC system in an old house or a new one, the steps involved are quite similar. You’ll learn about the major phases of system installation, such as sizing and selecting the right HVAC system, ductwork installation, electrical connections, and thermostat installation.
This guide also shares the best practices for HVAC installation, including safety precautions, code compliance, maintenance tips, and ductwork installation optimization. Plus, we’ll delve into the crucial factors that affect the cost of new HVAC system installation, such as the size of the unit, location, and additional features.
By the end of this guide, you’ll have an in-depth understanding of what it takes to install an HVAC system, and you’ll be better equipped to make informed decisions that align with your budget and preferences. Let’s dive in!
Steps to Install HVAC System
If you’re in the market for a new HVAC system, it’s essential to understand what goes into the installation process. Here are the steps you can expect a trained professional to take when installing a new HVAC system in your home:
1. Planning
The first step in installing an HVAC system is to plan the installation process carefully. A professional will determine the right size for your system, assess your home’s ductwork, and decide where to place the system’s components. They may also take airflow measurements to ensure that you’ll get enough air conditioning and heating throughout your home.
2. Removing the Old System
If there’s already an HVAC system in your home, the next step is to remove it. A professional will disconnect the old system, remove it from your property, and dispose of it.
3. Installing the New HVAC System
Once the old system is out, the professional will start installing the new system. They’ll begin by installing the unit outside your home, either on the roof or the ground. Next, they’ll install the air handler, which is typically placed inside the home, in an attic or utility closet.
4. Installing Ductwork
If necessary, new ductwork will need to be installed for the new HVAC system to operate correctly. The professional will expertly measure and route the ductwork throughout your home, ensuring it’s optimized for energy efficiency.
5. Electrical Wiring
The HVAC system requires proper electrical wiring and grounding. A professional electrician will handle any necessary wiring and make sure that everything is up to code.
6. Refrigerant and Drainage Installation
Refrigerant and drainage lines are crucial components of your HVAC system. A technician will carefully install the refrigerant lines and drainage system to ensure your HVAC system runs efficiently.
7. Testing and Final Inspections
Once everything is installed, a professional will test your HVAC system to ensure it’s running correctly. They’ll also perform a final inspection to check that everything meets local code requirements.
By following the steps mentioned above, a professional can install an HVAC system effectively and efficiently. If you’re unsure about any of these steps, don’t hesitate to ask questions. A qualified professional will be happy to explain the process and answer any questions you may have.
Installing HVAC Ductwork: A Step-by-Step Guide
Installing ductwork for your HVAC system may seem daunting, but with the right tools and a little guidance, it can be done easily. Here is a step-by-step guide on how to install HVAC ductwork:
Materials Needed:
- Ductwork
- HVAC fittings
- Sheet metal screws
- Screwdriver
- Tape measure
- Tin snips
- Hammer
- Gloves and safety glasses
Steps to Install HVAC Ductwork:
-
Measure and plan: Before you begin, measure the layout of the ductwork to ensure it fits in the desired space. Plan the ductwork layout, including the size and number of ducts required.
-
Cut the ductwork: Using your tin snips, cut the ductwork into the desired lengths and shapes. Make sure to use gloves and safety glasses to protect yourself.
-
Connect the HVAC fittings: Attach the HVAC fittings to the ductwork using sheet metal screws. Make sure the fittings are secure and tight.
-
Seal the ductwork: Use aluminum tape or mastic sealant to seal the connections between the ductwork and the HVAC fittings. This will prevent leaks and ensure efficient airflow.
-
Support the ductwork: Use hangers or supports to secure the ductwork in place. This will prevent the ductwork from vibrating or sagging over time.
-
Install the registers and grilles: Install the registers and grilles on the ductwork. These will allow air to flow into and out of the ducts and into your home.
Congratulations! You have successfully installed HVAC ductwork. While it may be a challenging process, with these steps, you can do it yourself without the need for professional help.
Key takeaways:
- Measure and plan the layout of the ductwork before cutting.
- Use gloves and safety glasses when cutting the ductwork.
- Attach HVAC fittings tightly and securely with sheet metal screws.
- Seal the connections with aluminum tape or mastic sealant to prevent leaks.
- Use hangers or supports to secure the ductwork in place.
- Install registers and grilles to allow air to flow into your home.
By following this guide, you can install HVAC ductwork with confidence. Remember to always prioritize safety and measure twice before cutting once.
HVAC Installation Best Practices
When it comes to installing an HVAC system, there are some best practices that you should keep in mind to ensure the job is done correctly. Follow these tips to ensure the installation is successful:
Hire a Professional
Installing an HVAC system is not a DIY project. Hire a professional to get the job done right. A professional will have the proper tools, equipment, and knowledge to ensure the system is installed correctly and will work efficiently.
Choose the Right Size
Selecting the right size system is crucial for optimal performance. A system that is too small will struggle to keep up with demand, while an oversized system will waste energy and money. A professional can perform a load calculation to determine the correct size for your home.
Properly Seal Ducts
Leaky ducts can lead to energy loss and reduced performance. Ensure ducts are properly sealed to prevent air leaks. A professional can perform a duct blower test to check for leaks.
Consider Zoning
Zoning allows for different areas of the house to be heated or cooled separately. This can result in more efficient operation and increased comfort. A professional can assess your home to determine if zoning is a good option for you.
Upgrade Insulation
Proper insulation is necessary for efficient operation. Ensure that your home is properly insulated, especially in the attic and walls. This can help reduce energy waste and increase comfort.
Regular Maintenance
Regular maintenance is crucial for keeping your system running efficiently and prolonging its lifespan. Schedule annual maintenance with a professional to keep your system in top condition.
Following these best practices can help ensure that your HVAC installation is successful. Remember to hire a professional, choose the right size system, properly seal ducts, consider zoning, upgrade insulation, and schedule regular maintenance.
Installing a New HVAC System Cost
Have you been considering installing a new HVAC system but not sure how much it would cost you? Worry not! We’ve got you covered. Below are the factors that affect the cost of installing a new HVAC system:
1. System Size
The size of the HVAC system you need largely depends on the size of your home. The larger the size of your home, the more powerful the HVAC system you’ll need. Here are the cost estimates for different HVAC sizes:
- A 1.5-ton system costs around $3,000 to $4,000.
- A 2-ton system costs around $3,500 to $4,500.
- A 2.5-ton system costs around $4,000 to $5,000.
- A 3-ton system costs around $4,500 to $5,500.
- A 4-ton system costs around $5,500 to $6,500.
- A 5-ton system costs around $6,000 to $7,000.
2. Type of HVAC System
There are two types of HVAC systems: centralized and ductless. Centralized systems cost more due to extra expenses such as ductwork, while ductless systems are cheaper because they don’t require ductwork. A central system for a 2,000 square foot home can cost around $7,000 to $12,000, and a ductless system for the same space can cost around $2,000 to $7,000.
3. Labor Costs
The cost of labor varies depending on the complexity of the installation. If your home needs additional work, such as upgrading the electrical work, adding new ductwork, or repairing insulation, the cost of labor will increase. On average, expect to pay around $2,000 to $5,000 in labor costs.
4. Efficiency Ratings
Energy-efficient HVAC systems can cost more upfront, but you’ll save money in the long run. High-efficiency systems can save you up to 30% on energy costs. The rating systems you’ll hear about are SEER (Seasonal Energy Efficiency Ratio) and AFUE (Annual Fuel Utilization Efficiency). The higher the rating, the more efficient the system. Here’s an idea of what to expect:
- A 14 SEER air conditioner can cost around $2,500 to $4,000.
- A 16 SEER air conditioner can cost around $3,500 to $5,000.
- A 95% AFUE gas furnace can cost around $4,000 to $6,000.
- A 98% AFUE gas furnace can cost around $6,000 to $8,000.
5. Additional Costs
Some additional costs you should consider include permits, warranty, and ongoing maintenance. Permits cost around $50 to $500, while warranties could add around $500 to $1,000. Ongoing maintenance can cost around $150 to $500 annually, depending on the type of system.
The cost of installing a new HVAC system can vary depending on the size of the system, type of HVAC, labor costs, efficiency ratings, and additional costs. On average, expect to pay around $2,000 to $15,000. However, remember that a high price tag doesn’t always translate to a high-quality system. Make sure to conduct thorough research and hire a reputable HVAC contractor to ensure that your new system meets your needs while staying within your budget.
How to Install Central Air System
Installing a central air system may seem like a daunting task, but with the right tools and a bit of know-how, you can successfully install it and keep your home cool and comfortable during those hot summer days! Here are some steps to follow:
Step 1: Gather Your Tools
Before beginning your installation process, gather the following tools:
- Hammer
- Screwdriver
- Pliers
- Wire strippers
- Pipe wrench
- Tape measure
- Level
Step 2: Choose a Location
The next step is to choose a location for your central air system. Pick a location that has enough airflow and is away from any obstructions. You might want to consider consulting with a professional HVAC technician to help you make the best choice.
Step 3: Install the Air Handler
Now it’s time to install the air handler. Here’s how to do it:
- Position the platform where the air handler will sit.
- Place the air handler on the platform.
- Secure the air handler to the platform with screws.
- Connect the air handler to the ductwork.
- Attach the drain pipe to the air handler.
Step 4: Install the Condenser
The condenser is responsible for removing heat from the air. Follow these steps to install it:
- Choose a location for the condenser outside.
- Install the pad where the condenser will sit.
- Set the condenser on the pad and secure it to the pad with bolts.
- Connect the refrigerant lines to the condenser.
- Attach the electrical conduit to the condenser.
Step 5: Install the Thermostat
Finally, it’s time to install the thermostat. Here’s how to do it:
- Choose a location for the thermostat.
- Mount the thermostat bracket to the wall.
- Run the wire from the air handler to the thermostat bracket.
- Connect the wire to the thermostat.
Key Takeaways
- Installing a central air system may seem like a daunting task, but with the right tools and a bit of know-how, you can do it!
- Before beginning the installation process, gather all the necessary tools and choose a location for your central air system.
- Install the air handler, condenser, and thermostat, and make sure you follow all the instructions carefully.
- Don’t hesitate to consult with a professional HVAC technician if you’re unsure about anything.
Now that you know how to install a central air system, you can stay cool and comfortable during those hot summer days!
Steps to Install HVAC
If you’re considering installing a new HVAC system, you may be wondering what steps you need to take to ensure the installation process goes smoothly. Here are the main steps you can expect:
1. Plan and Prepare
- Determine the size of your HVAC system based on the square footage of your home or space.
- Research and choose a high-quality HVAC unit with a good warranty.
- Decide on the location for installation.
- Obtain any necessary permits from your local authority.
2. Remove Old Equipment
- Turn off the power to the existing HVAC unit.
- Disconnect and remove the old unit.
3. Install New Equipment
- Install the new HVAC unit in the predetermined location.
- Connect the electrical wiring, refrigerant lines, and exhaust vents.
- Add insulation as needed.
4. Test and Inspect
- Turn on the power and test the unit for proper function.
- Inspect the system for any leaks or other issues.
- Make any necessary adjustments.
5. Finalize and Maintain
- Register your unit with the manufacturer for warranty coverage.
- Schedule routine maintenance for your new HVAC system to keep it running smoothly.
Following these steps can help ensure a successful installation of your new HVAC system. Don’t hesitate to seek professional help if you’re not comfortable performing any of these steps on your own. Remember that proper installation and maintenance are key to HVAC efficiency and longevity.
Installing HVAC System in an Old House
If you have an old house and you’re planning to install an HVAC system, it’s important to consider some factors that might affect the installation process. Here are some key points to keep in mind:
HVAC System Type
First, you need to determine what type of HVAC system you want, and whether it’s suitable for your old house structure. For example, a central air conditioning system requires ductwork to be installed throughout the house, so you need to check if your old house has enough space for it. Other options, such as ductless mini-split systems or window units, may be better suited for your home.
System Sizing
The size of your HVAC system is also an essential factor in determining its efficiency and effectiveness. An HVAC contractor must assess your home’s insulation, the number of windows and doors, and the general square footage of your home to determine what size of the HVAC system you need.
Air Ductwork
If your old house doesn’t have pre-existing ductwork, the contractor will have to install it. Ductwork installation may involve cutting through walls and floors, which can be messy and cause damage to the home. You should hire an experienced HVAC contractor to install ductwork without causing significant damage to your home.
Electrical Upgrades
Old houses often have outdated electrical systems that aren’t designed to handle the electrical demand of a modern HVAC system. Upgrading the electrical system may be necessary to accommodate the HVAC system. If the electrical wiring is outdated or insufficient, it can pose a fire hazard, so it’s vital to hire a licensed electrician to perform electrical upgrades.
Choosing the Right HVAC Contractor
Choosing a reputable HVAC contractor is crucial for the success of your HVAC system installation. Consider getting quotes from several contractors and asking for references from previous clients. Check for certifications, licenses, and insurance before hiring an HVAC contractor to ensure the job is done safely and correctly.
Installing an HVAC system in an old house can be challenging, but with careful planning and hiring a professional HVAC contractor, you can enjoy the comfort and benefits of modern heating and cooling systems. Remember to keep these factors in mind when conducting your installation planning.
How Hard is it to Install an HVAC System
Installing an HVAC system can be quite challenging, but it’s not an impossible task. It takes a significant amount of knowledge, skill, and experience to do the job without any issues. However, with the right tools, guidance, and patience, anyone can install an HVAC system.
Here are some factors that influence the level of difficulty in installing an HVAC system:
1. Size and type of the HVAC system
The larger and more complex the HVAC system, the more challenging the installation process becomes. Moreover, the difficulty level varies depending on the type of HVAC system, such as ductless mini-split, packaged, or central air conditioning systems.
2. Location of the installation
The location of the HVAC system installation also plays a crucial role. For instance, installing a unit on the ground floor is more straightforward than installing it on the rooftop or higher floors of a building where access is restricted.
3. The condition of the existing infrastructure
The condition of the existing infrastructure determines the level of difficulty in installing an HVAC system. If the ductwork, wiring, or piping is outdated or damaged, it may require repairs or replacement, adding to the complexity of the installation process.
4. Technical knowledge and experience
Installing an HVAC system requires technical knowledge and experience with HVAC systems, including electrical, refrigeration, and plumbing knowledge. Without this expertise, DIY installations can be challenging and time-consuming.
5. Compliance with codes and regulations
HVAC installations must comply with local and state codes and regulations. Failure to comply with these standards could result in costly fines or penalties.
6. Cost
Installing an HVAC system can be expensive, especially if the installation requires additional work and repairs to existing infrastructure. Therefore, it’s essential to consider the installation cost and hire reputable professionals to avoid costly mistakes.
In conclusion, installing an HVAC system can be challenging, but with proper planning, preparation, and execution, you can complete the job. It’s vital to have a clear understanding of the installation process, the type of HVAC system, and the condition of the infrastructure. If you’re not confident in your installation skills, it’s best to hire a licensed HVAC contractor to ensure that the installation is installed correctly, safely, and legally compliant.
How to Install Heating and Cooling Systems
Are you tired of being blasted by hot or cold air every time you step foot in your home? It might be time to install a heating and cooling system. Here’s a comprehensive guide on how to install your own HVAC system and enjoy comfortable temperatures year-round.
Determine the Type of HVAC System
The type of HVAC system you install depends on the size of your home, your budget, and your personal preferences. Here are the most common types of HVAC systems:
- Split systems
- Packaged heating and air systems
- Duct-free systems
- Hybrid heating and air systems
- Geothermal heating and cooling systems
Research each type of system before deciding which one is right for you.
Evaluate Your Home’s Heating and Cooling Needs
Before installing your HVAC system, determine the heating and cooling needs of your home. You can calculate this by using industry-standard calculations or consulting with a professional HVAC contractor. This evaluation will determine the size of the system you need and the necessary ductwork.
Purchase the Right HVAC System
Once you’ve determined your heating and cooling needs, purchase the right HVAC system. Make sure to choose a reputable brand and provider. If you’re unsure which system to buy, consult with a professional HVAC contractor.
Install the Ductwork
The ductwork is a crucial component of any HVAC system. Here are the steps to install ductwork:
- Measure the ducts to ensure proper sizing.
- Cut the ductwork to the right size using sheet metal cutting tools.
- Install any necessary fittings.
- Connect the ducts to the HVAC system.
Install the HVAC System
Now it’s time to install the HVAC system. Here’s how to do it:
- Install the heat exchanger, air handler, and other components according to the manufacturer’s instructions.
- Connect the ductwork to the HVAC system.
- Install the thermostat according to the manufacturer’s instructions.
- Connect the HVAC system to your home’s electrical system.
Test Your HVAC System
After installing your HVAC system, it’s essential to test it to make sure it’s working correctly. Here’s how to do it:
- Test the thermostat by setting it to the desired temperature and ensuring the system turns on and off accordingly.
- Walk around your home and make sure each room is receiving the appropriate amount of air.
- Check for any leaks in the ductwork or HVAC system.
Hire a Professional
If you’re uncomfortable installing your own HVAC system, consider hiring a professional HVAC contractor. They can ensure that the heating and cooling system is installed correctly and safely.
With these steps, you can install your HVAC system and enjoy comfortable temperatures all year round. Stay cool, my friends!
Can you Install a New HVAC System Yourself
Installing a new HVAC system can be quite the undertaking, and many homeowners may find themselves wondering whether it’s a job they can tackle on their own. While some experienced DIYers may feel confident in their abilities to install a new HVAC system, there are several factors to consider before getting started.
Factors to Consider:
- Level of experience and knowledge: Installing an HVAC system requires knowledge of electrical wiring, ductwork, and refrigerant lines. If you don’t have experience in these areas, it may be best to hire a professional.
- Safety concerns: HVAC systems involve working with gas lines, electrical wiring, and refrigerant, all of which can be dangerous when not handled properly. A professional HVAC technician has the training and equipment to ensure a safe installation.
- Local building codes: In many areas, installing an HVAC system requires a permit and must be done to local building codes. A professional HVAC technician will be familiar with these codes and can ensure that the installation complies with them.
- Warranty: Many HVAC systems come with a warranty that requires professional installation. Attempting a DIY installation could void the warranty and leave you without coverage if something goes wrong.
Key Takeaways:
- While it may be possible to install an HVAC system yourself, it’s important to consider your level of experience and knowledge, safety concerns, local building codes, and warranty requirements before getting started.
- Hiring a professional HVAC technician may be the best option for ensuring a safe and compliant installation and maintaining warranty coverage.
- If you do decide to tackle the installation yourself, be sure to thoroughly research the process, follow all safety guidelines, and double-check local building codes and permit requirements.
What Are the Major Phases of System Installation HVAC
After purchasing an HVAC system, the next step is installation. There are several phases involved in the installation of an HVAC system, including:
1. Pre-Installation Phase:
This phase involves the assessment of the installation site to determine the best location to install the HVAC system. It also involves obtaining all necessary permits and approvals required by law before installing the system.
2. HVAC System Design:
This phase involves the design of the HVAC system, including the ductwork, refrigerant piping, and venting. The proper sizing of the HVAC system is essential to achieve optimal performance and energy efficiency.
3. Installation Phase:
This phase involves the actual installation of the HVAC system, including the placement of the outdoor and indoor units, ductwork installation and connections, refrigerant lines, and electrical wiring.
4. Testing and Balancing Phase:
This phase involves testing the newly installed system to ensure proper functioning, inspecting for leakages, measuring airflow and refrigerant levels, and adjusting the system as necessary for optimal performance and efficiency.
5. Post-Installation Phase:
This final phase involves cleaning up the installation site, providing the homeowner with proper instructions for operating the system, and ensuring that the customer is satisfied with the installation.
Properly following these steps ensures a successful and efficient installation of your HVAC system. If you’re not confident in performing these tasks yourself, it’s always best to seek professional assistance.